

How To Draw I Love My Mom

On Dec 1, 2022, I asked myself the question: With but 1 calendar month of exercise, can I learn how to draw realistic portraits with only pencil and paper?
On Dec 24, 2022, afterwards 26 hours of practice, I constitute out that the answer was yes.

During the month of December, I documented my entire learning procedure in a serial of 31 daily blog posts, which are compiled here into a single narrative. In this article, you can relive my month of insights, frustrations, learning hacks, and triumphs, as I strive towards monthly mastery.

New month, new challenge.
For the calendar month of December, my goal is to draw a realistic self-portrait with but pencil and paper. Along the way, in lodge to learn the fundamentals of drawing and portraiture, I will also draw many other faces, which will hopefully proceed this month's posts more varied and interesting.
This new challenge starts today, December one, 2022, and, past Dec 31, I hope to be a master of portrait drawing.
My starting point
I've had stiff artistic tendencies since I was a kid, simply I've never invested much in my fine art skills. Instead, I've channeled my creative impulses mainly through music, film, and computer-aided design.
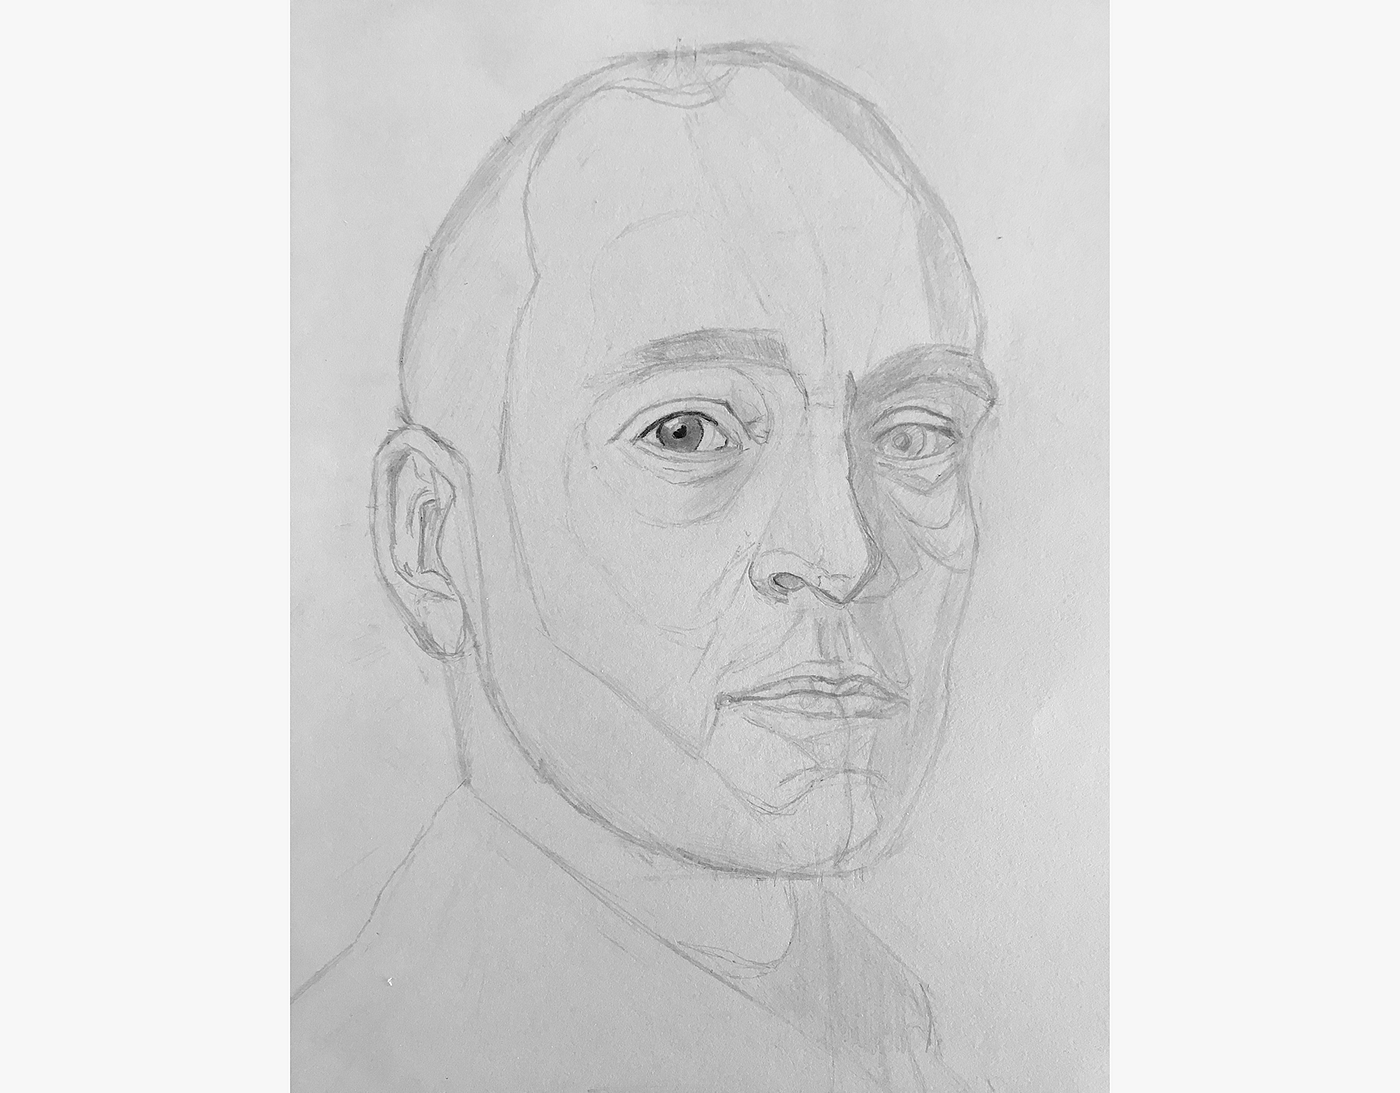
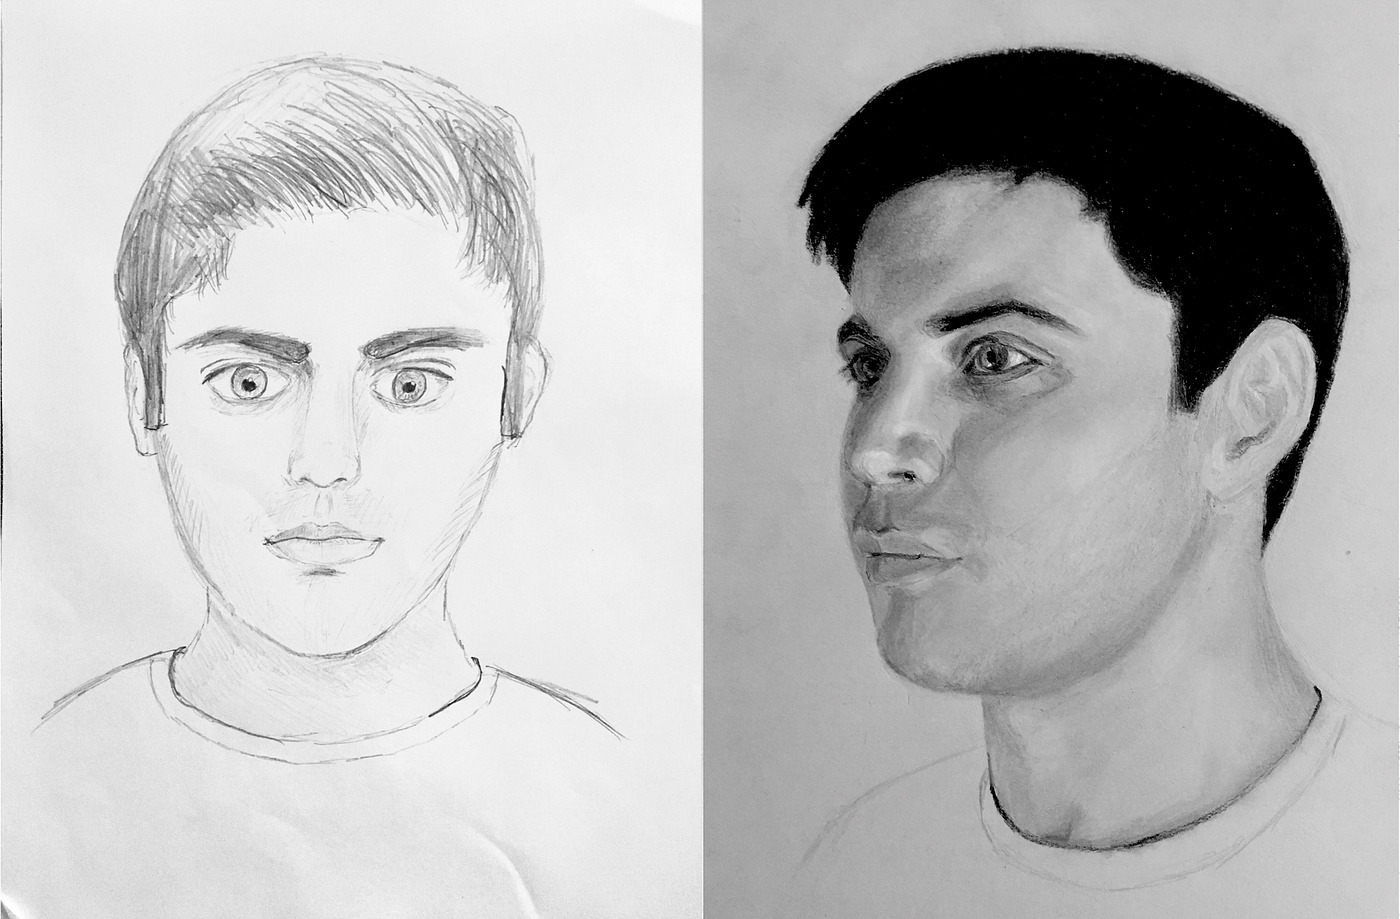
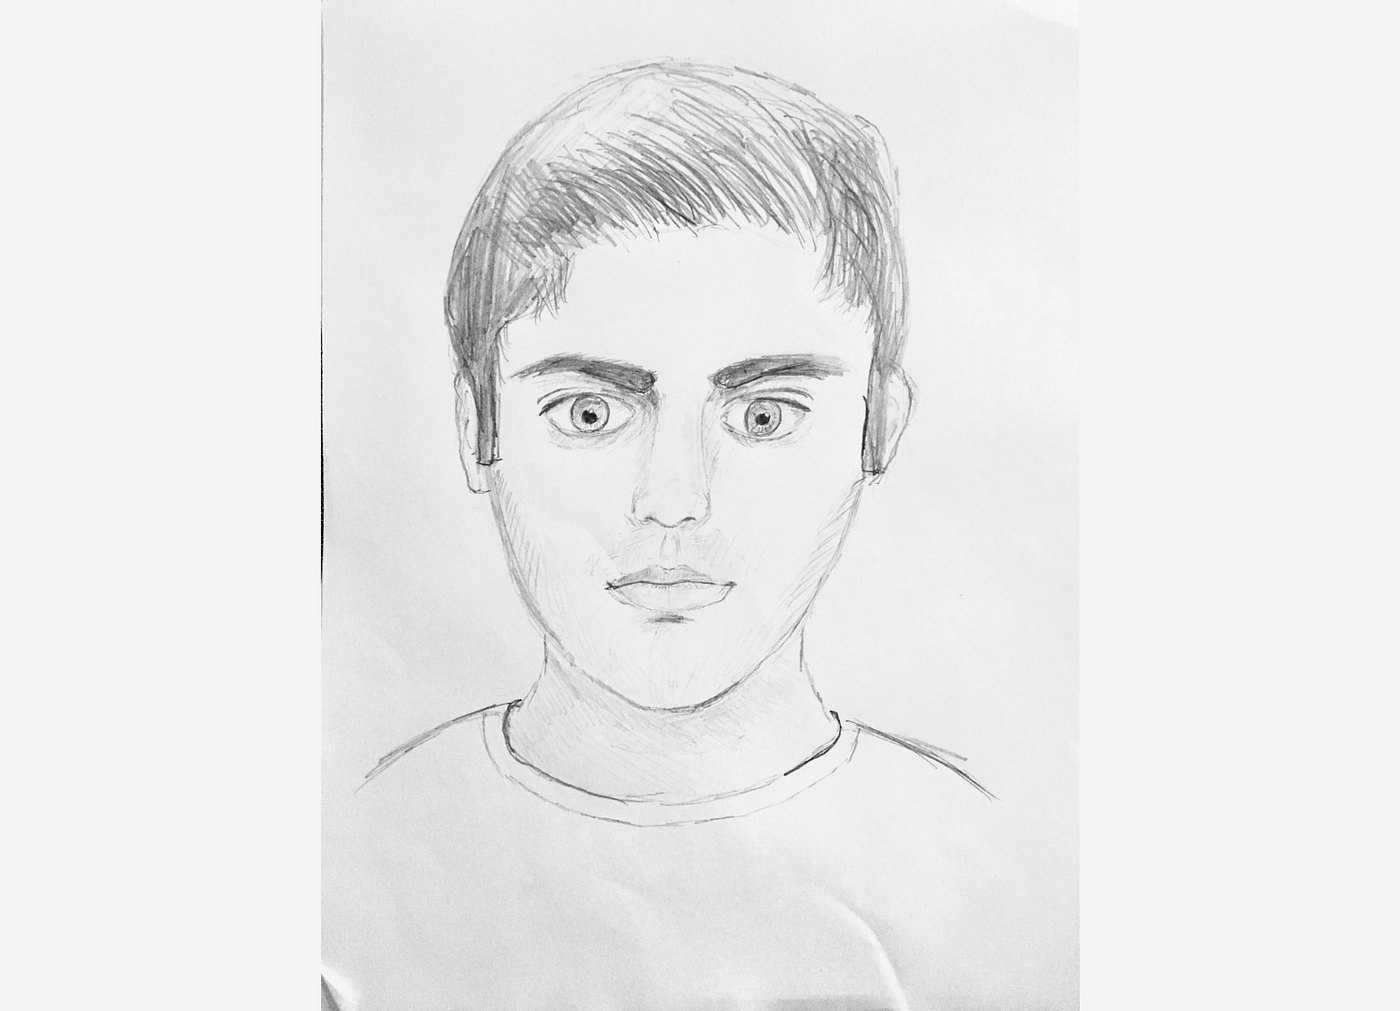
Thus, to set a baseline for this month'due south claiming, I've drawn a before cocky-portrait with my current drawing skills. Although it'south not the accented worst thing ever drawn, information technology sadly doesn't look very much like me.
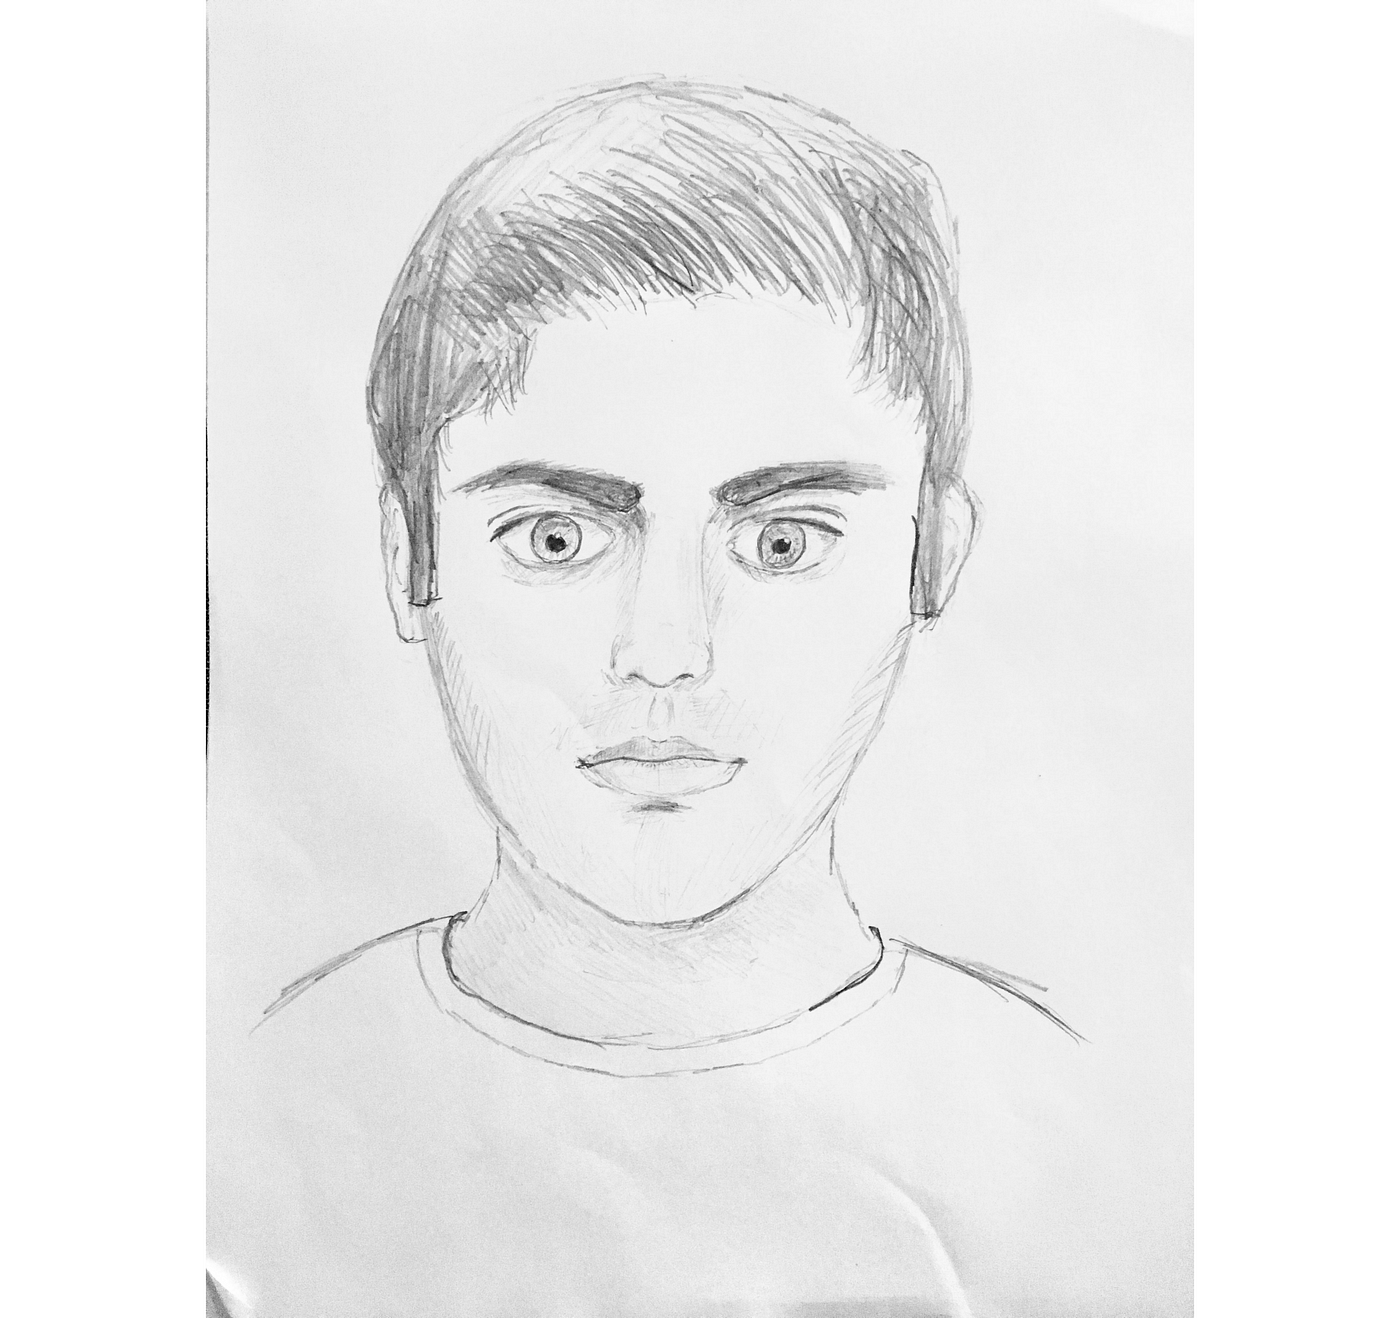
Measuring success
Measuring success for this claiming is certainly more subjective than last month (where I successfully memorized a deck of cards in less than 2 minutes).
In this case, the best I can practice is bear witness a photo that demonstrates the level of cartoon I'm aiming to attain…
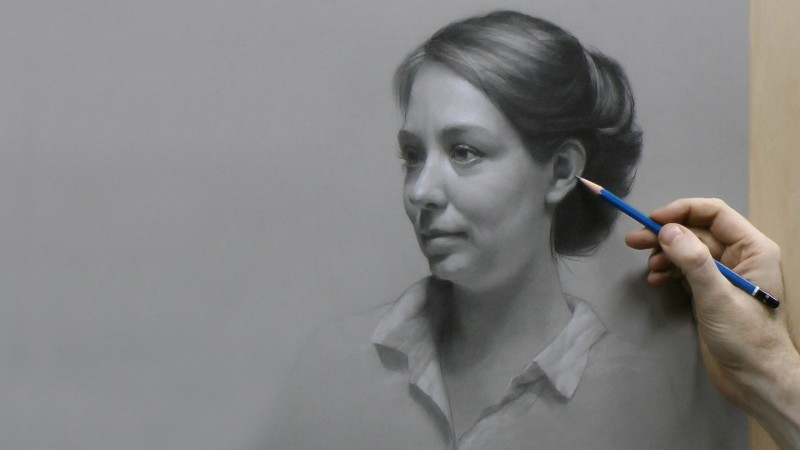
This portrait is the example drawn in the Vitruvian Studio Portrait Drawing Course, which is the class I'll exist following this month.
Clearly, there are major differences in realism between my starting drawing and this example portrait. Then, if I tin match the level of this instance (which will be, of class, a subjective, merely hopefully honest judgement), I volition consider this challenge a success.
With my goal fix, it'southward fourth dimension to first drawing…

In my life, I've created a off-white bit of (what I'll telephone call) art. Even so, I've done so, non by relying on well-adult fine art skills, but instead, by cheating my way through the artistic process.
Basically, I've used everything at my disposal (except for fine arts skills) to create artistically.
Y'all can decide if this is cheating or not, but either mode, this month is going to be different. This calendar month, I am really going to invest in my fine fine art skills. This month, I'1000 going to take a pencil and paper, and nothing else, and make information technology happen.
Still, before I get in happen, I thought it would be fun to share some of my previous works.
1. Lego Portraits (with the help of Photoshop)
During high school, whenever I was tasked with making someone a gift, I usually opted to construct a custom Warhol-inspired portrait out of Legos.
Here are two portraits that I made for my cousins Adam and Marissa.
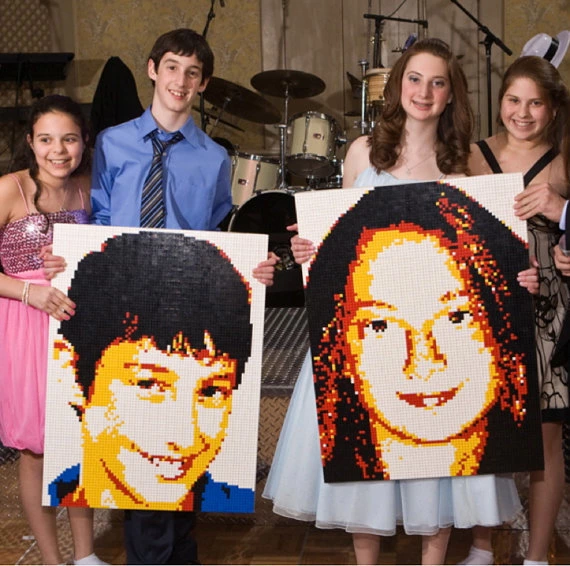
And another one I made for my grandparents.

While these pieces may wait like they required some amount of creative genius to pull off (do they?), that's really not the example. Instead, these pieces simply required some clever computational analysis, planning in Photoshop, and executional patience (while glueing and placing each Lego slice).
The estimator was the real artistic champion hither.
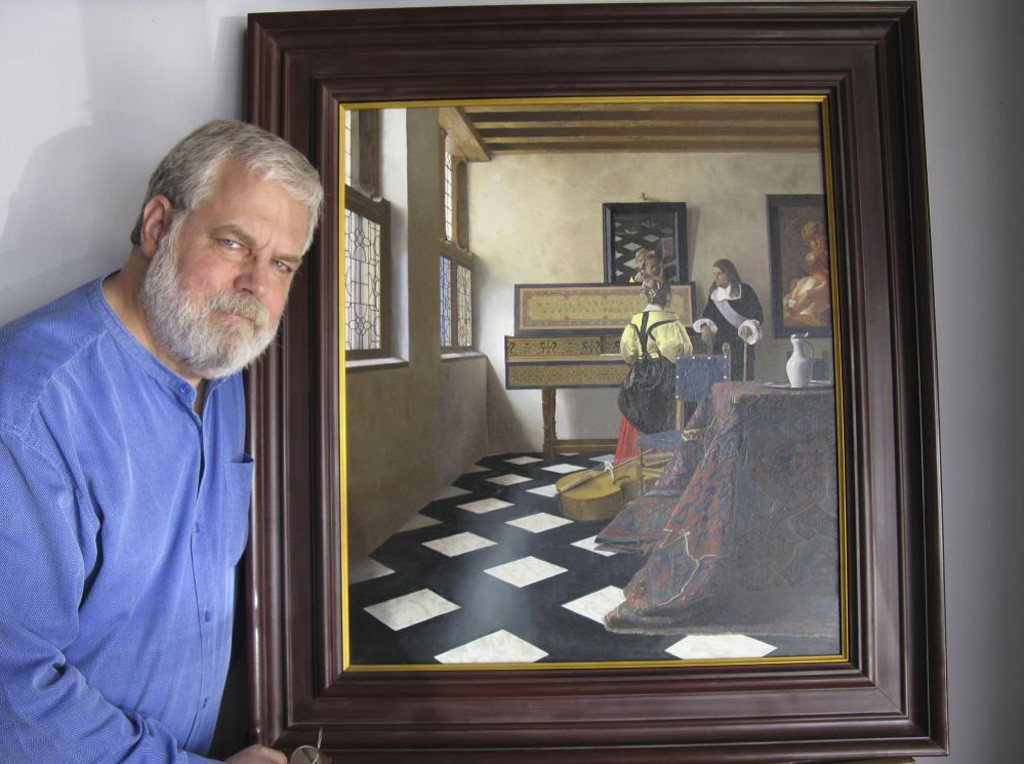
two. Counterfeit paintings (using optical tricks)
I've also experimented using optical tools (like mirrors and lens) to mechanically create. Although, I haven't invested enough time to produce anything worth sharing.
Tim Jenison, on the other hand, does have something worth sharing. Without any artistic preparation, he painted a most-exact replica of a Vermeer painting solely using optical techniques.
Tim'due south journeying is documented in the Penn and Teller-produced pic "Tim's Vermeer", which I highly recommend you check out.
Here's Tim's terminal painting.
This month I'm only using pencil and paper
While technology-aided art still should probably count as art (in some capacity), this month, I'g committed to creating using just the tools shown below: 9 black pencils, 1 white pencil, a few different erasers, and a grey piece of newspaper (which I'll explain some other time).
Information technology's going to be hard, but that's the indicate.

This month, to learn how to draw portraits, I'll be following the Portrait Cartoon video course from Vitruvian Studio.
Today, I spent 2.5 hours starting the form and first my beginning portrait.
Selecting who to draw
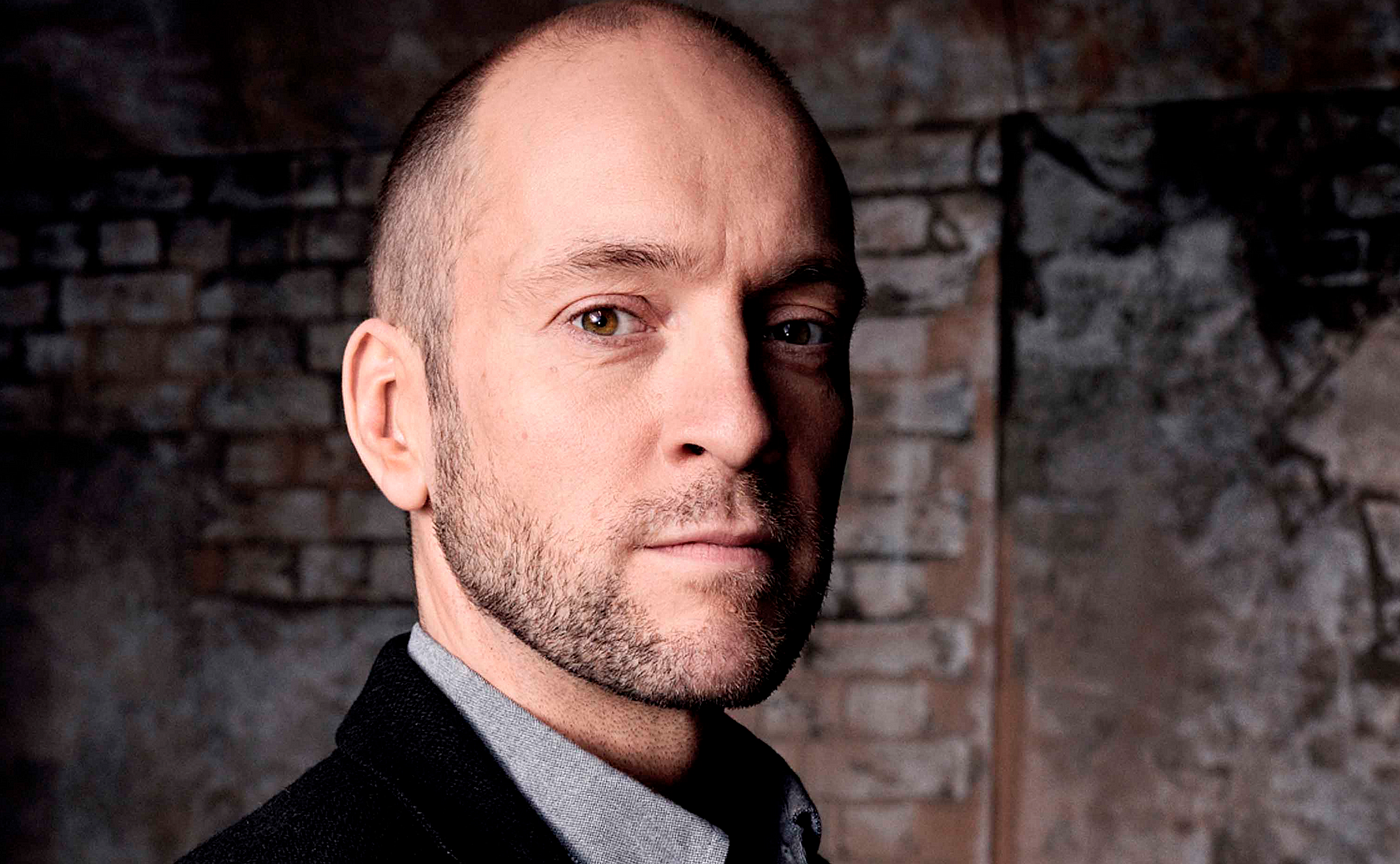
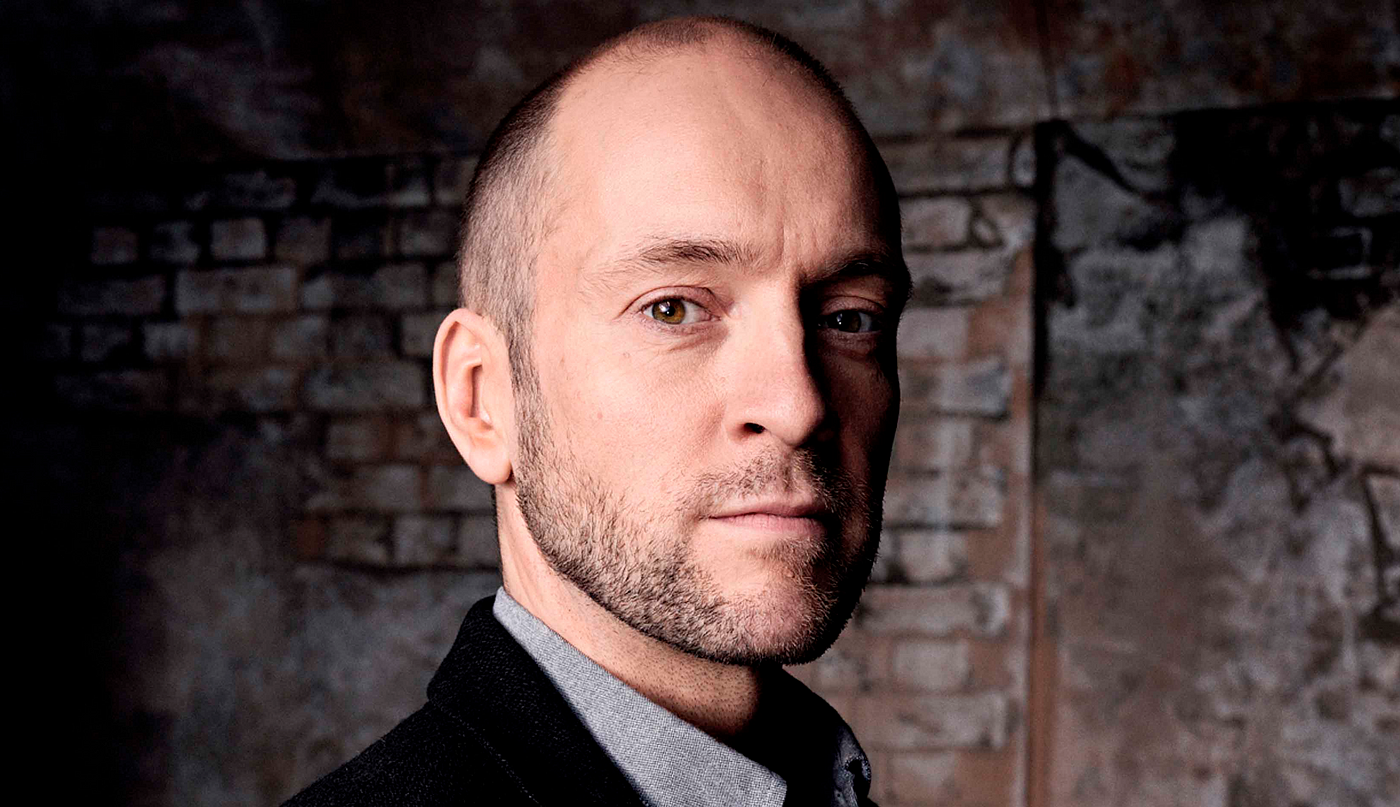
For my outset piece, rather than drawing the model from the form, I've chosen to depict Derren Dark-brown, who originally inspired me to pursuit portrait drawing.
Derren is a British illusionist, who I've been following for a while now, and who, I recently learned, casually paints portraits on the side.
Here are a few things he's casually painted.

After seeing these, I decided I also would like to exist the kind of person that casually paints impressively skillful portraits on the side.
For now, earlier I get to the painting, I'll showtime off by mastering the cartoon part of program.
This is the picture of Derren I'm drawing.
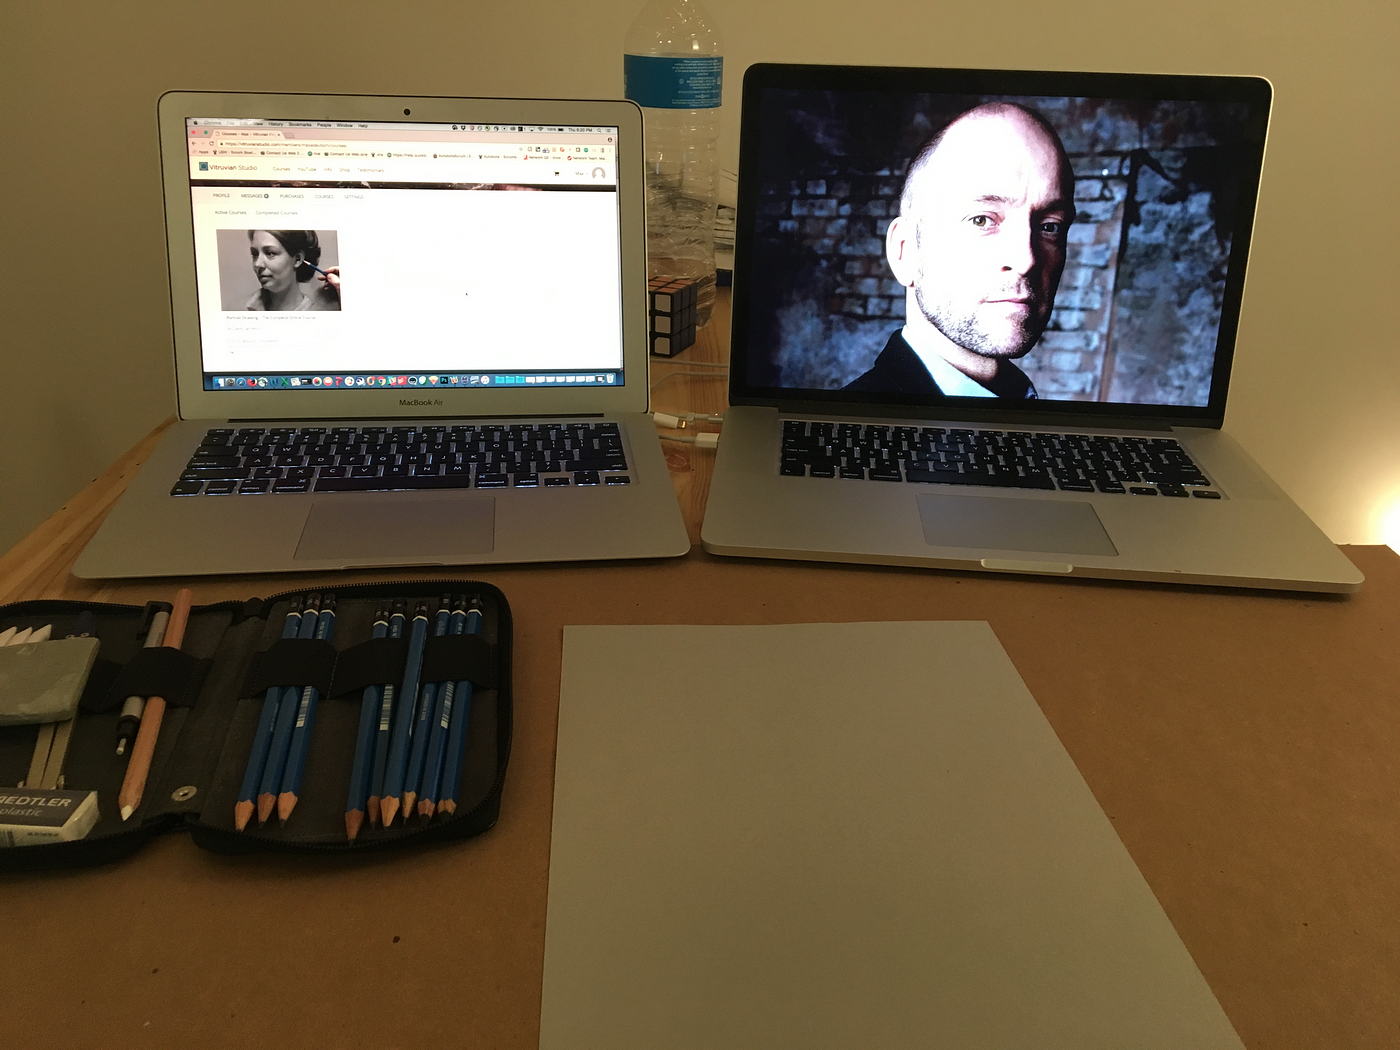
And hither's my setup.
Starting the drawing
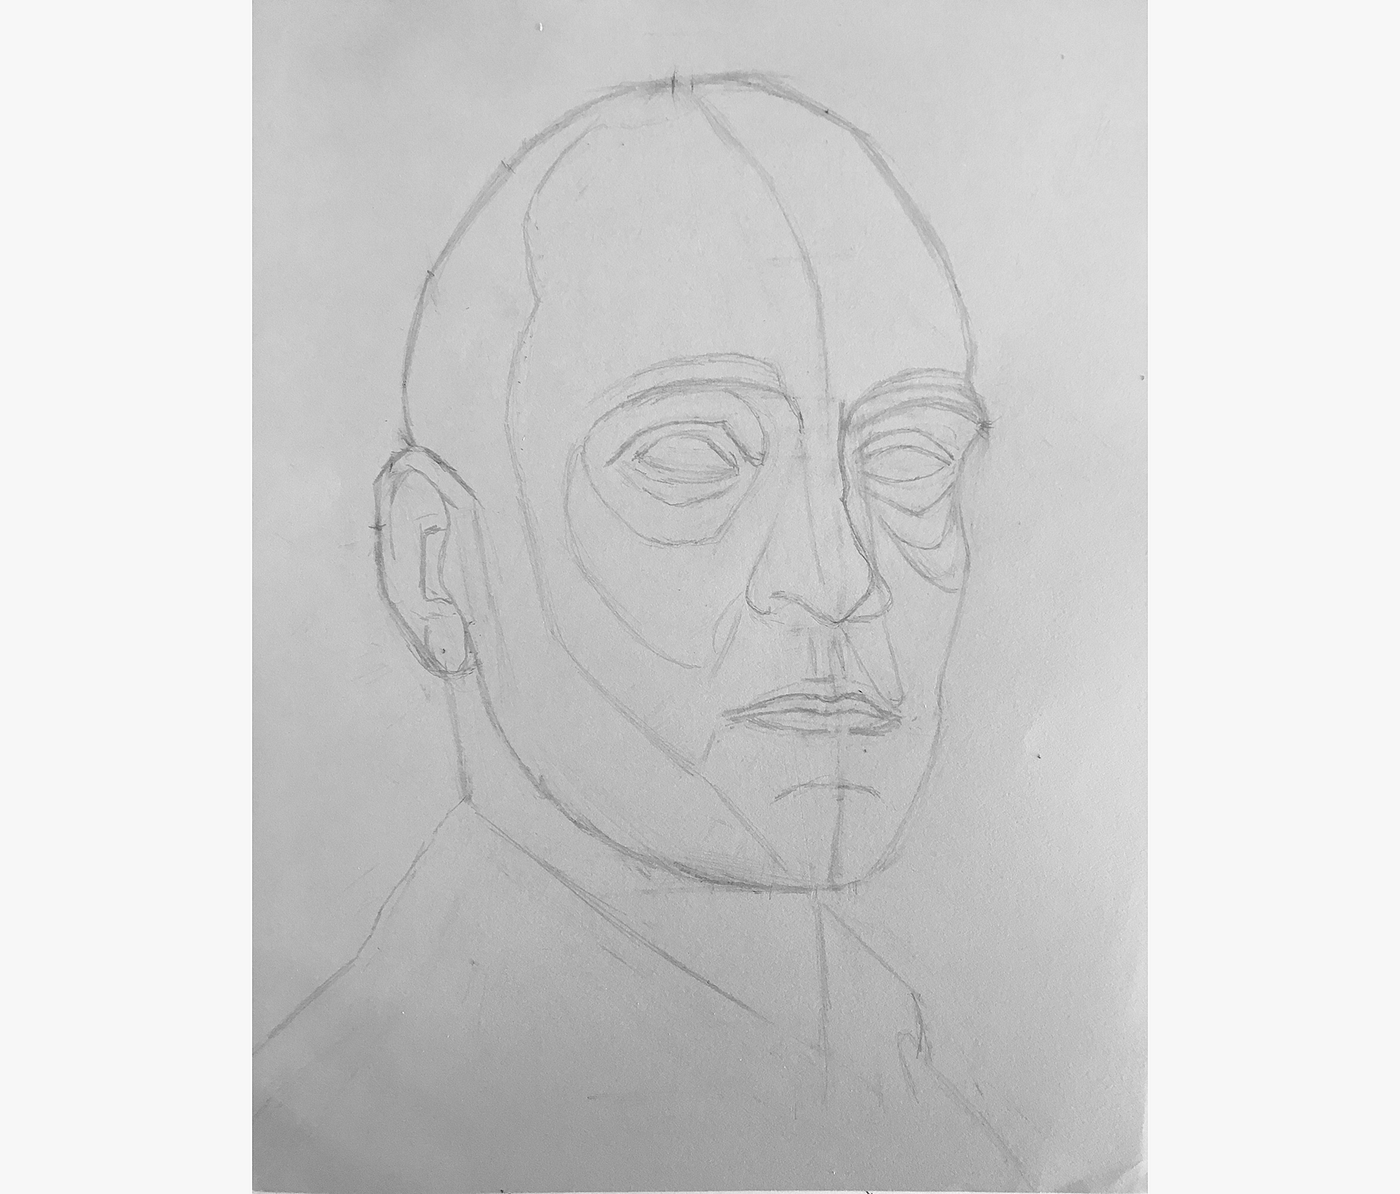
The first module of the grade focuses on mapping out the portrait, which includes determining the shape of the head and locating the features.
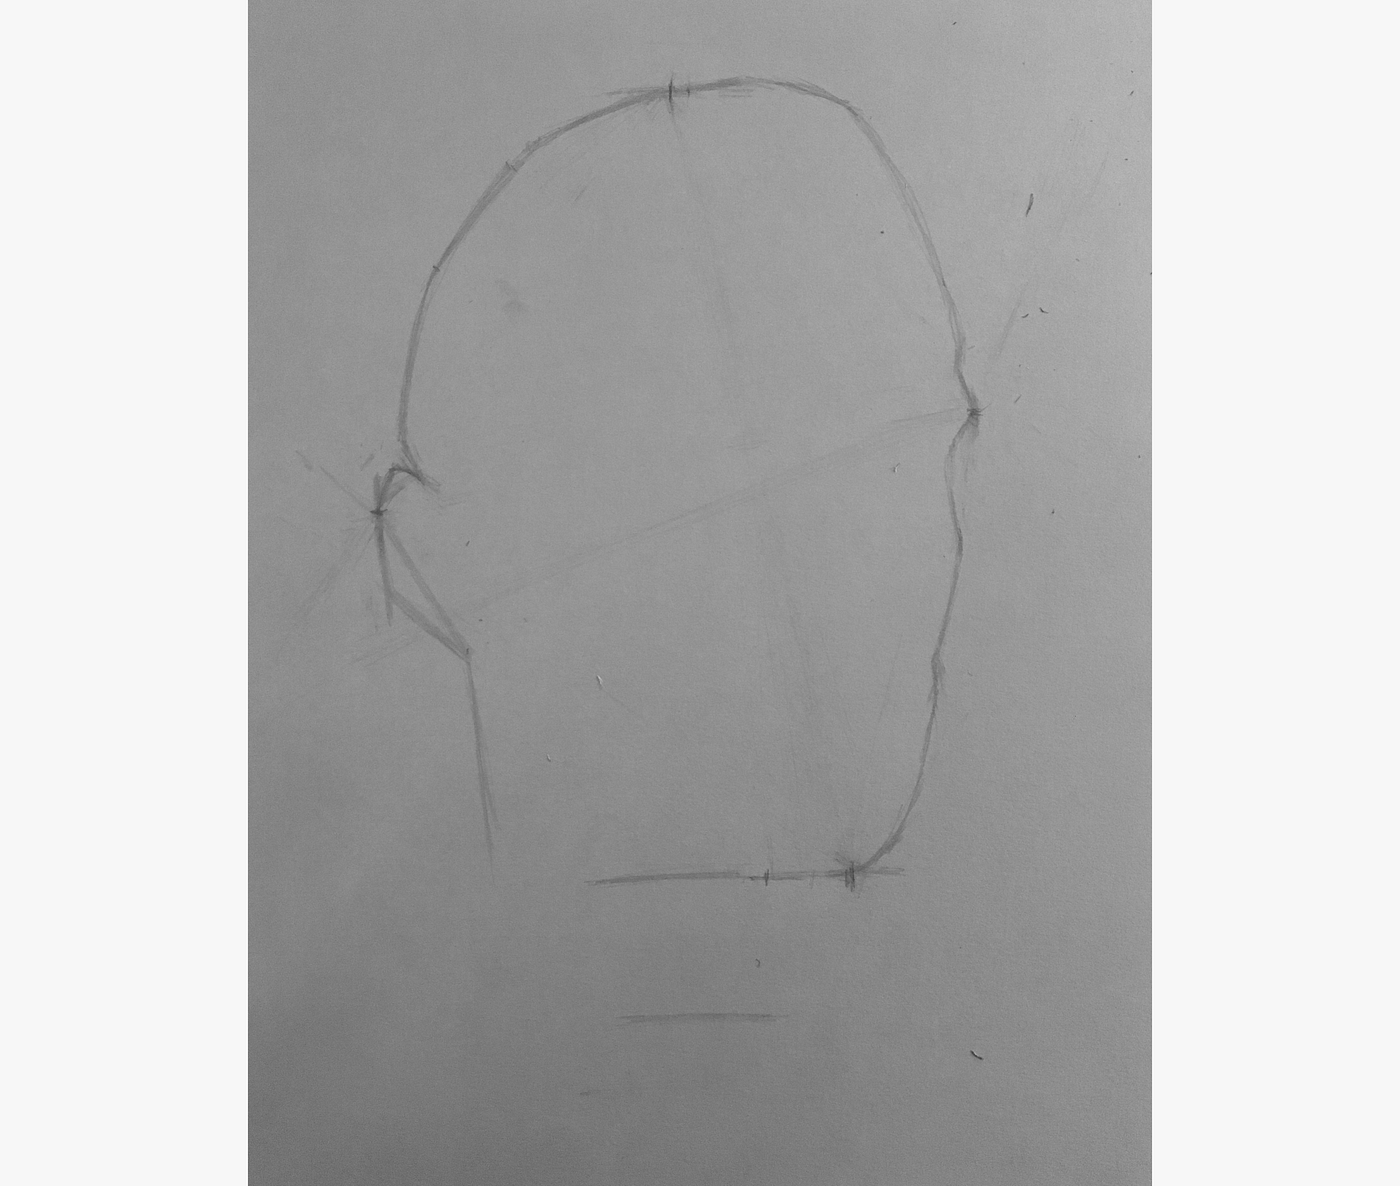
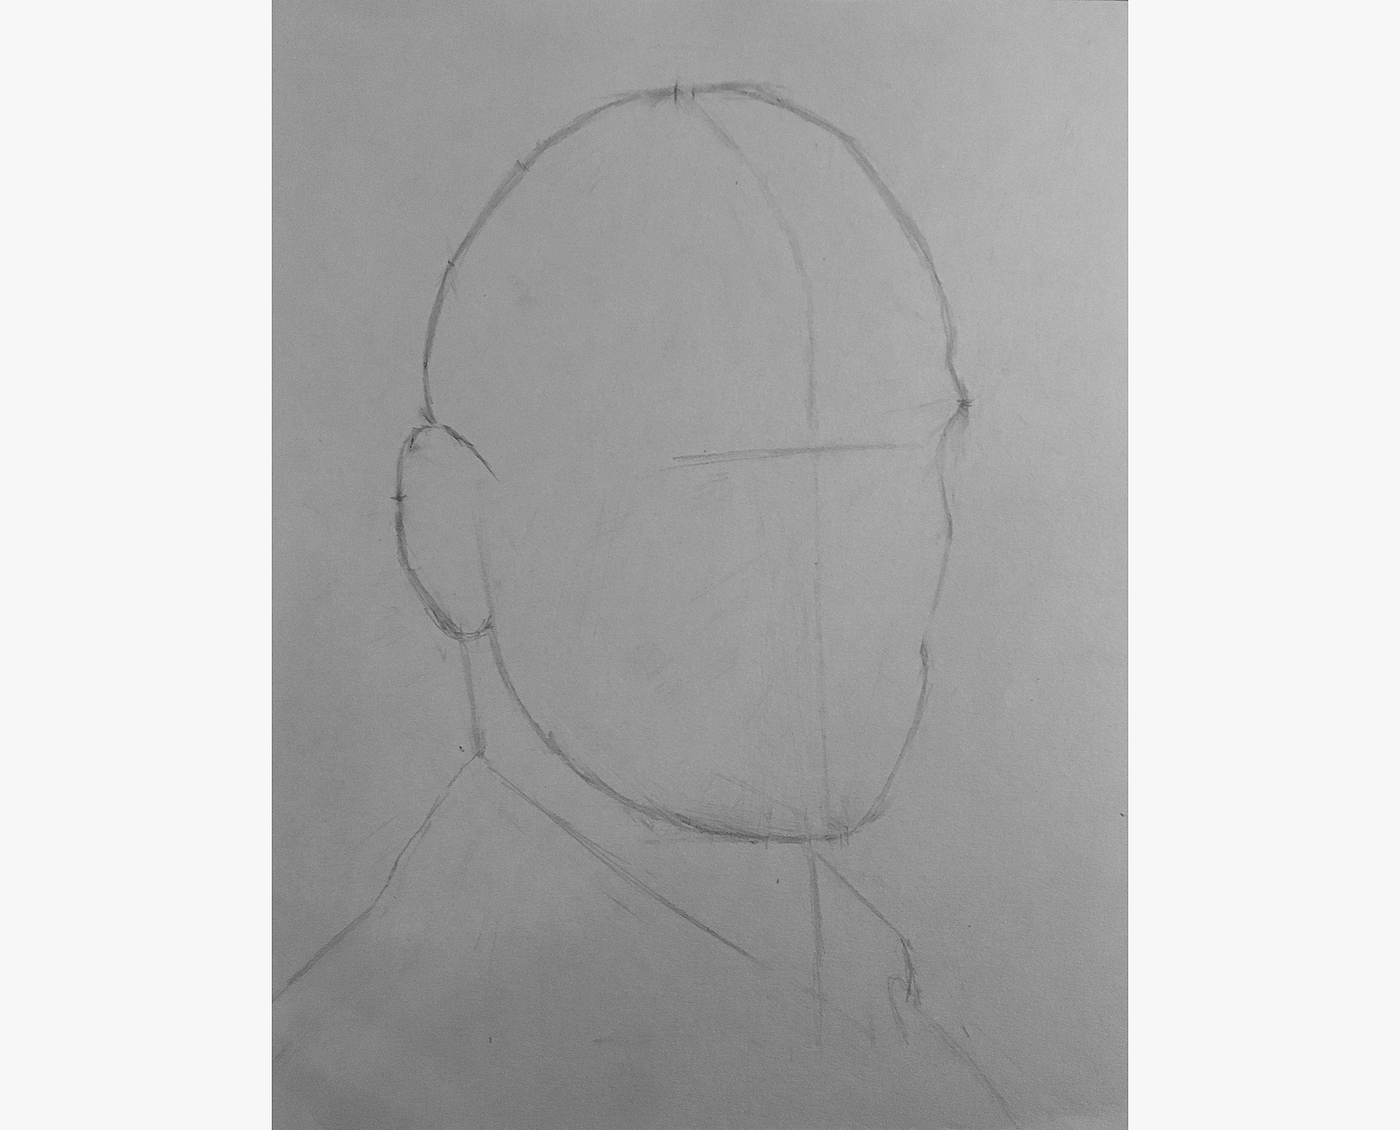
Finding the summit and bottom of the head
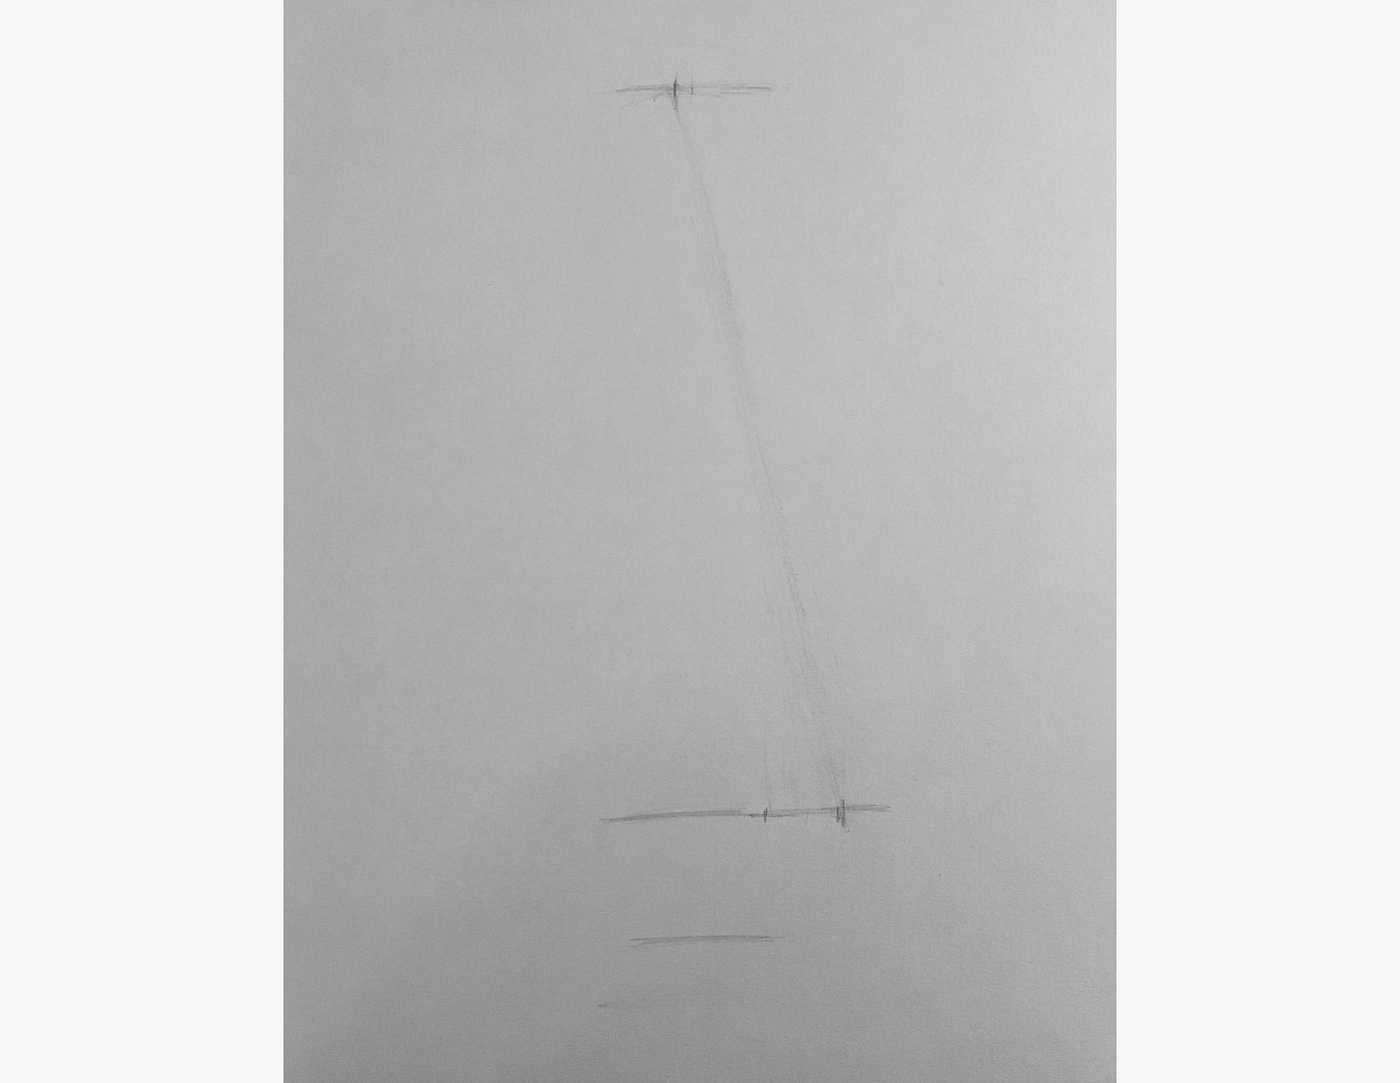
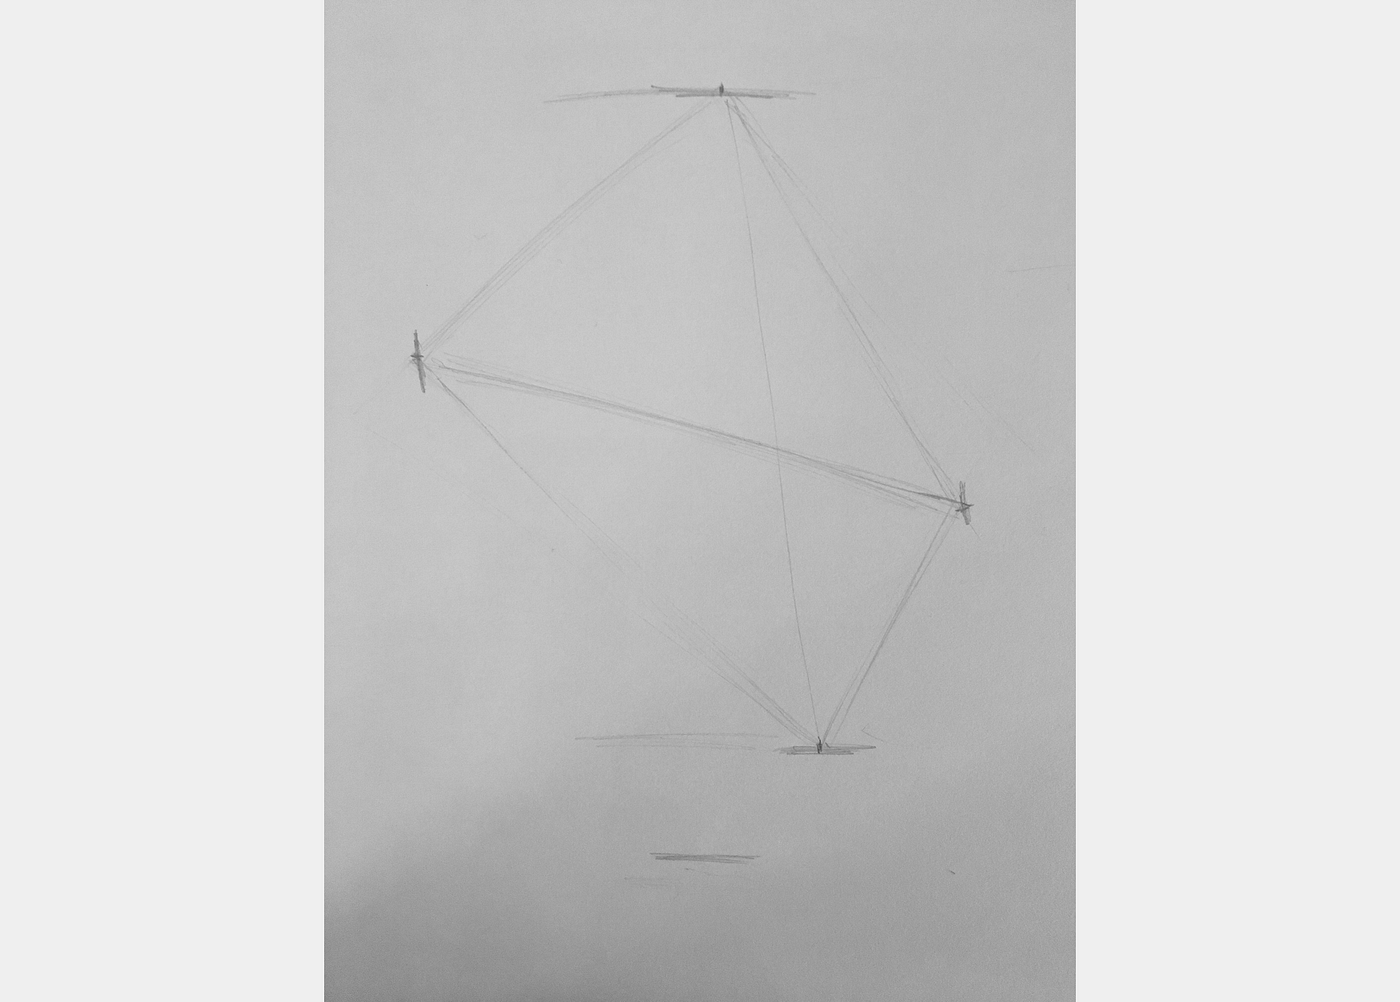
I started by arbitrarily drawing two lines on the page to point the level of the top of the head and the level of the bottom of the head.
So, I arbitrarily marked, on the summit level, the highest bespeak of the caput, and then used the angle between this bespeak and the bottom of the chin, to locate the bottom of the chin on the folio.
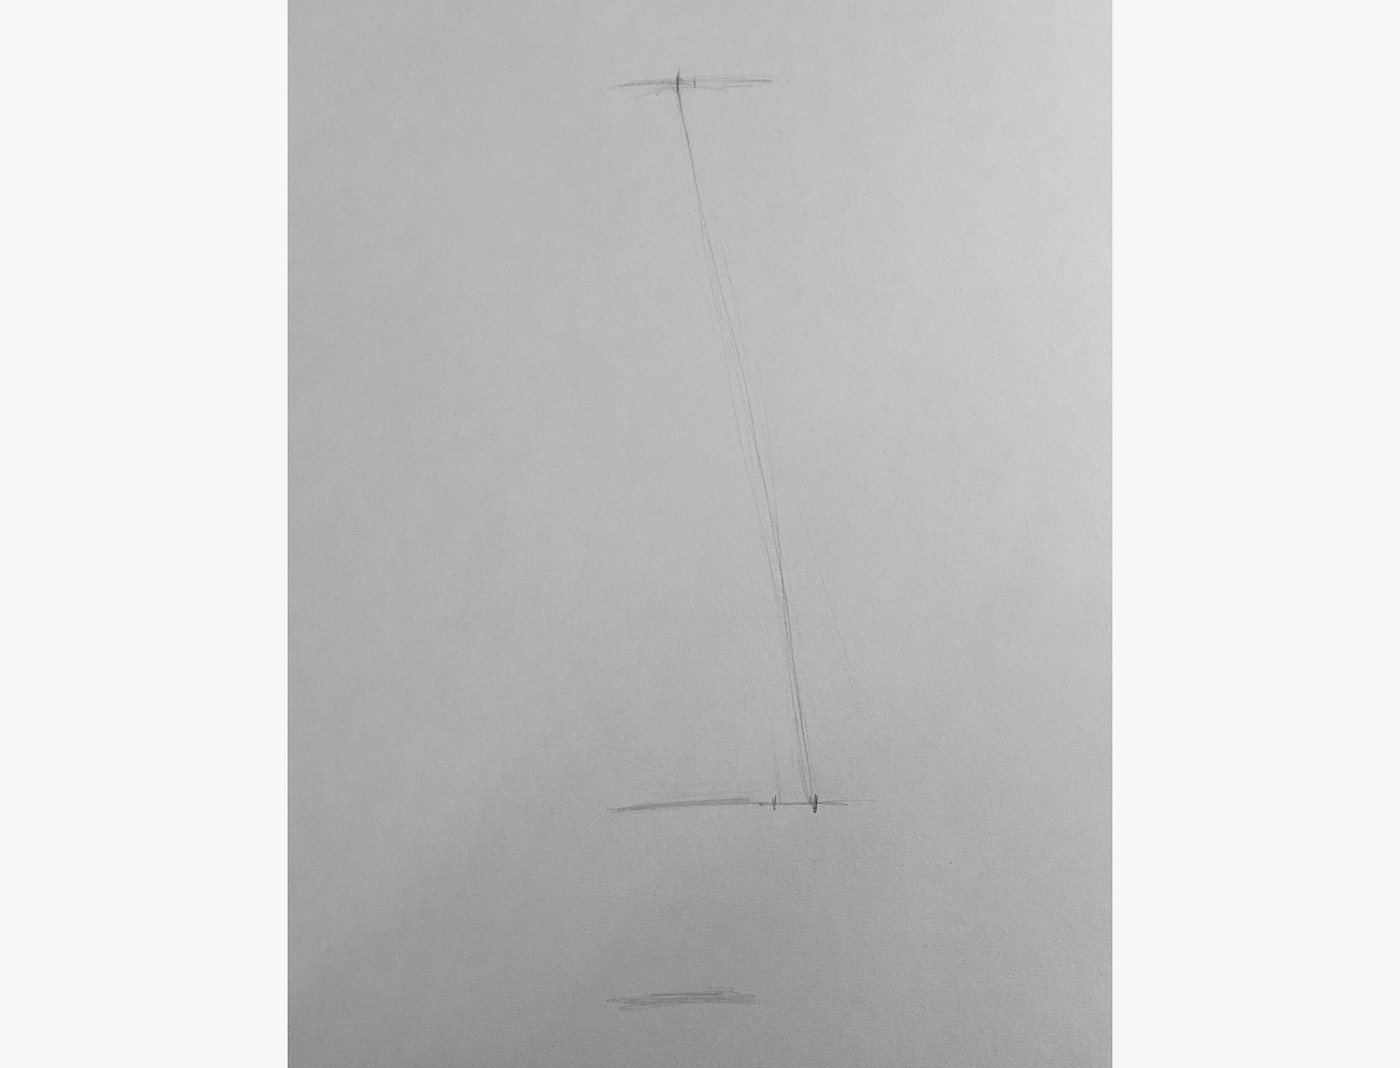
I also drew in the level of the notch of the cervix. The first time, I drew it as well low, and so I moved it up. I gauged this distances as a proffer of the caput length.
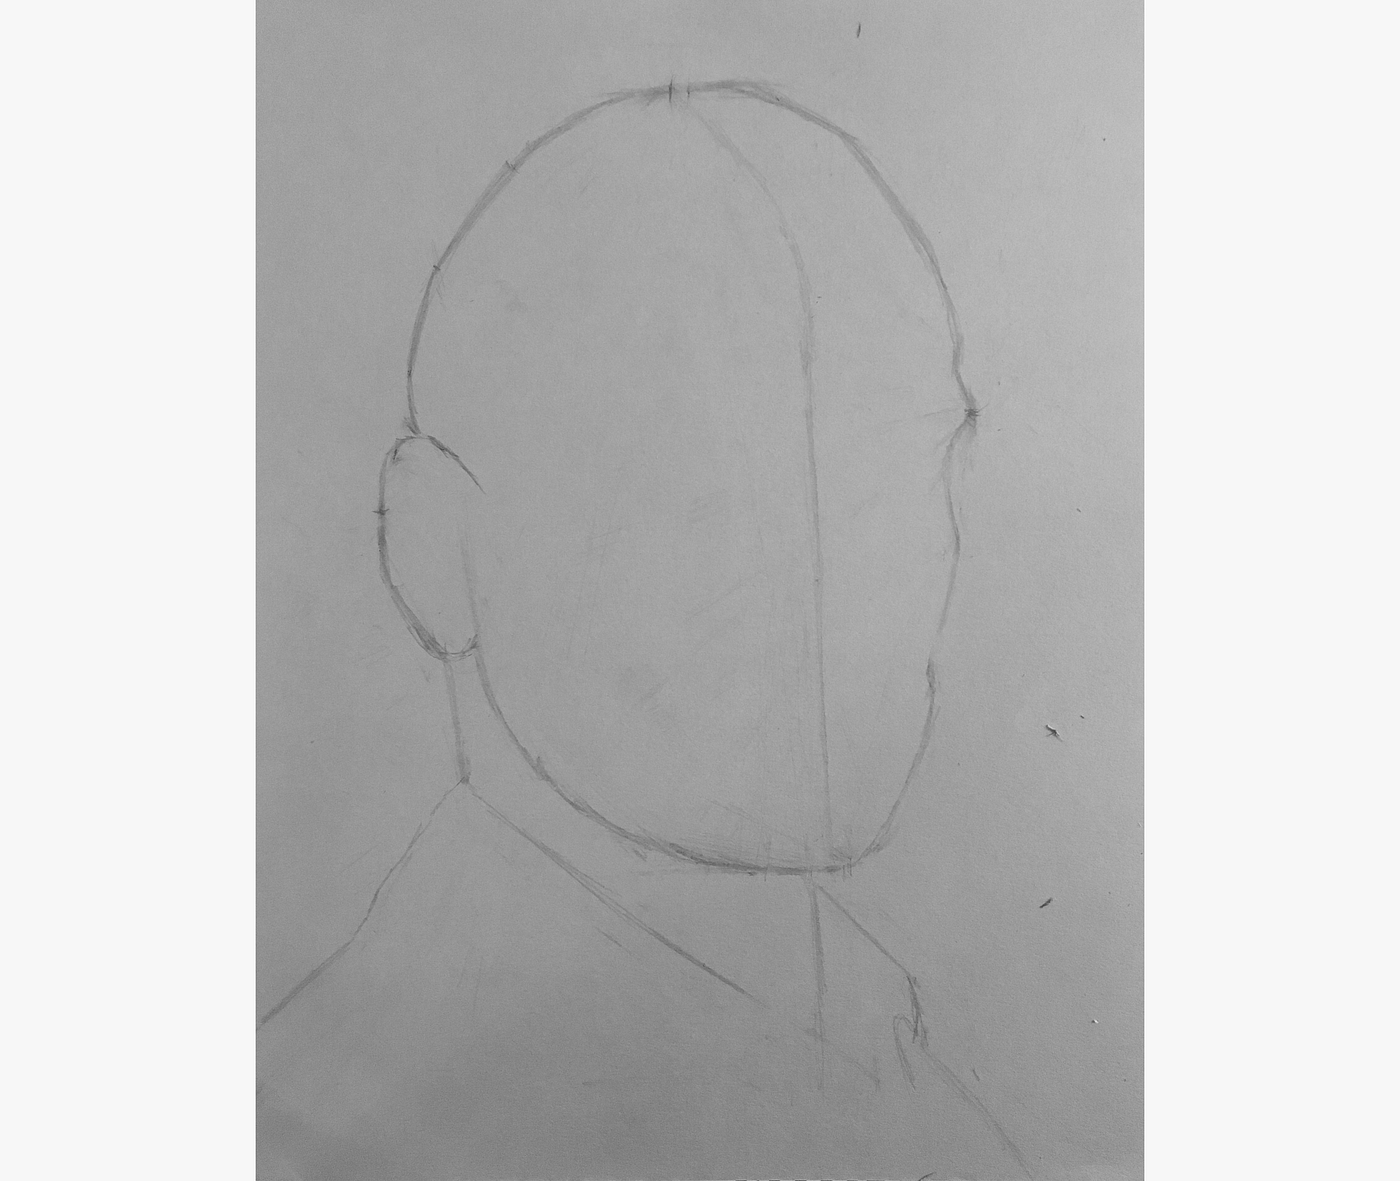
Detect the leftmost and rightmost parts of the head
With the topmost and bottommost points identified, I then needed to identify the leftmost and rightmost points.
To do this, I used a new technique I learned called triangulation. To triangulate a new signal, I outset sight (endeavour to visualize) the angles to this new bespeak from ii existing points. So, I draw lines from the existing points in the direction of the new point based on the sighted angles. Finally, I mark the new point where the lines intersect.

Later checking the angles again, I updated these two new points.
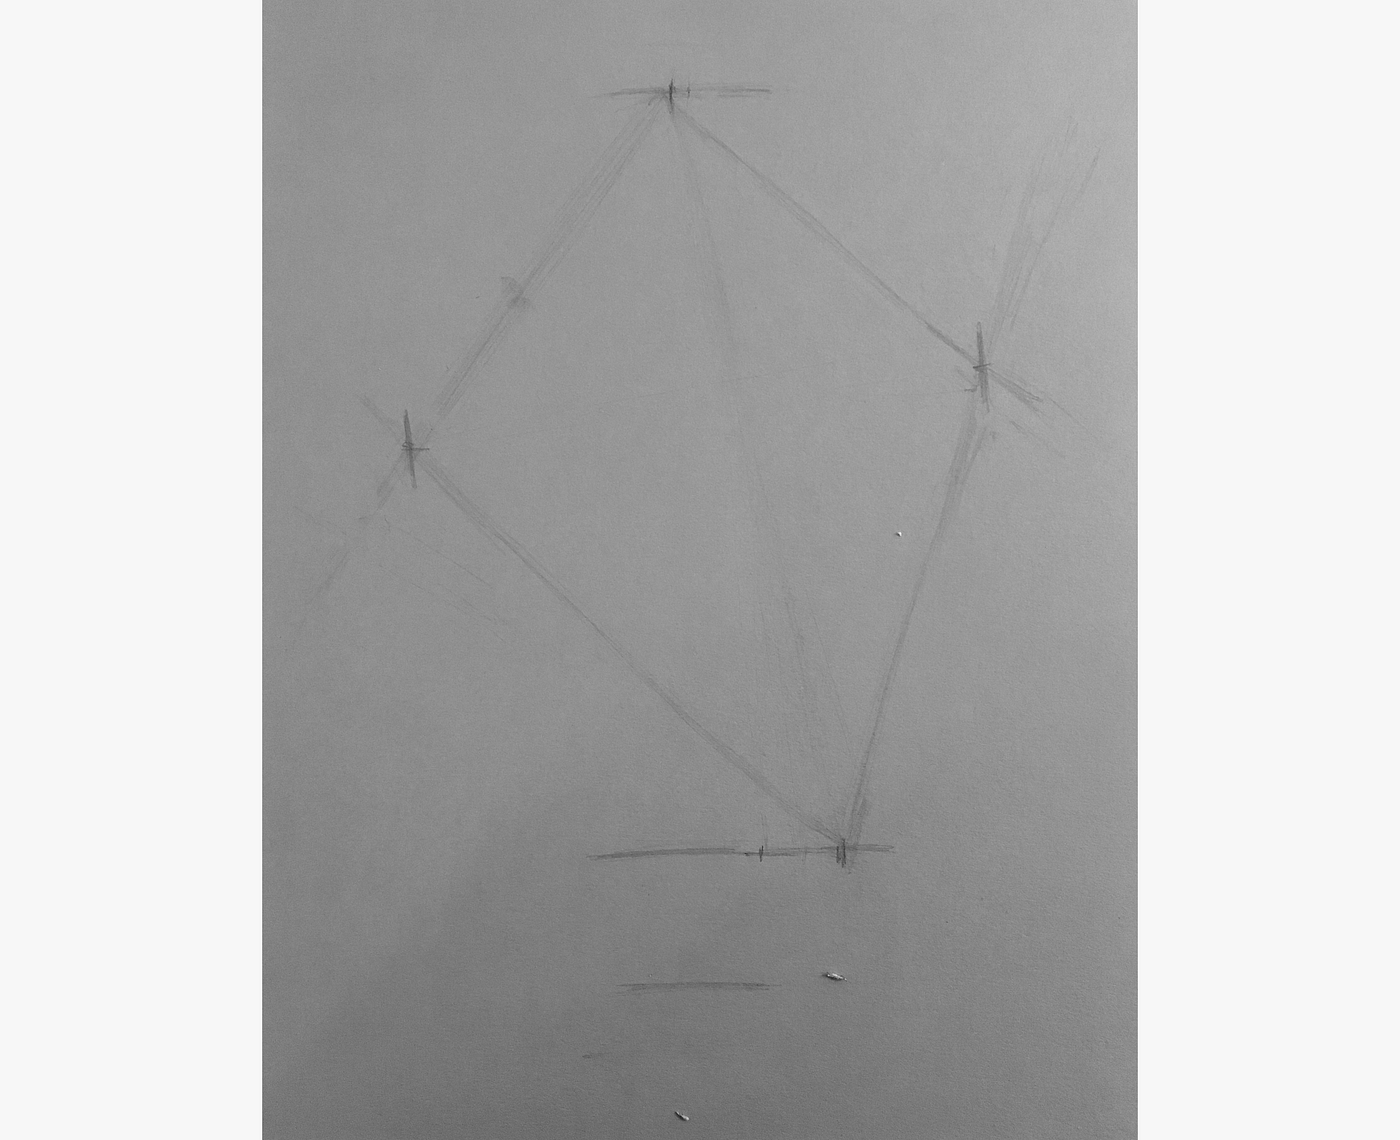
To check, I then sighted the angle betwixt the 2 new points, ensuring this bending matches what I see on Derren's head.
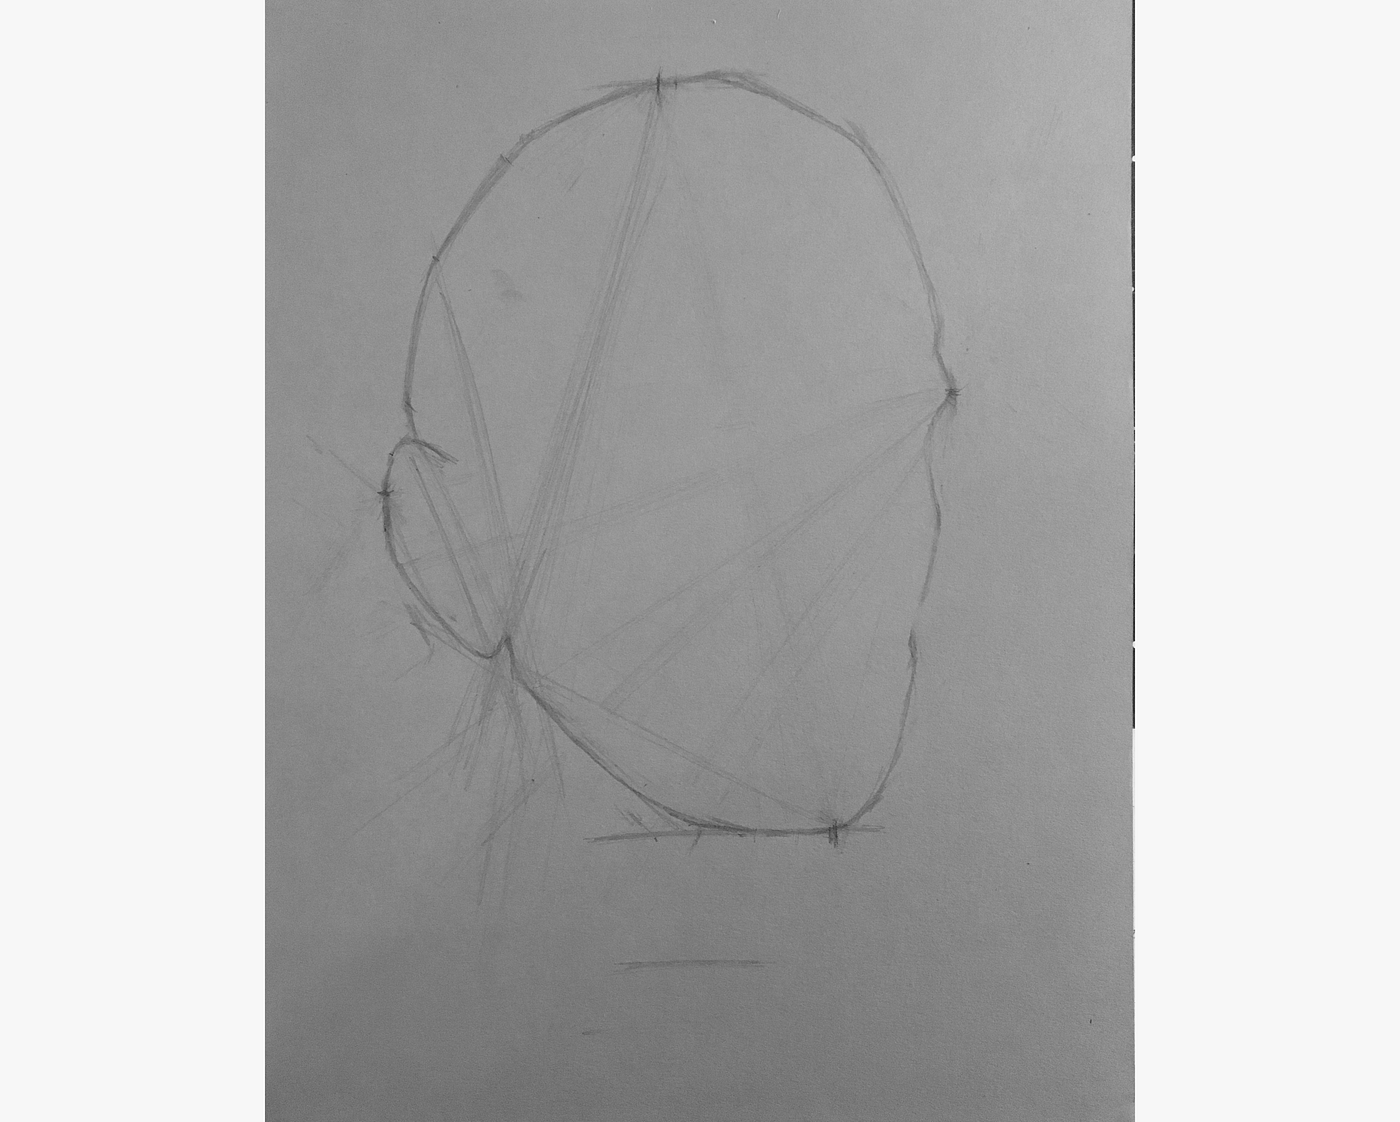
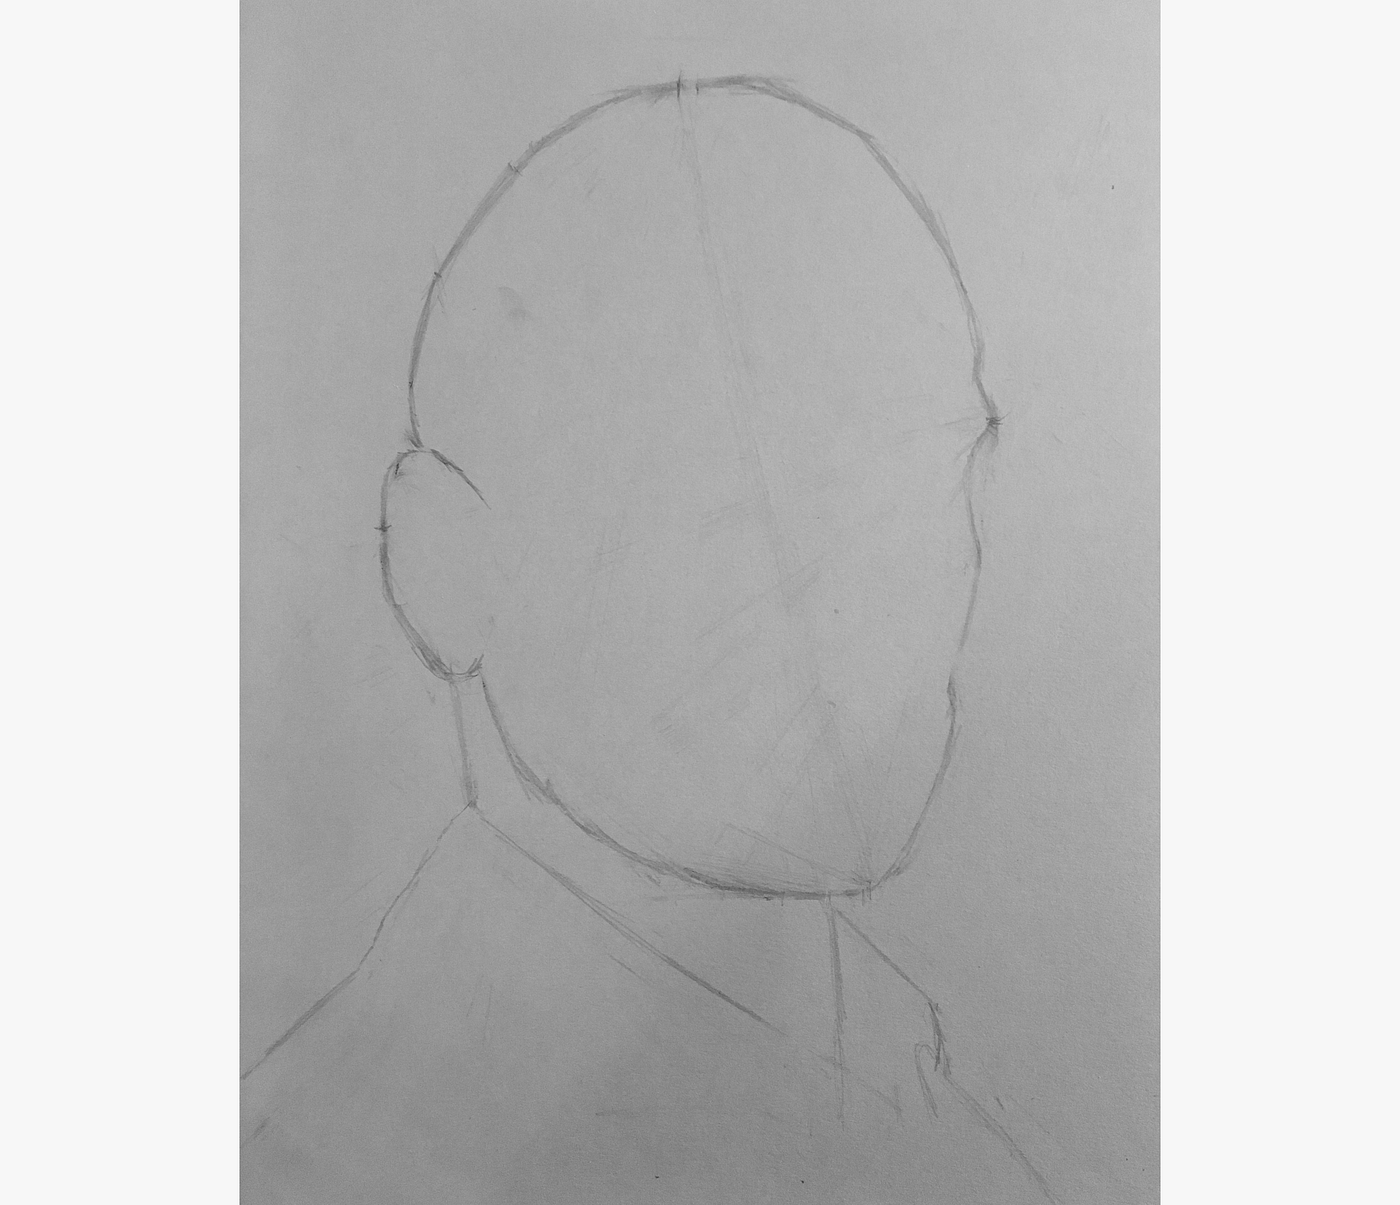
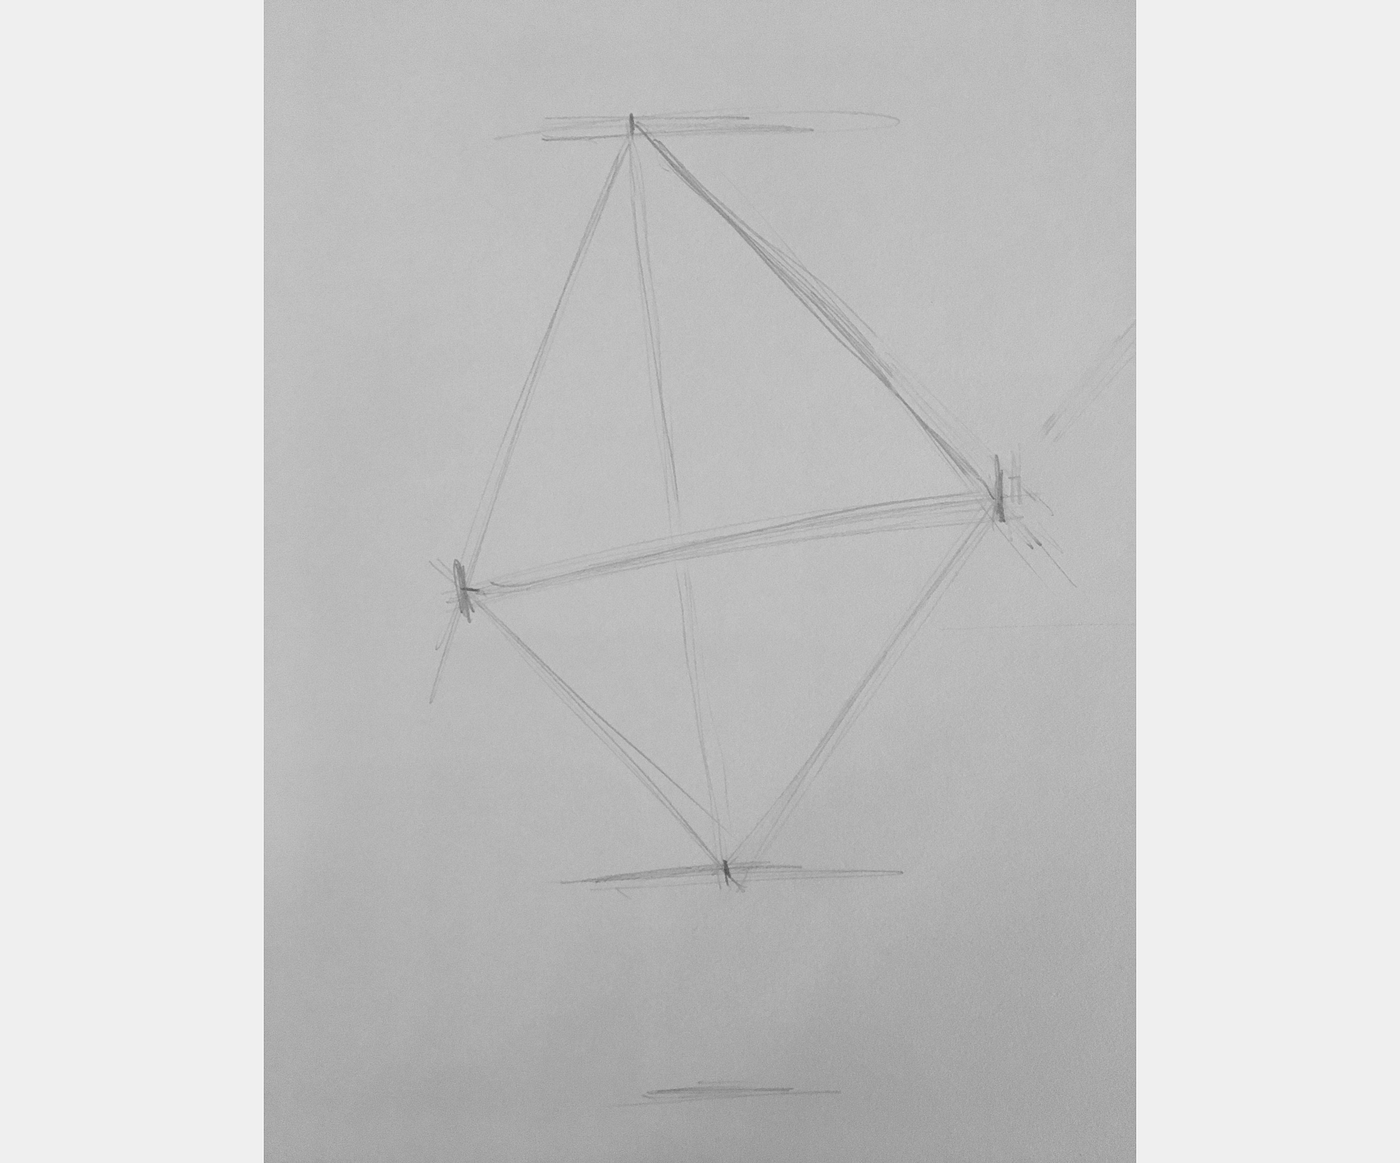
Drawing the shape of the head
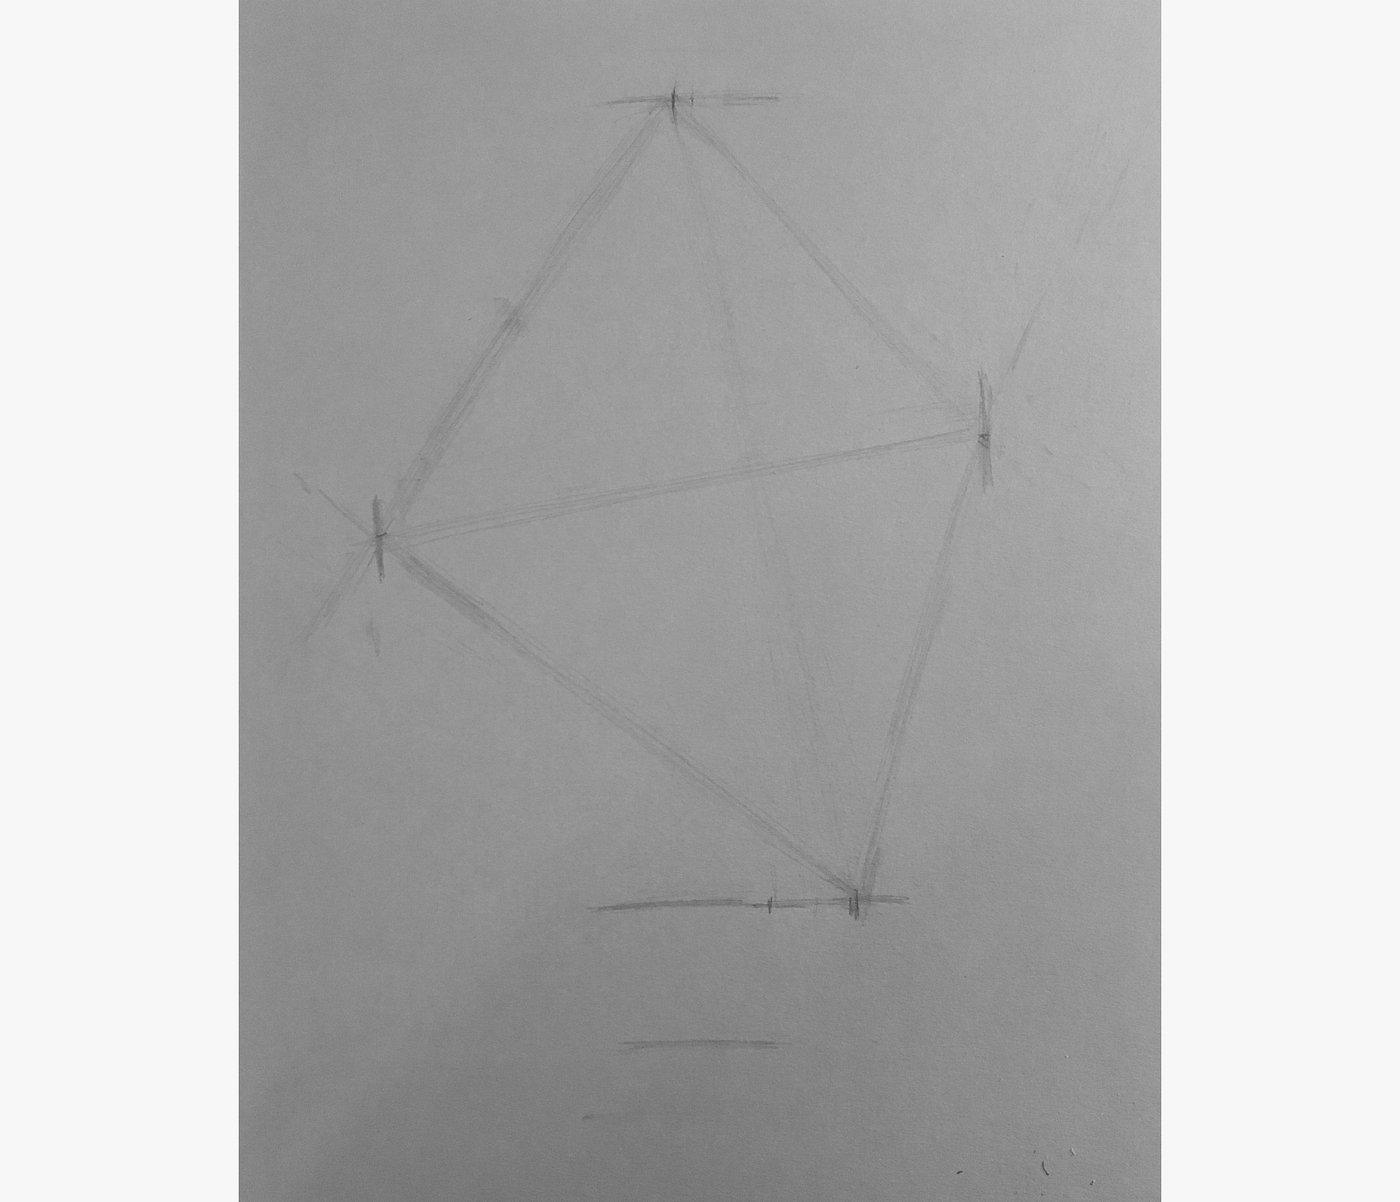
With these four outer points drawn, the side by side footstep is to describe in the shape of the head. To do this, I continued to triangulate more points, and depict in the necessary curves to connect them.
I connected in this manner, until I outlined the entire shape of the caput.
It didn't look quite right, so I checked a agglomeration of angles.
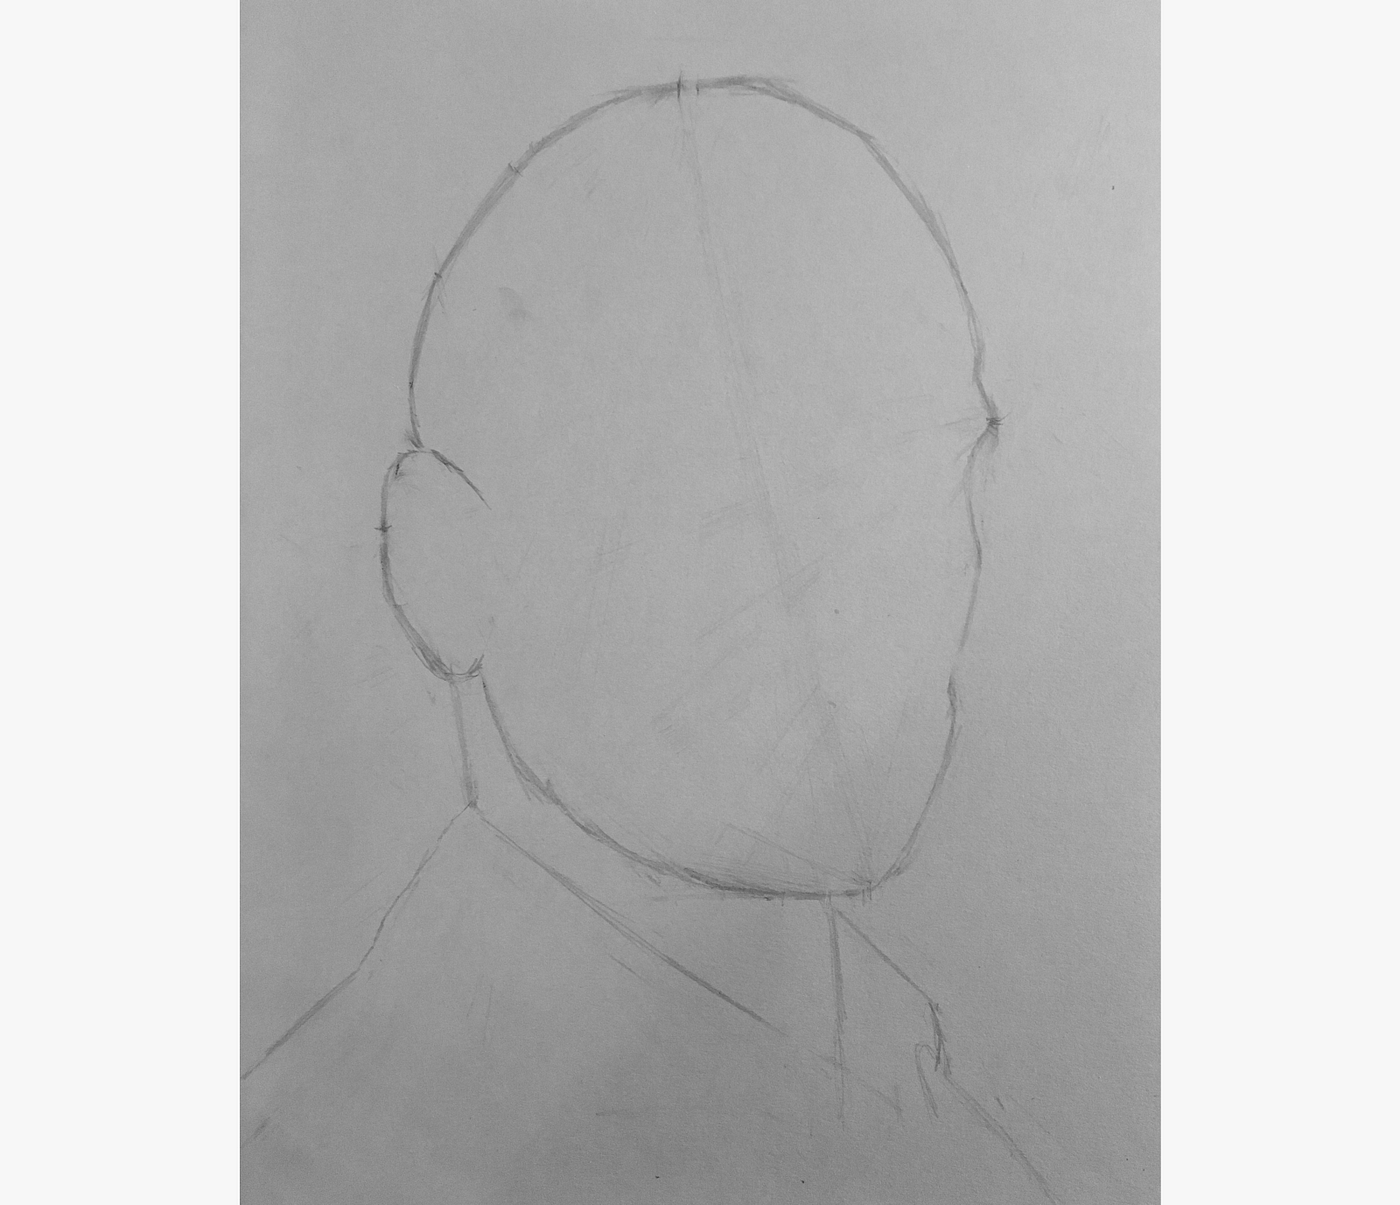
In one case information technology seemed closer, I added in the neck and shoulders.
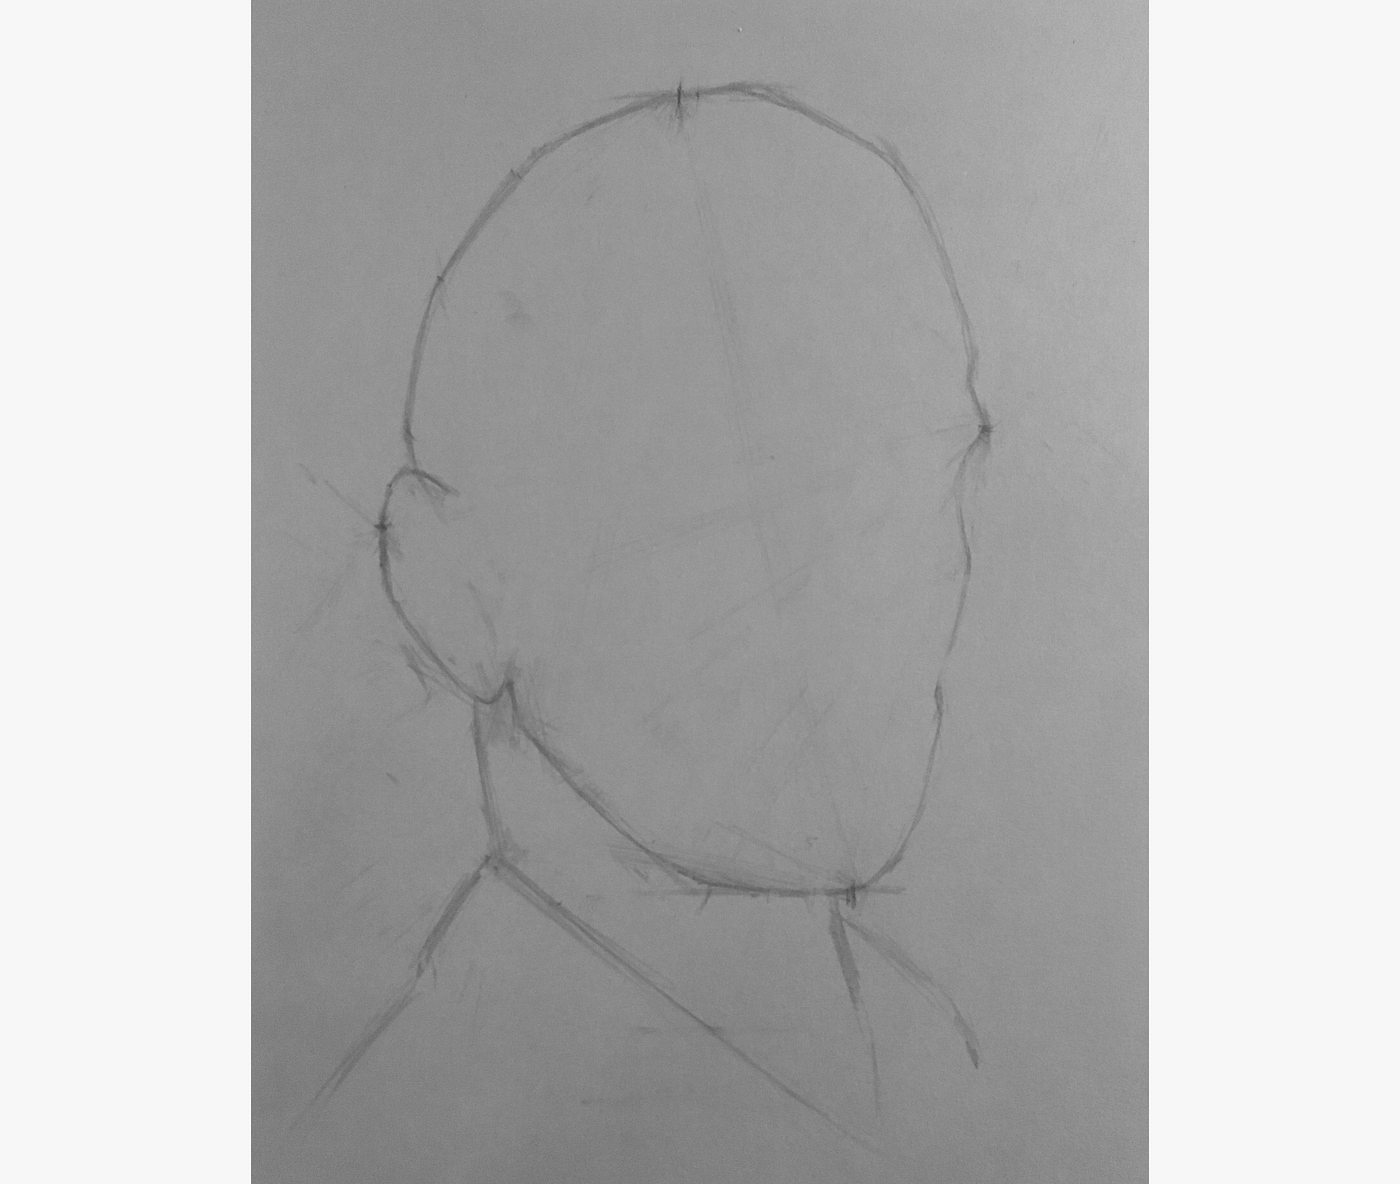
With the neck and shoulders in place, information technology once more didn't look right. So, I checked more angles and made adjustments as necessary (mostly to broaden the jaw)
The head was now looking pretty skillful, but the neck and shoulders needed a few adjustments. I retriangulated, and adjusted the collar up.
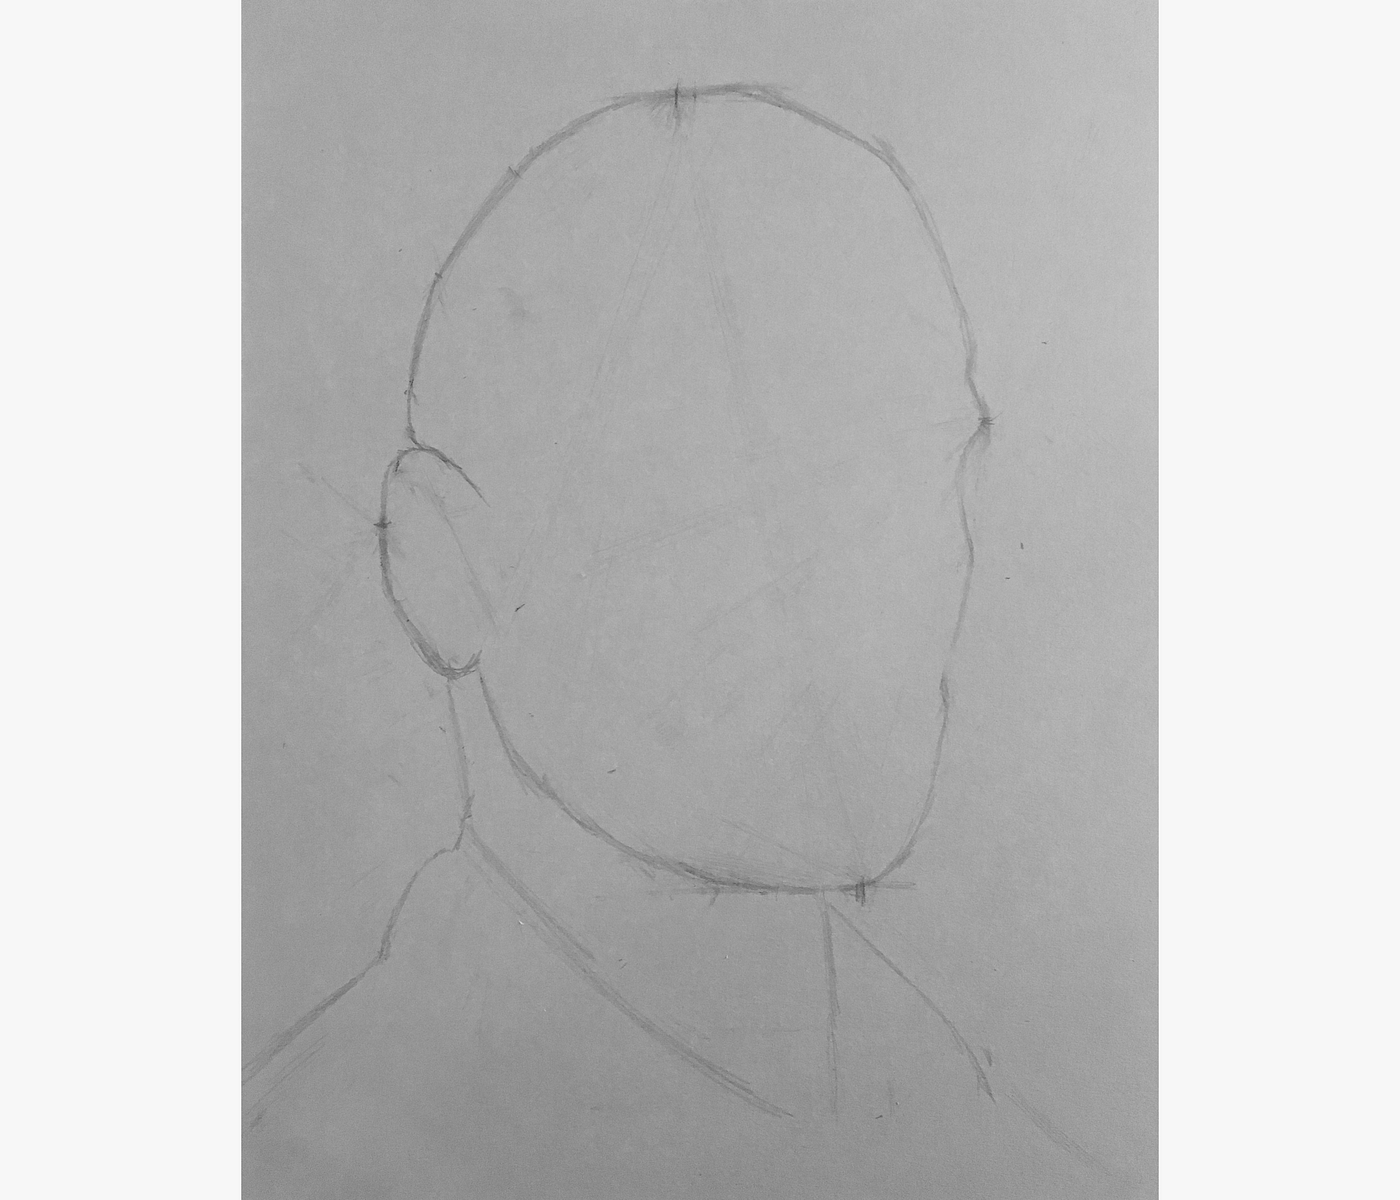
That'southward information technology for today
Getting to this indicate took me ii.5 hours, which was divide betwixt watching the video grade and drawing my Derren portrait.
So far, the portrait doesn't look like much, simply I withal learned a bunch today. I particularly similar the triangulation technique, which makes drawing much more procedural and mathematical (a.k.a. easier for me).
Tomorrow, I'll continue following the form, and start drawing in the facial features.

Yesterday, I started following along with the Vitruvian Studio portrait class, and began drawing a portrait of Derren Brown.
Here'southward what I accomplished yesterday.
And hither'due south my cease goal (more or less).
Today, I spent another 2.v hours watching the course and working on the portrait.
Today'due south progress
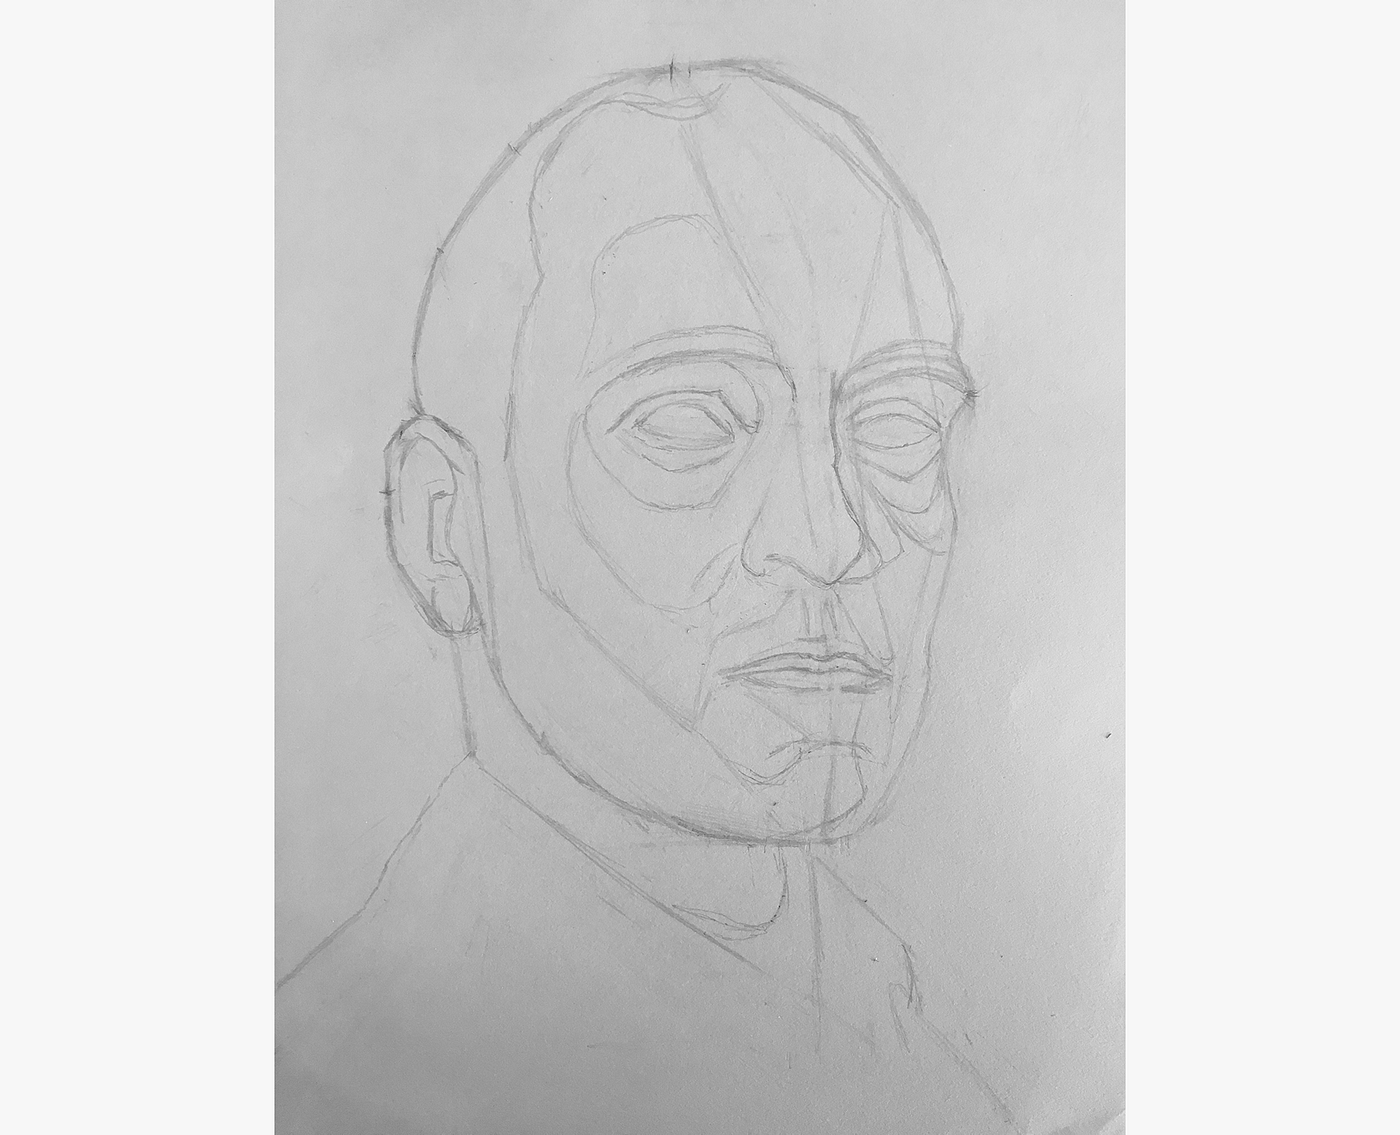
Drawing in guides
The kickoff thing I did today was add construction lines to my drawing. These construction lines are designed to act equally landmarks and assist me eventually place the facial features.
First, I drew in the vertical center line, which will help me laterally place the features.
And so, I marked center level, to start gauging the features' vertical placement.
I followed up with the levels of the brows, olfactory organ, and lips.
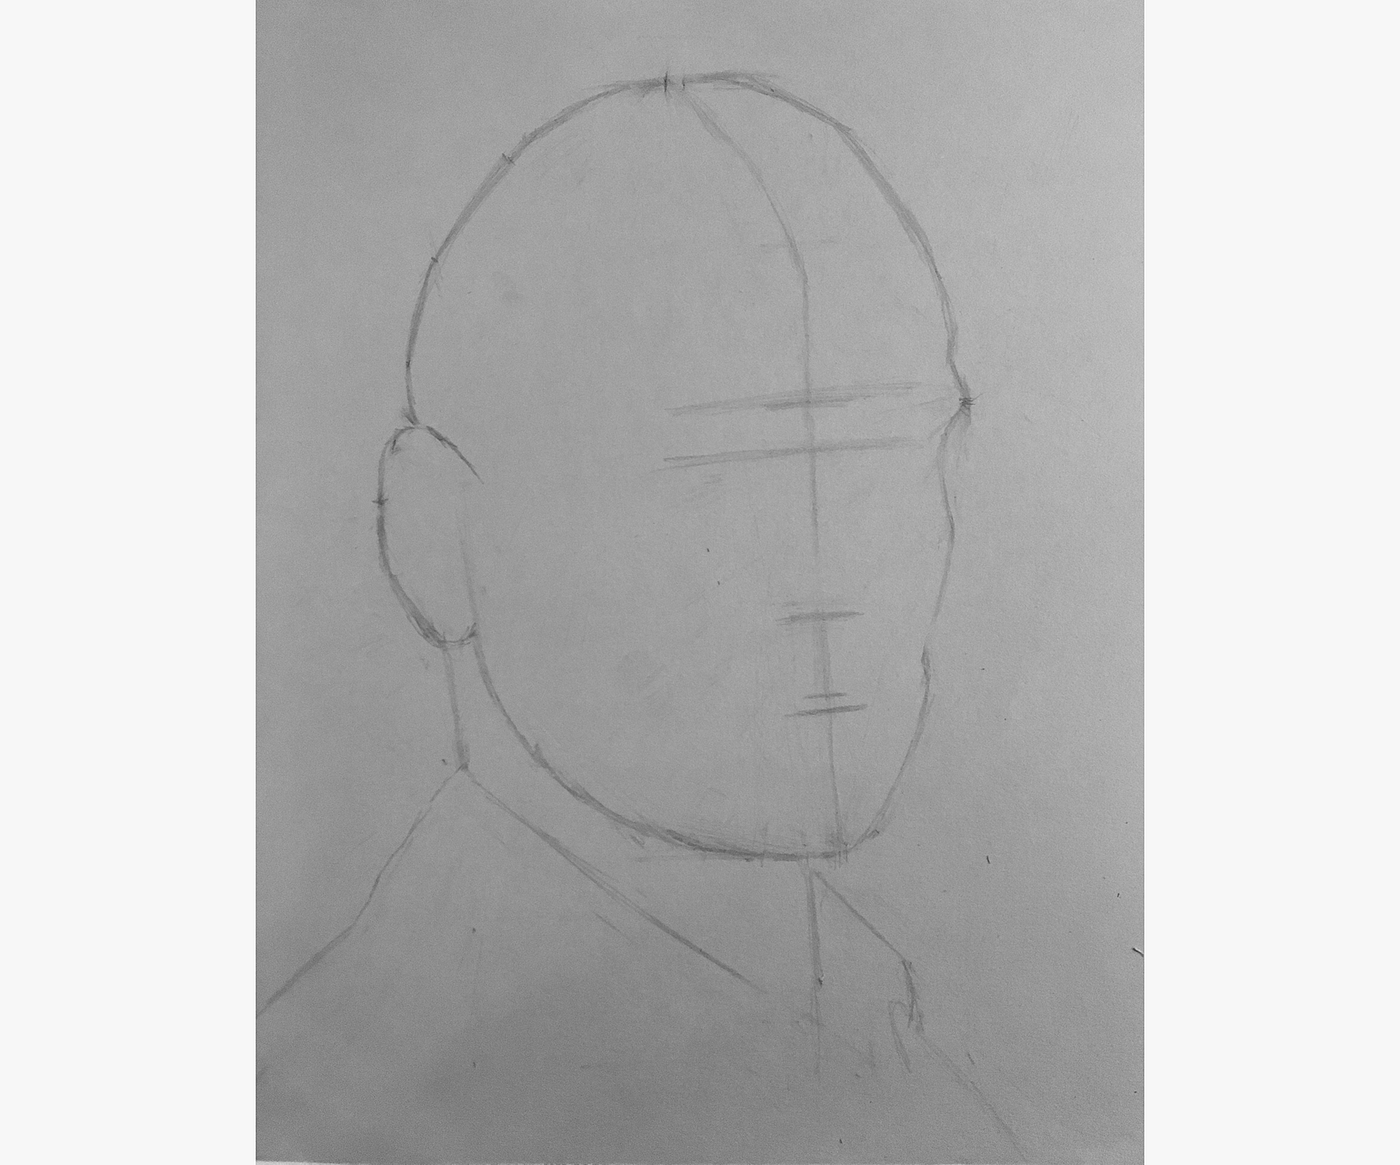
I made a fleck of a mistake here. I drew the horizontal construction lines perpendicular to the center line (which seemed reasonable), merely did non mimic the angle of the features in the actual drawing.
So, I sighted the right angles, and adapted the structure lines appropriately.

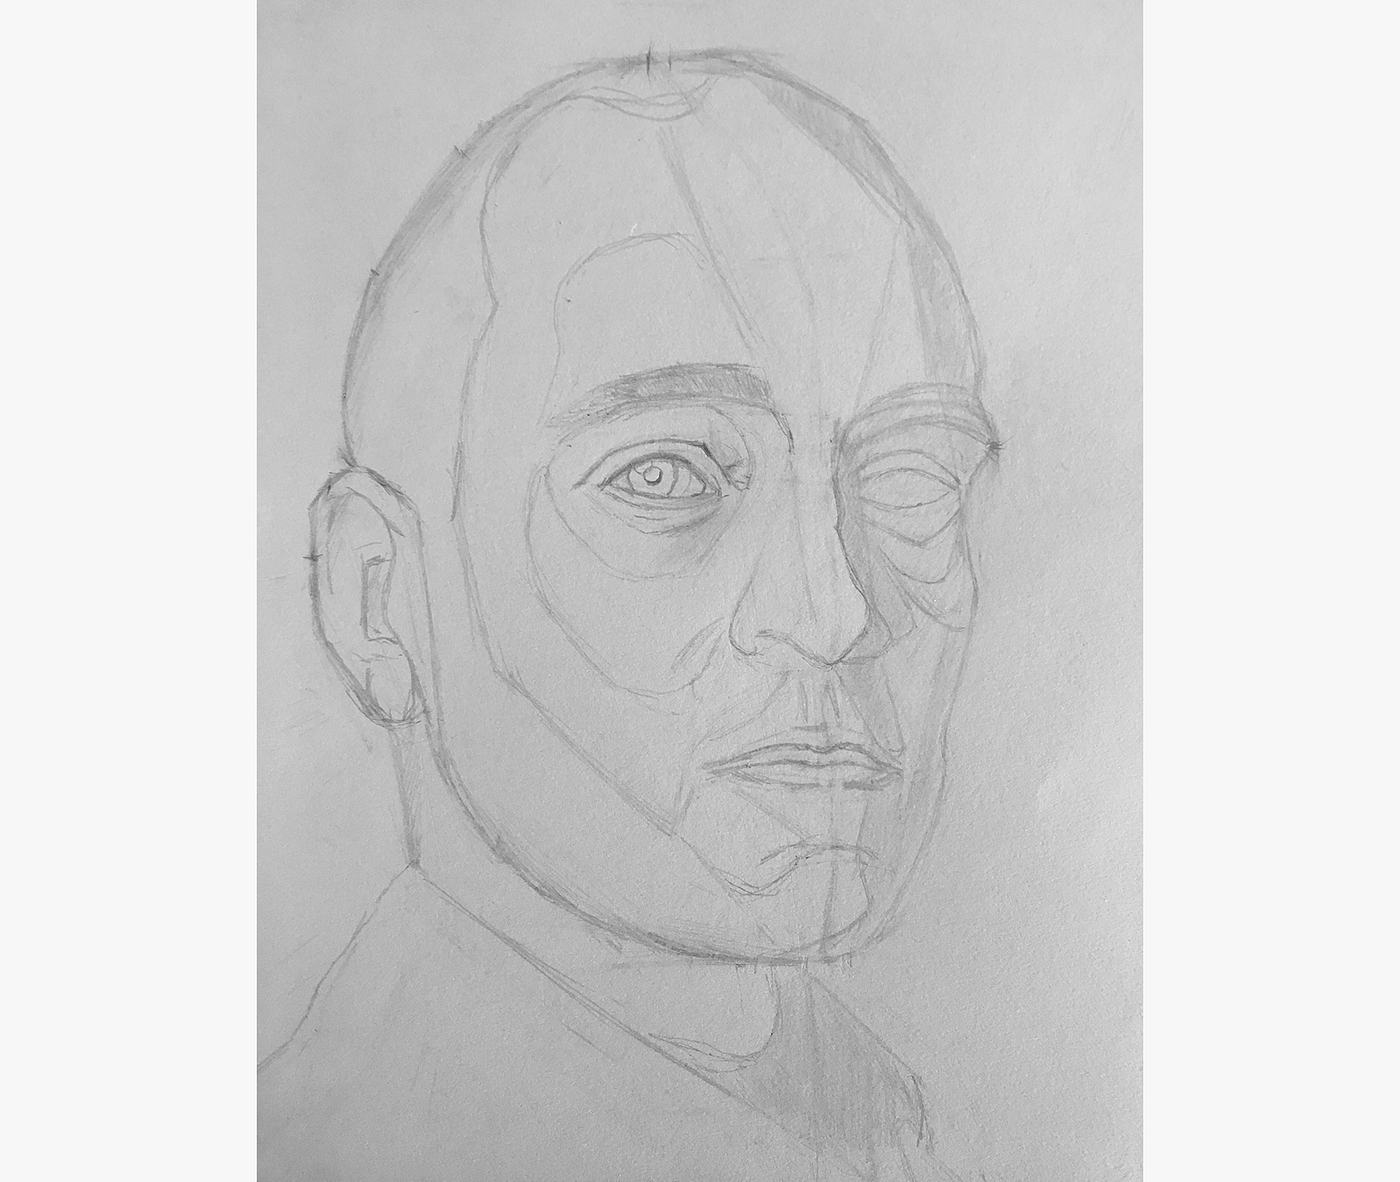
Blocking in the features
With the construction lines as references, I was then prepare to start blocking in the facial features.
I started by adjusting the center line slightly for the nose, and mark the olfactory organ's outer boundary.
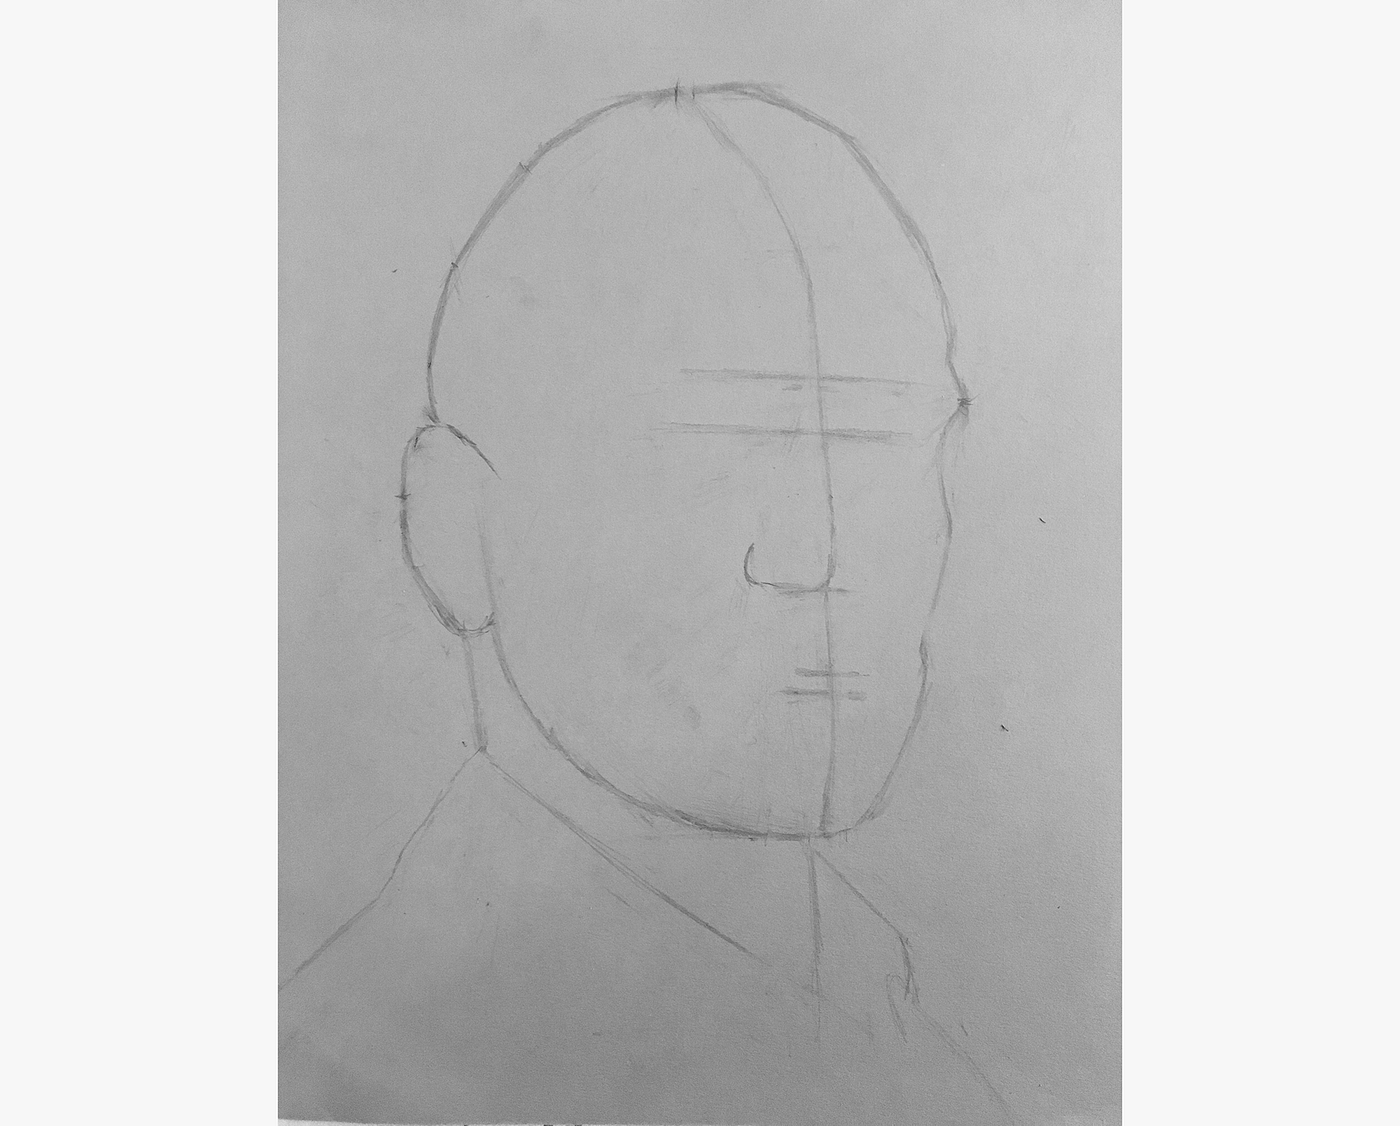
And so, I drew in shapes for the brows.
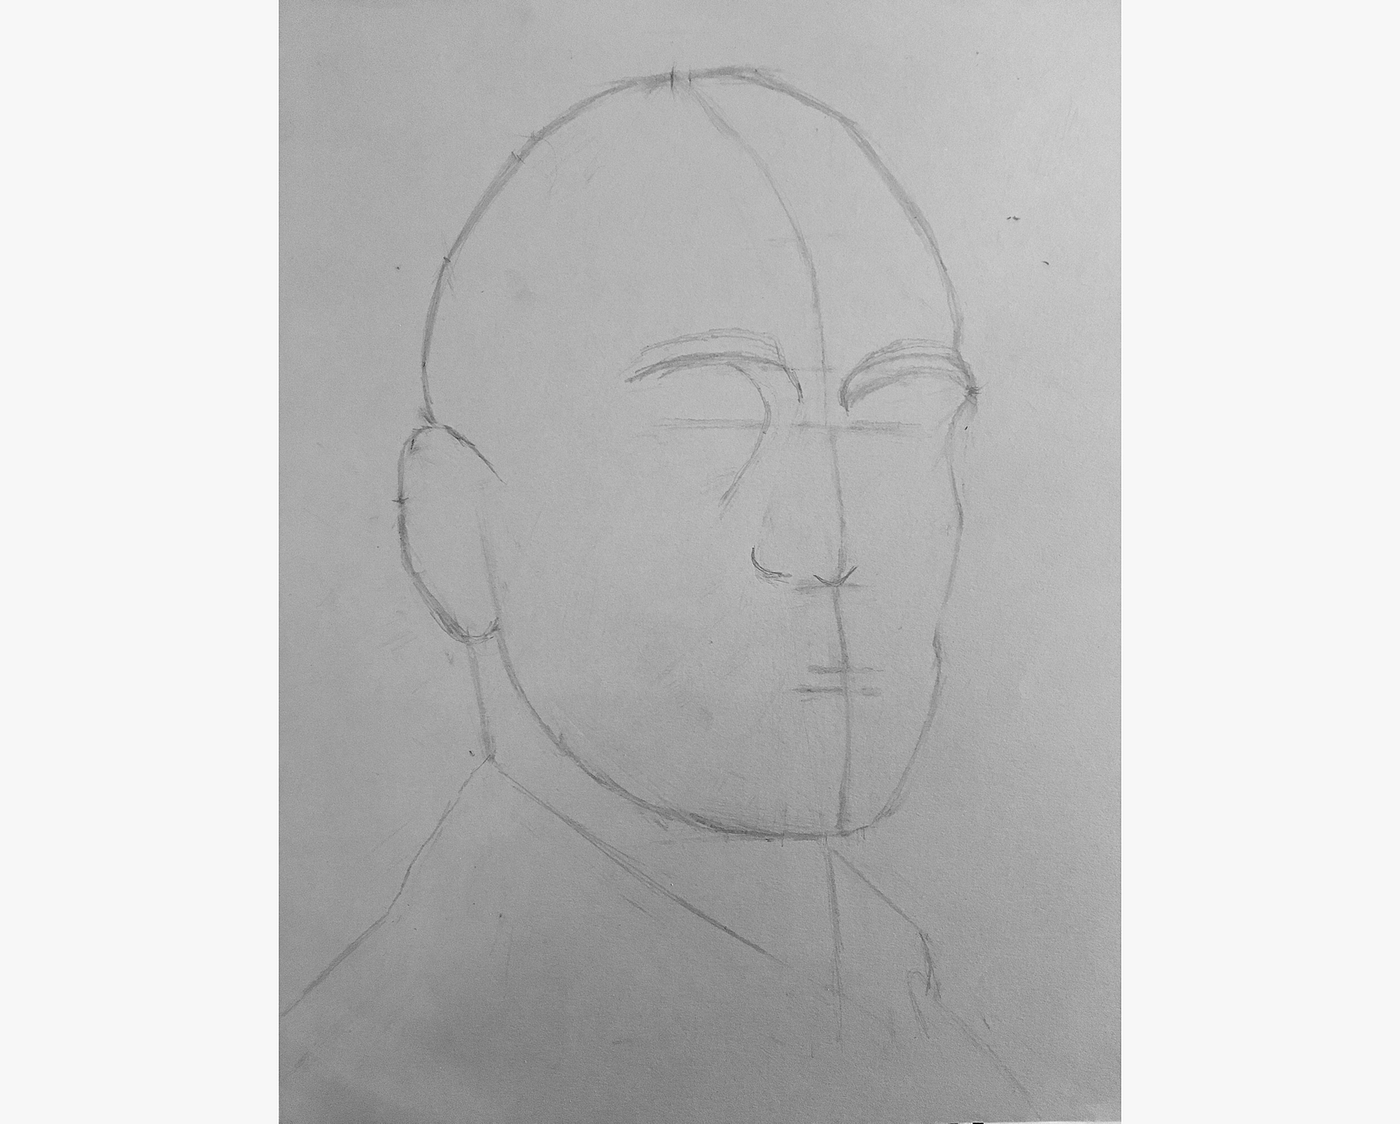
Next, I included the eye sockets and some more detail around the nose.
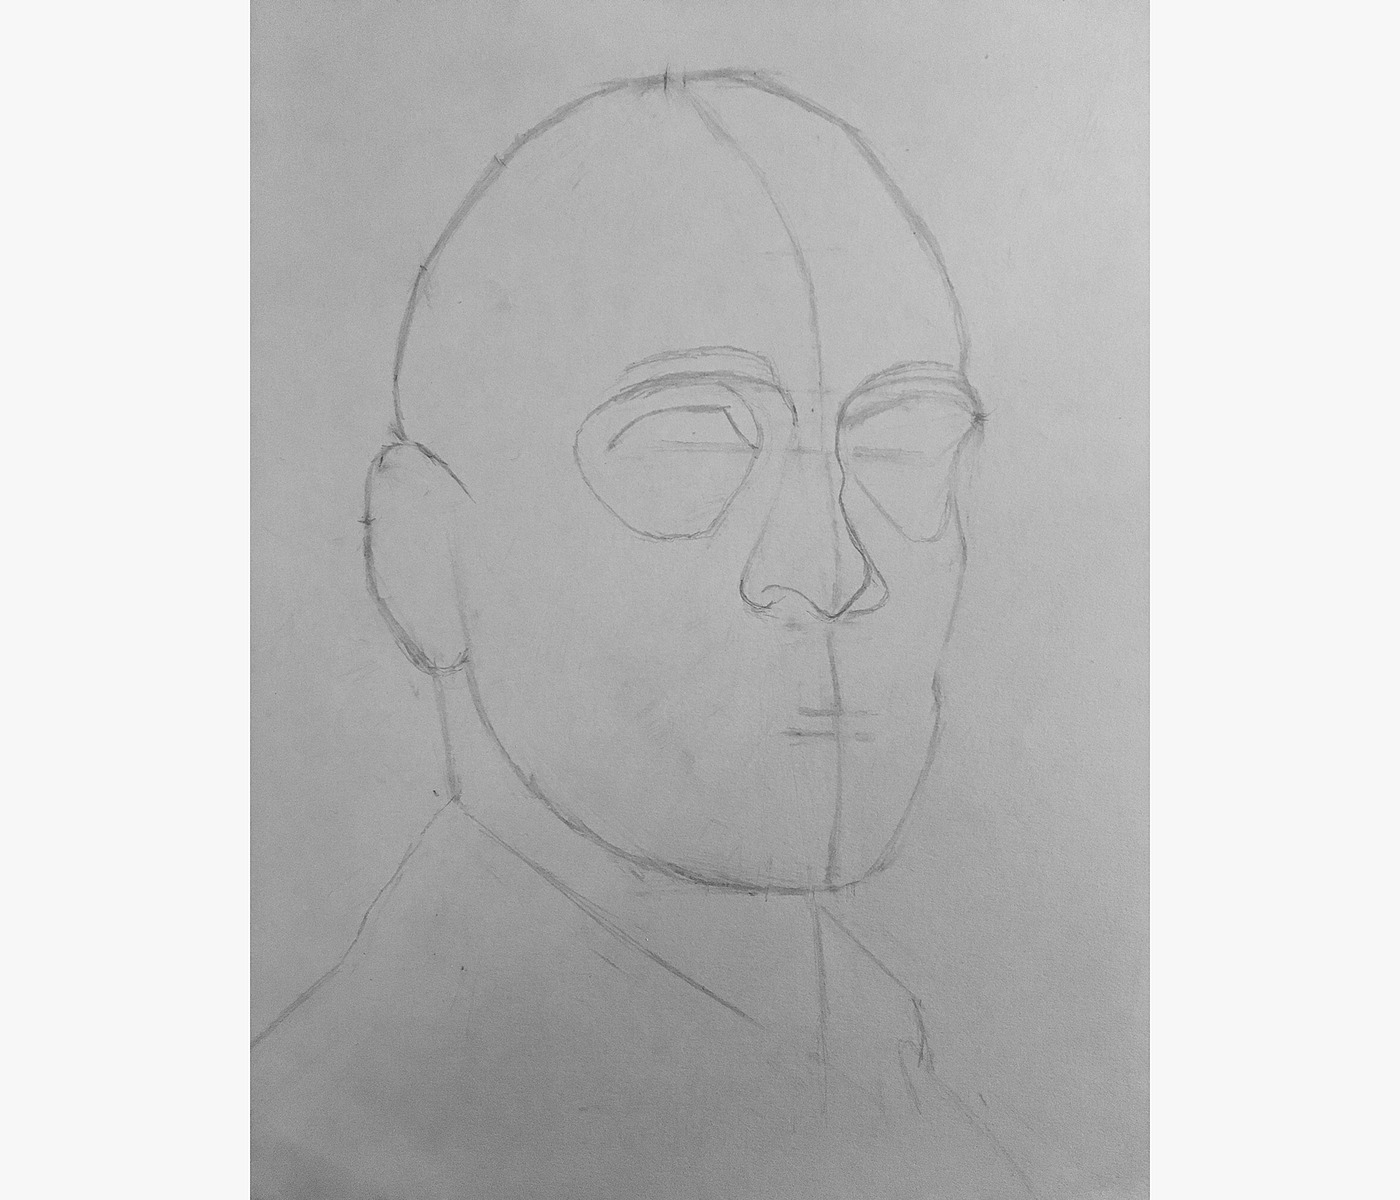
Finally, I added in shapes for the eyelids and eyes, and finished up for the day.
Reaching this point took another 2.5 hours.
Progress still seems fairly slow on the drawing, but I'one thousand making a conscious try to work carefully through the blocking in stage (so I can exercise what I'k learning, and and then I can ensure the portrait is congenital on a strong foundation).
I'll start detailing the features tomorrow.

Today, for the third solar day in a row, I spent 2.5 hours on my Derren Brown drawing. Notwithstanding, unlike the other days, today, I feel like I fabricated a lot of progress.
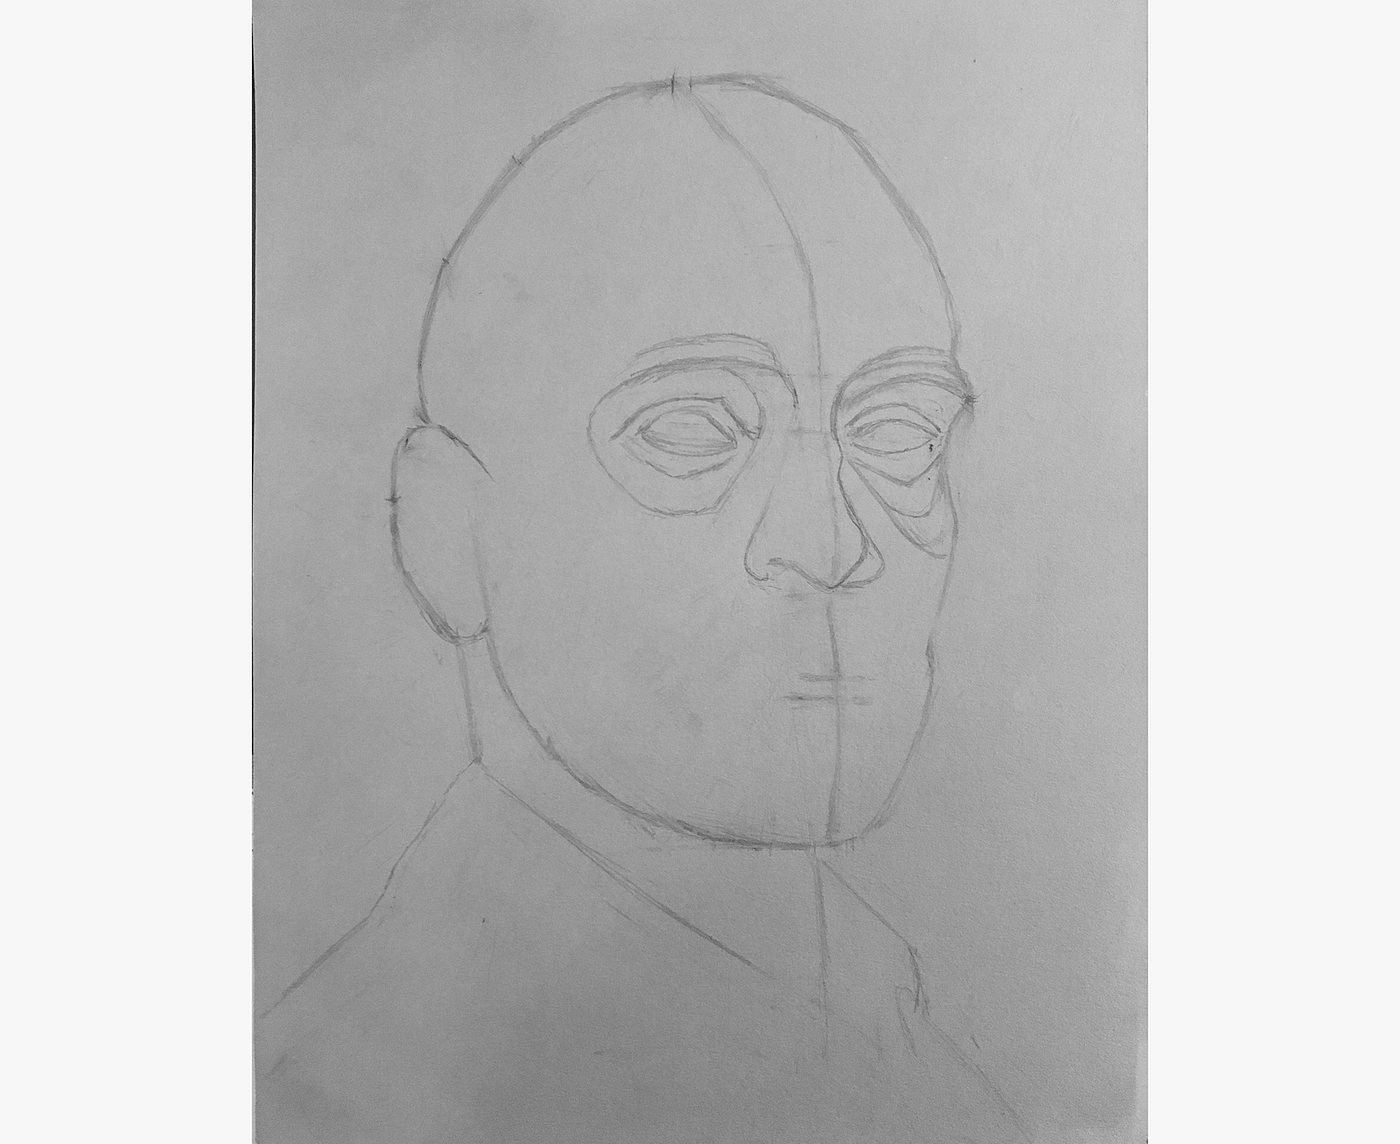
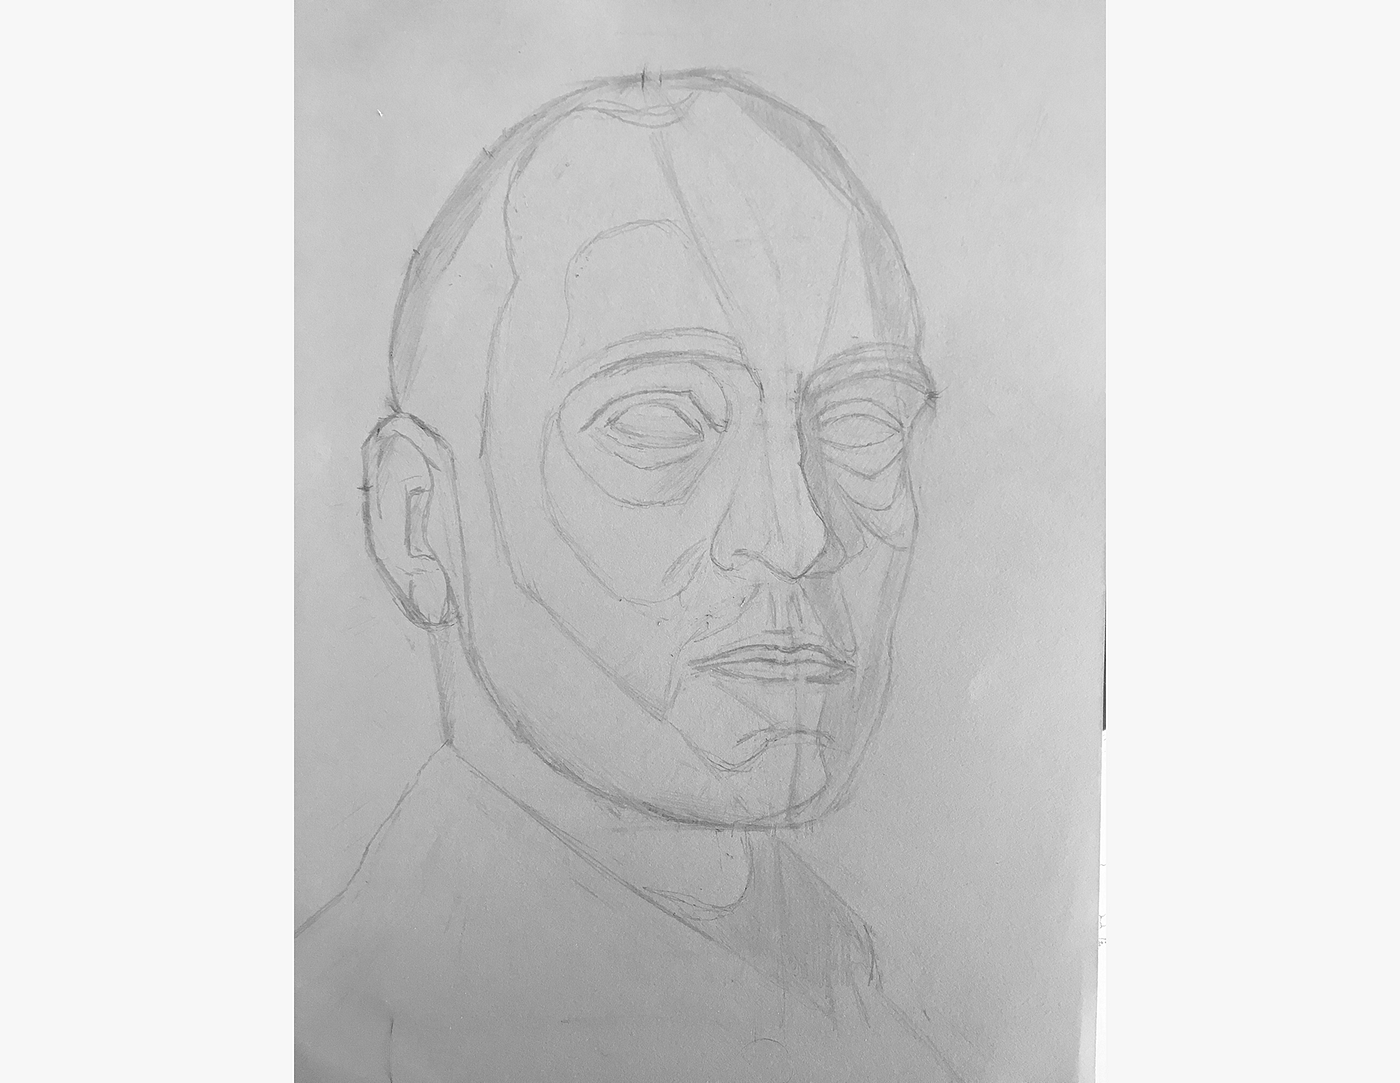
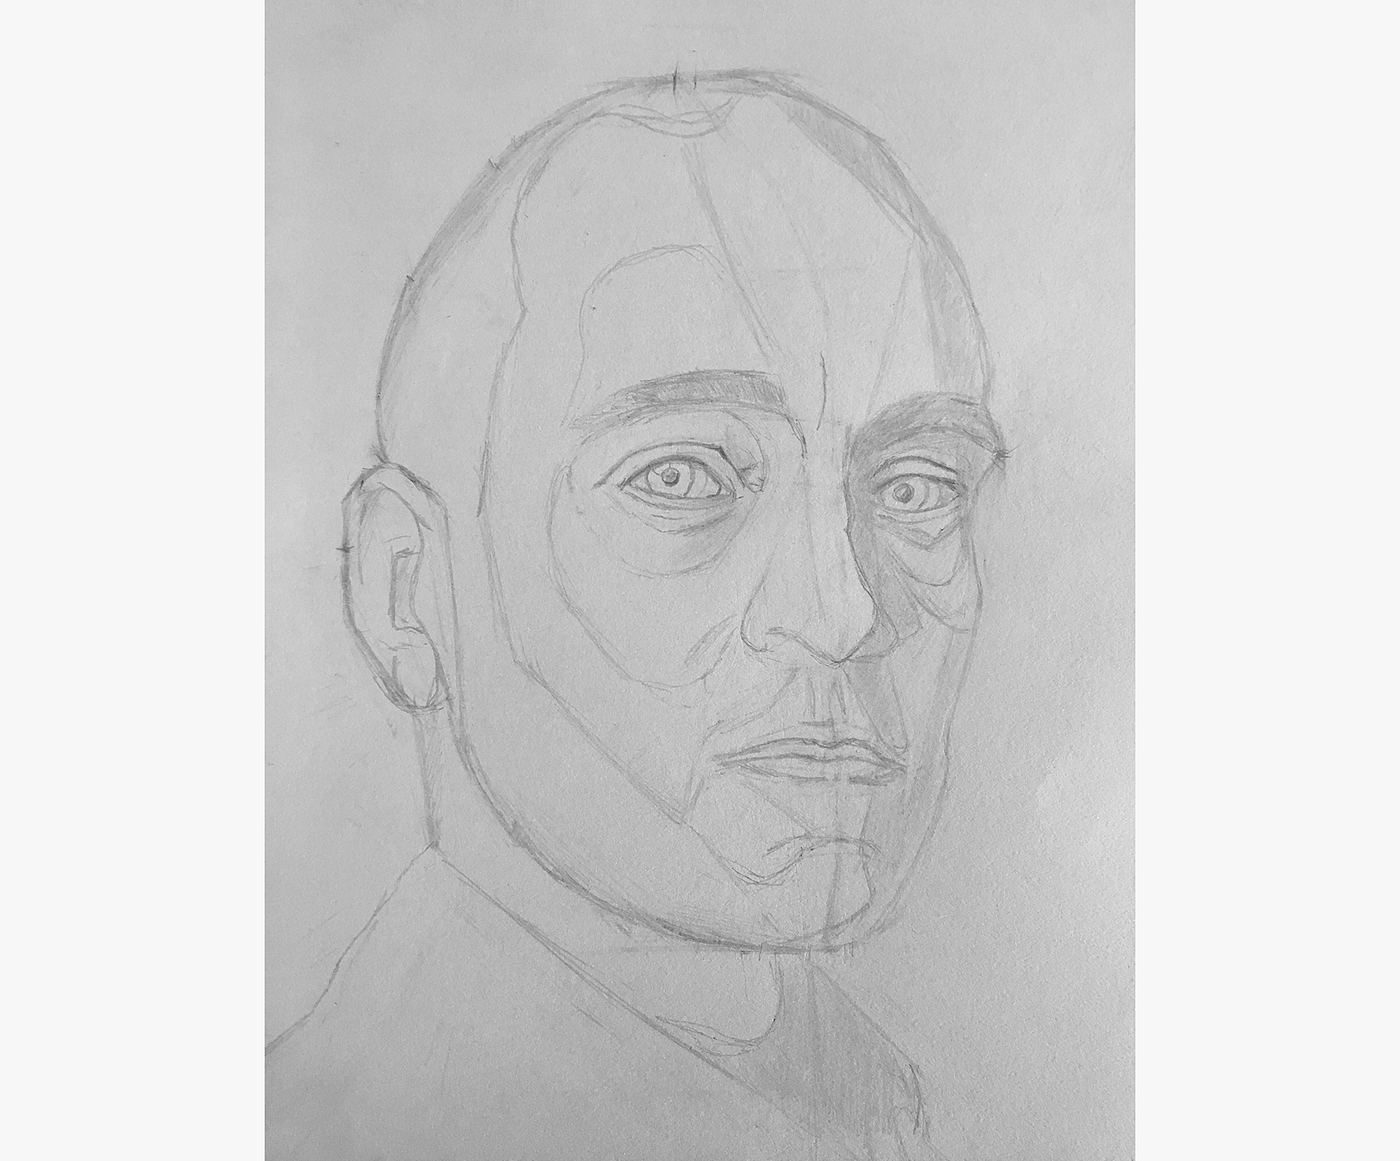
Finish blocking in the features
Picking upwardly where I left off, I continued to block in shapes for the features.

I added in the centre line of the lips and the shadow on the nose.
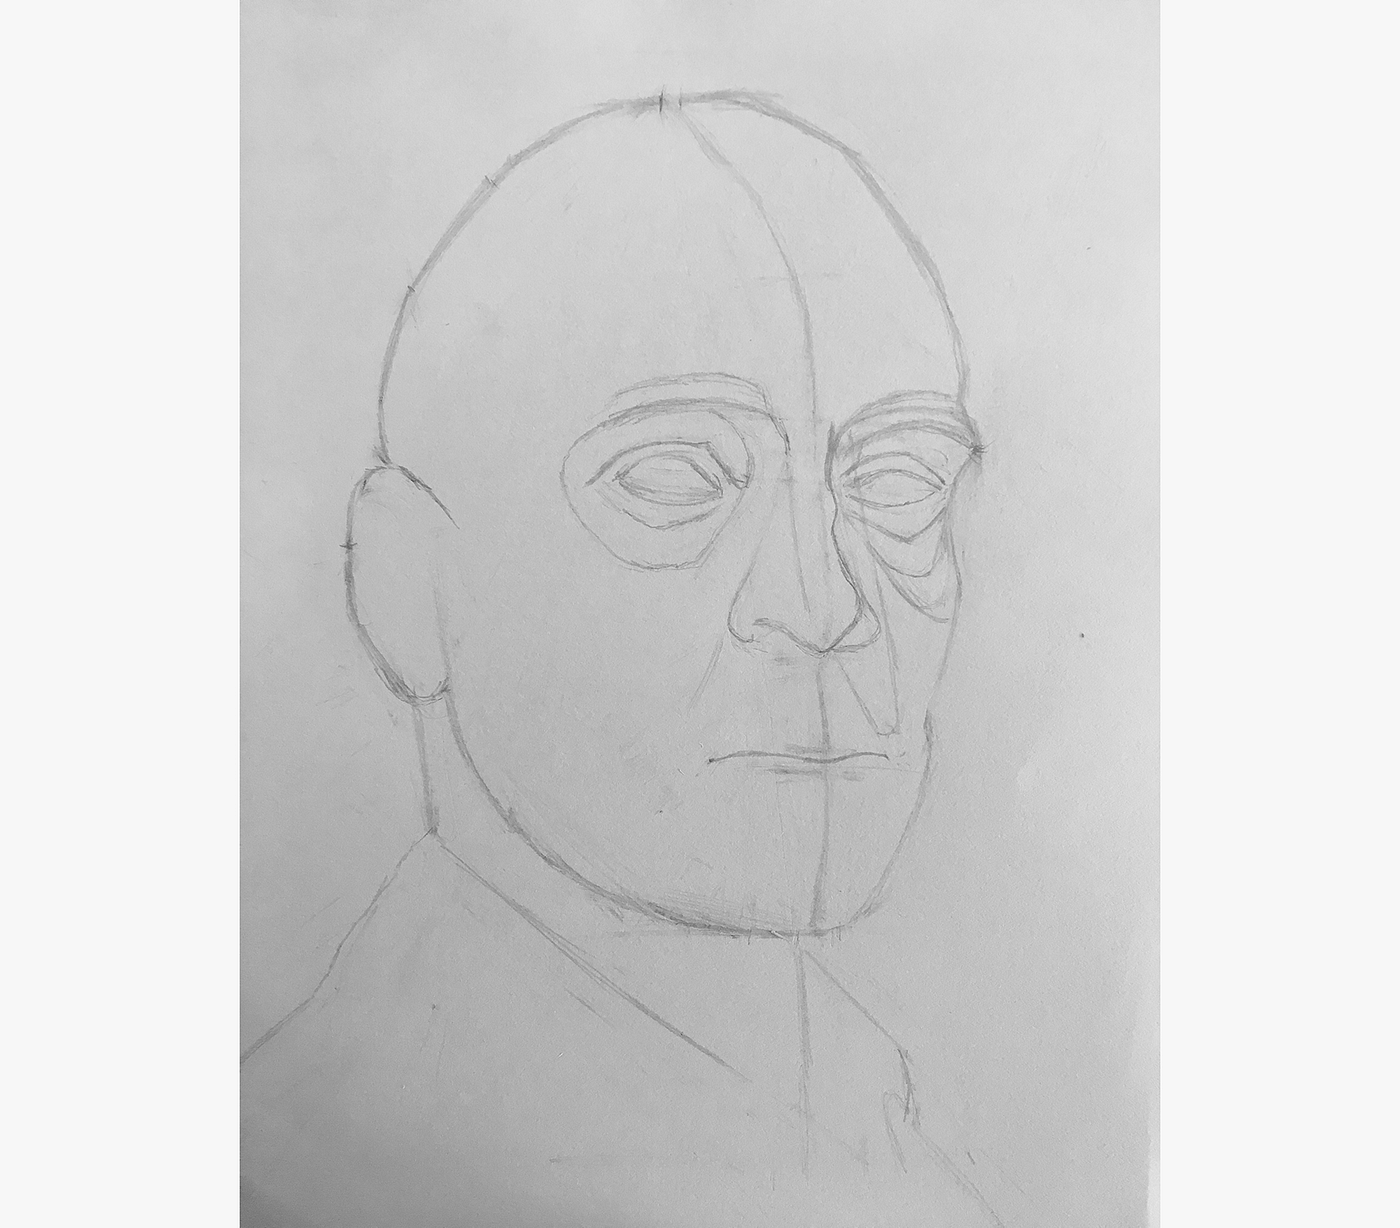
I so finished the lips and added a line for the mentum.
Lastly, I blocked in the chief structures of the ear and added an outline for the beard.
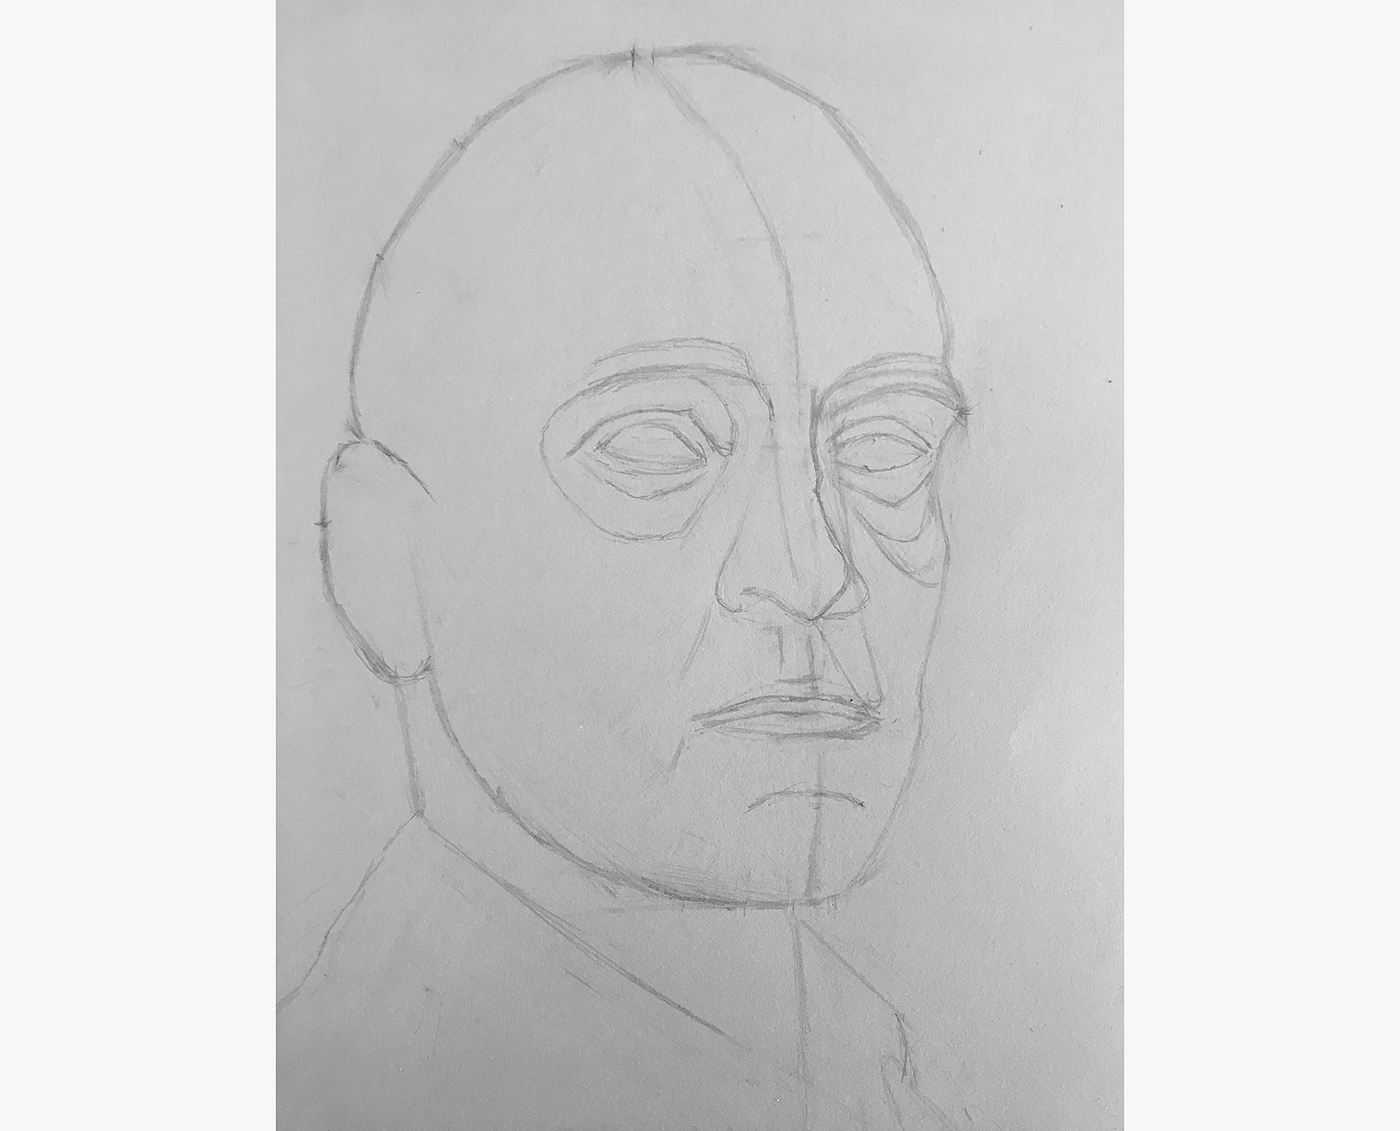
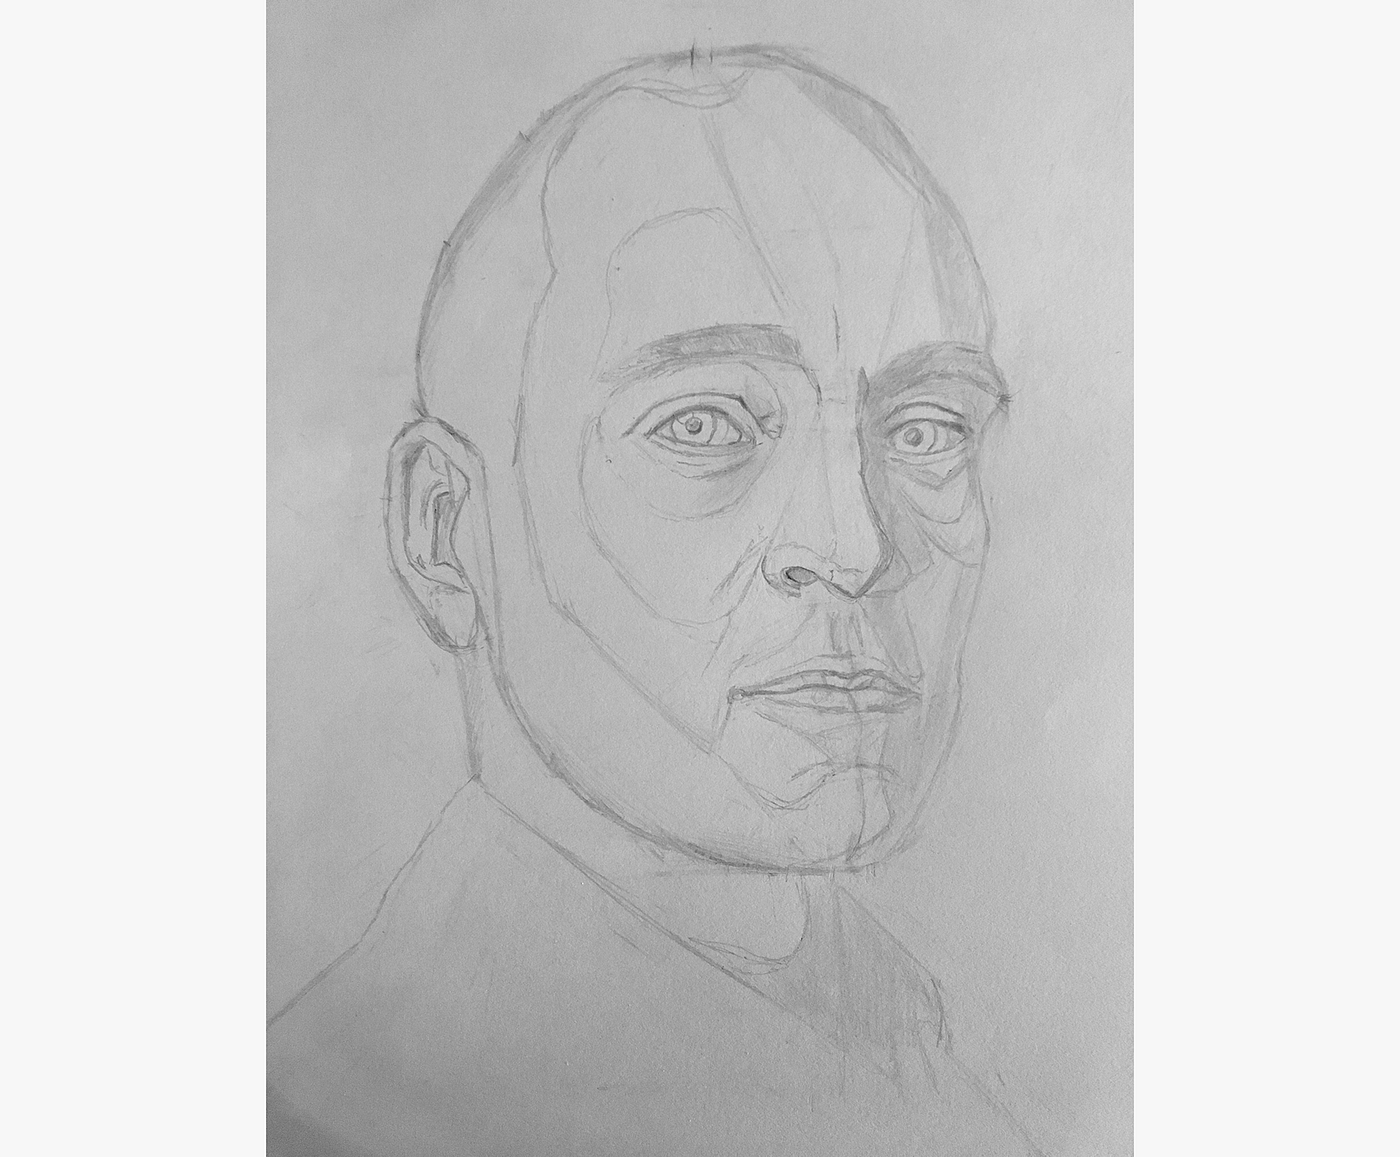
Drawing in shadow/highlight shapes
With the features in identify, I side by side blocked in shapes for the shadows and highlights.
With these tonal contours in identify, I darkened the shadow areas slightly, giving the portrait some roundness and three-dimensionality.
Detailing features
With the features and shadows blocked in, I detailed the features, starting with the optics.
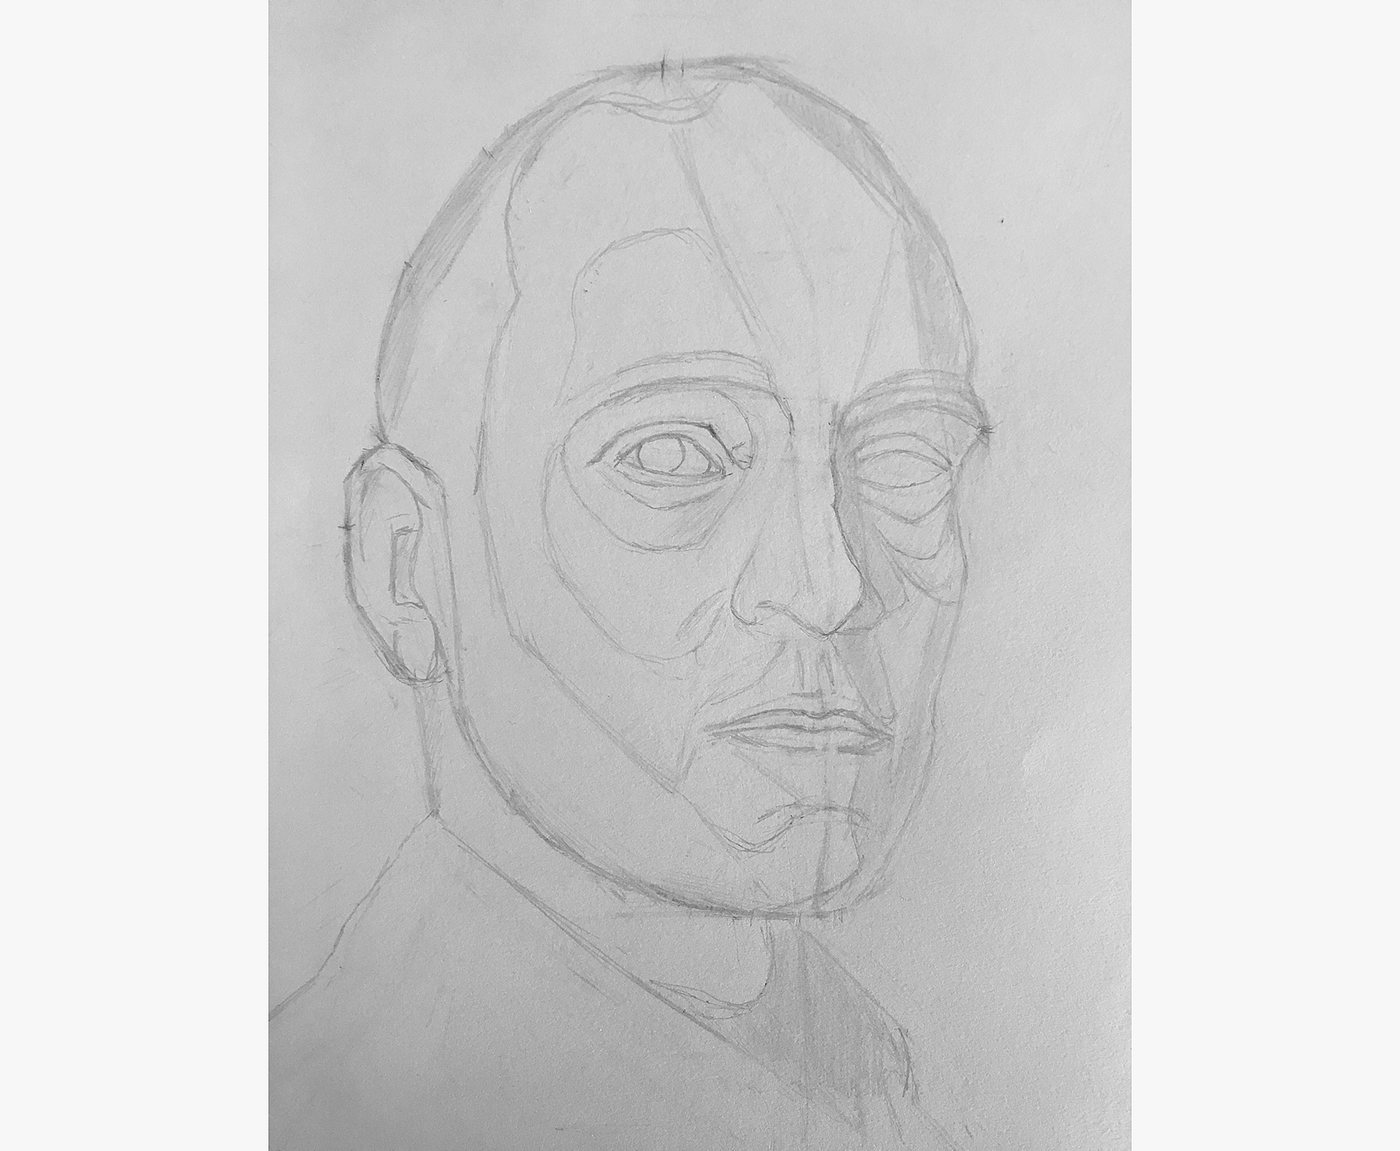
Left eye washed.
Right centre done.
Olfactory organ done.

Lips done.
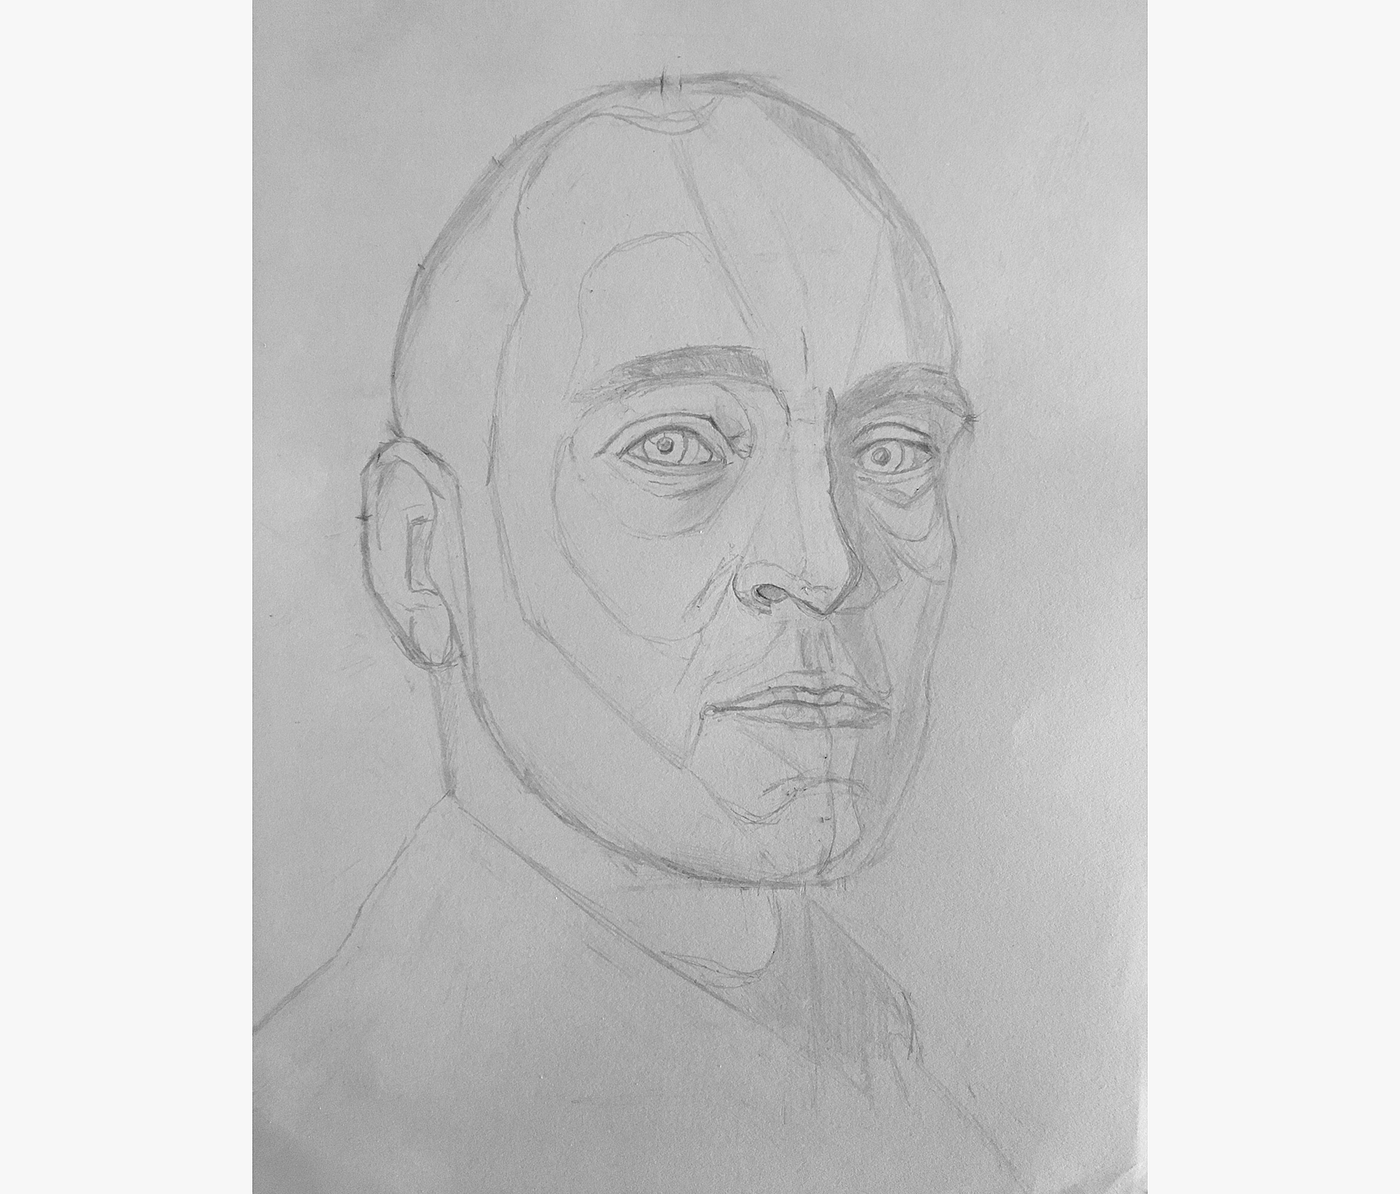
Finally, I finished up for the twenty-four hours with the ear.
After vii.5 hours of work (two.5 hours over the past three days), I'm finally hopefully that this portrait volition resemble Derren Brown.
Tomorrow, I'll starting adding tonal values (i.e. shading) to the cartoon.
Observation about today'due south session: Based on the output from today, it may seem like today's drawing was the most technically challenging. But, in fact, I found simply the opposite.
Considering I spent the past two days meticulously locating and blocking in the features, it was very easy to add the incremental detail. (Trying to draw big shapes is much harder than trying to depict trivial shapes. Little shapes are a lot easier to visually empathize and replicate)
In fact, I suspect that today was least consequential to the result of the portrait. If I mess upwards the shape of the caput and the location of the features, I have very little chance of capturing a likeness. If the features are not quite accurately detailed, only in the right place, I still might take something…

Yesterday, after 7.5 hours of piece of work, I finally finished sketching / laying out my first portrait. Today, I started adding tonal values (a.k.a. "shading the drawing").
Before I show today's progress, I desire to share two techniques I learned that make it significantly easier to accurately add tonal values to portraits.
1. Commencement with the most extreme values and then meet in the middle
The human eye is really bad at assessing tonal values in isolation — which is why your encephalon thinks squares A and B below are very different colors, when, in fact, they are the same.
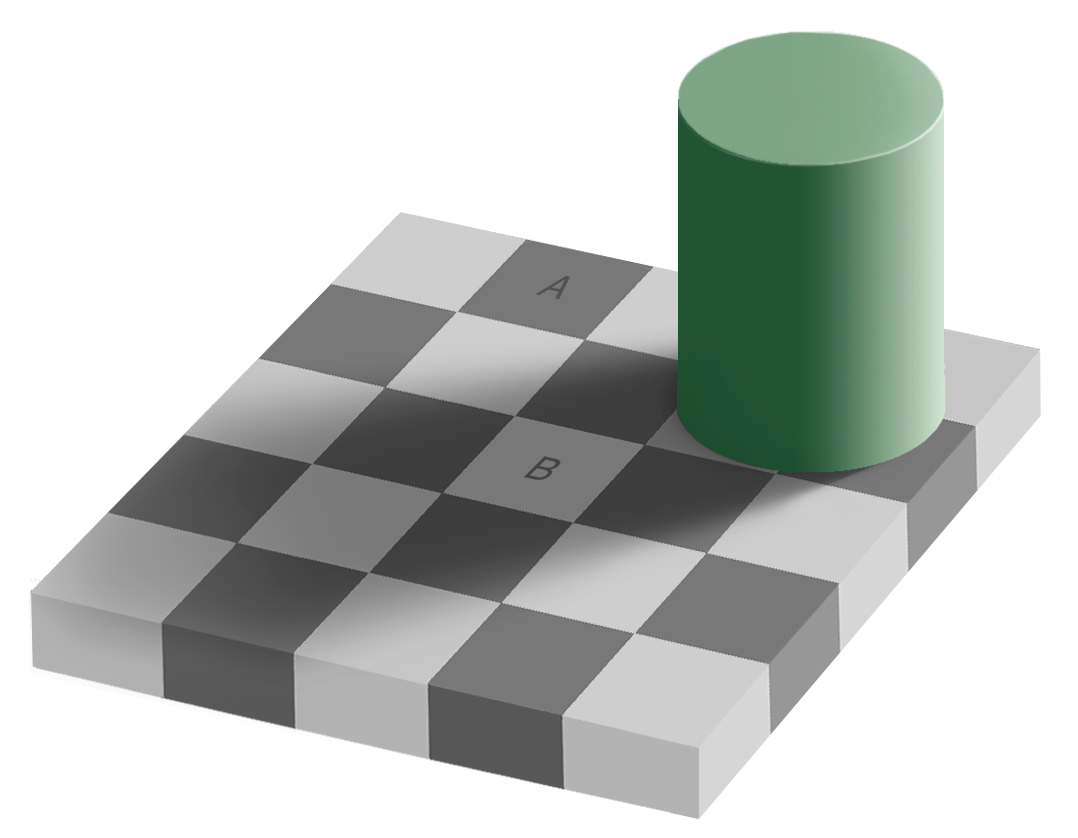
Thus, instead of relying on visual inferences, tonal values can be better approximated through a simple, not-so-interpretative procedure.
Here's how it works:
Starting time by identifying the absolute darkest and accented lightest areas of the drawing. For the darkest areas, shade them as night equally you tin can/want. For the lightest areas, highlight them as light every bit you lot can/want.
This establishes the unabridged tonal range of the drawing, which is called the key of the drawing.
Establishing the central is straightforward, and doesn't require much visual estimation (i.eastward. it's easy to find the lightest lights and the darkest darks).
Once the key is established, and the lightest and darkest values are in place, the intermediate values need to exist introduced. Over again, this tin exist done procedurally, by identifying and shading/highlighting the areas which are slightly lighter than the darkest darks and slightly darker than the lightest lights. Continuing recursively in this way, the tonal values eventually run into in the center, and the drawing (or the relevant function of the drawing) is complete.
two. Squint to better see tonal shapes
When keying the drawing (and developing tonal values in general) information technology's important that the shapes of the tonal areas are captured accurately.
In other words, if the highlight on the brow is athwart, drawing it with rounded edges wouldn't properly capture the form.
This sounds obvious, but again, your brain and visual system can play tricks on y'all. Your brain is attempting to encounter a face (via your psychologically skewed, emotions-based mental model of a face), and not just tonal blobs.
In fact, this psychological problem of misinterpreting faces is so common, in that location are entire drawing systems (like drawing upside down, drawing the negative space around the face, etc.) designed to combat these problems.
Side note: Hither'south a video of Derren Chocolate-brown, the subject of my portrait, when he used to have pilus, experimenting with some of these culling methods of painting. It'south a pretty absurd flim-flam.(If you're going to picket, stick information technology out until the finish).
In lodge to accurately see tonal shapes, and avoid psychological errors, I've found ane method to be surprisingly successful: squinting.
Basically, yous look at the area y'all want to draw, squint your eyes (so the image becomes blurred and your encephalon no longer sees a face), and identify the tonal shapes yous see through your eyelashes. This works super well. (I didn't invent this method, I've just validated that it works for me).
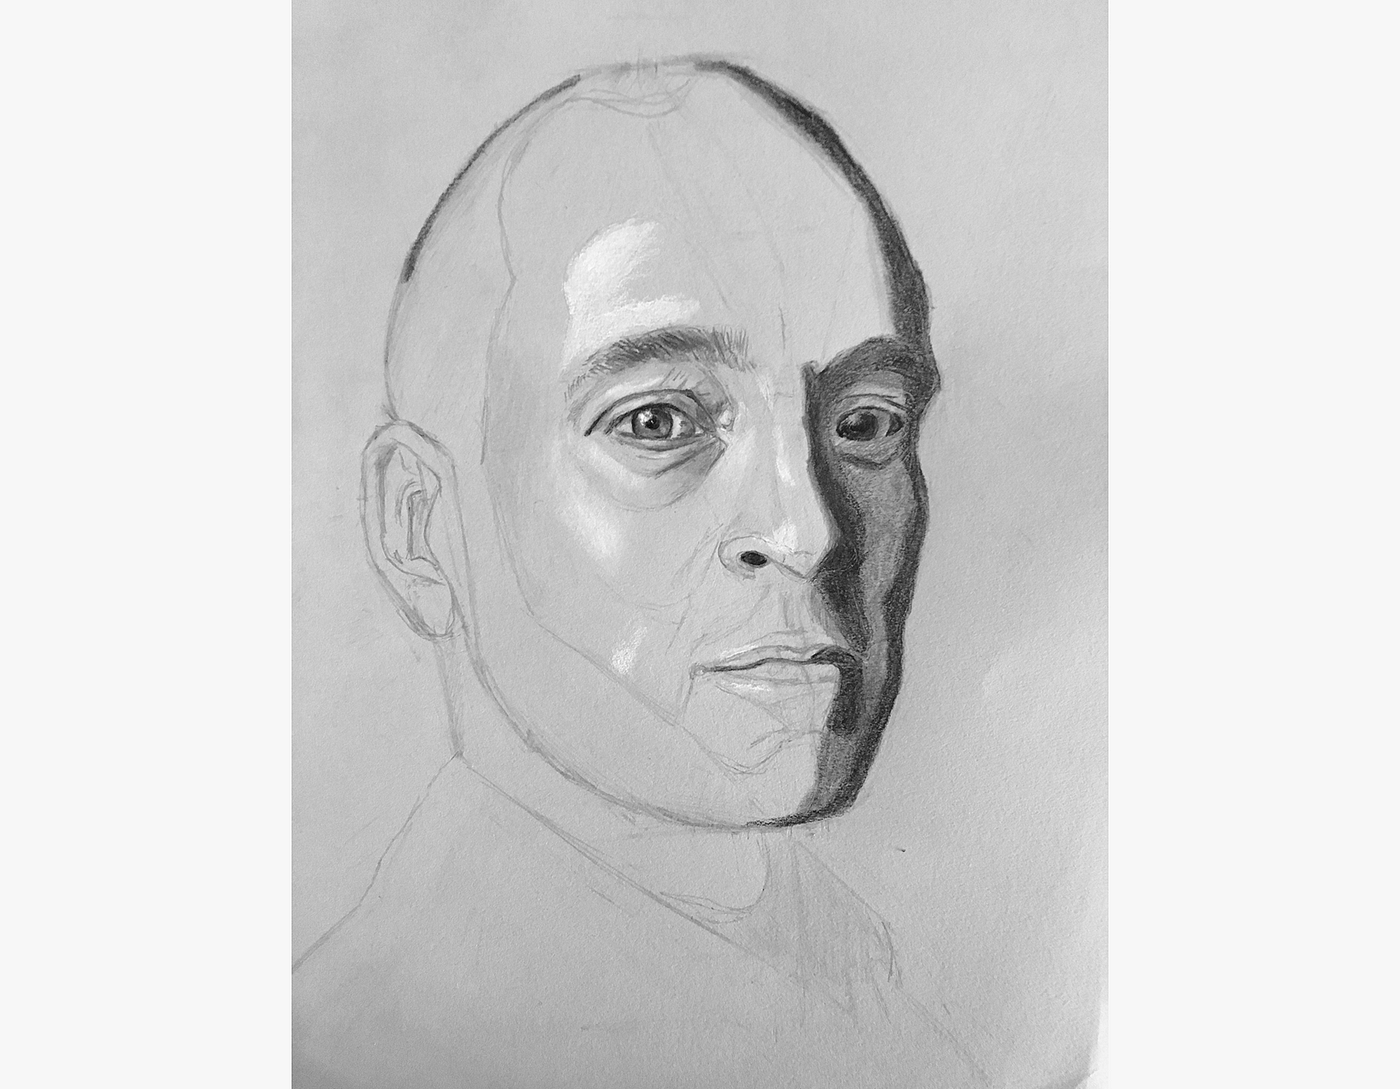
Today'due south progress
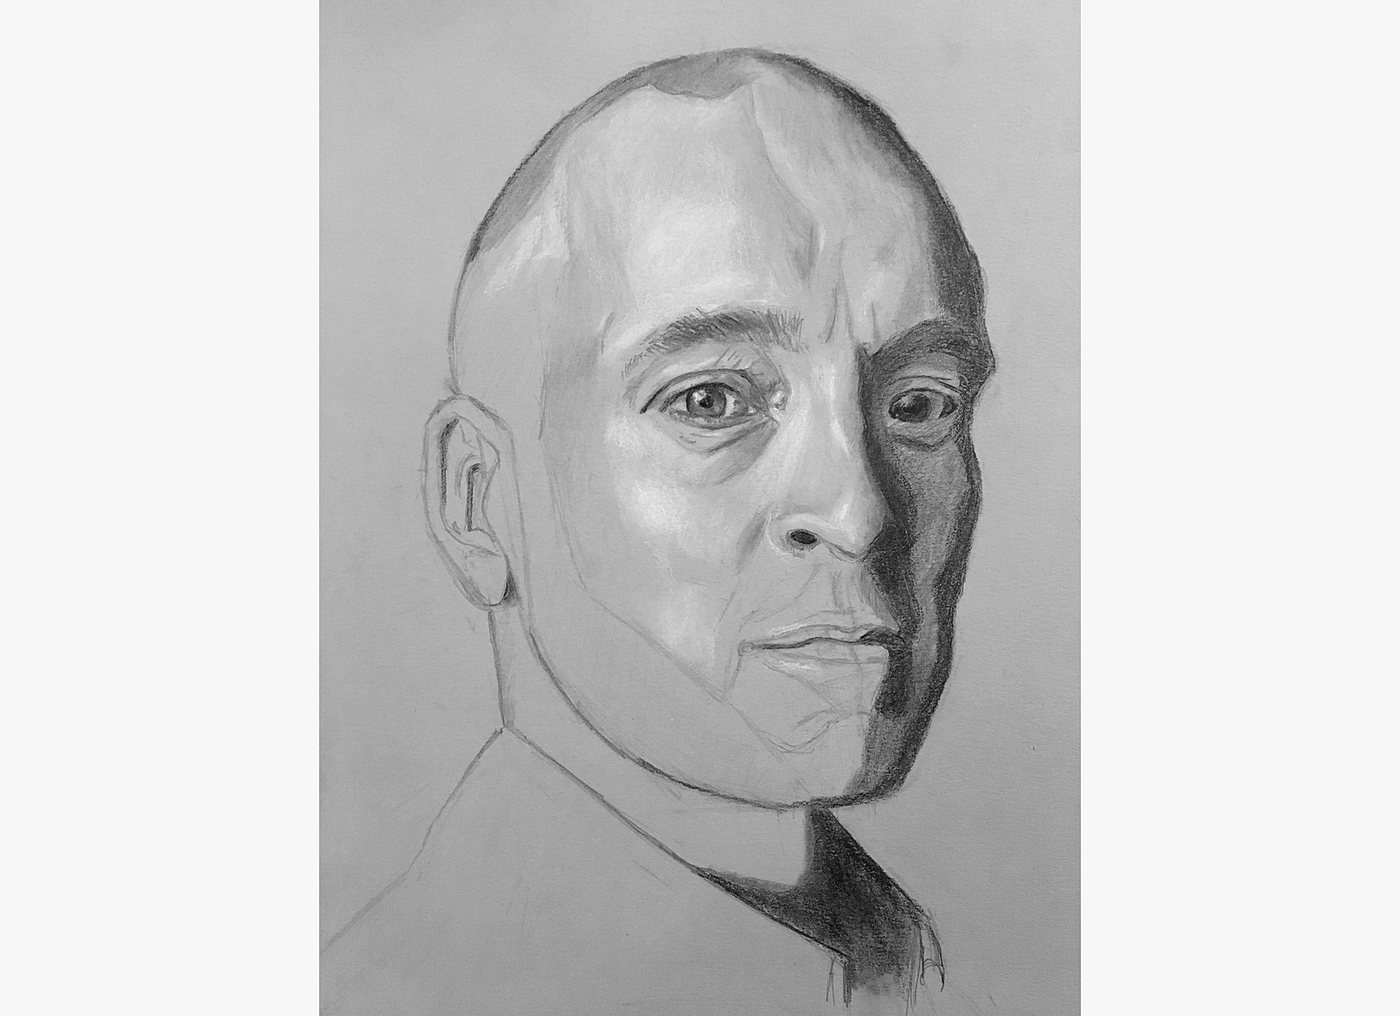
With these techniques newly-learned, I began to add tonal values to my Derren Brown portrait.
First, I started with the eye.
In the course, the teacher mentioned that it's skilful to start with a small area that exhibits the full range of tones.
However, the eye was besides small to help effectively establish the key. Then, I keyed the cartoon more than aggressively, starting with the shadow on the nose and the highlights on the forehead and cheek.
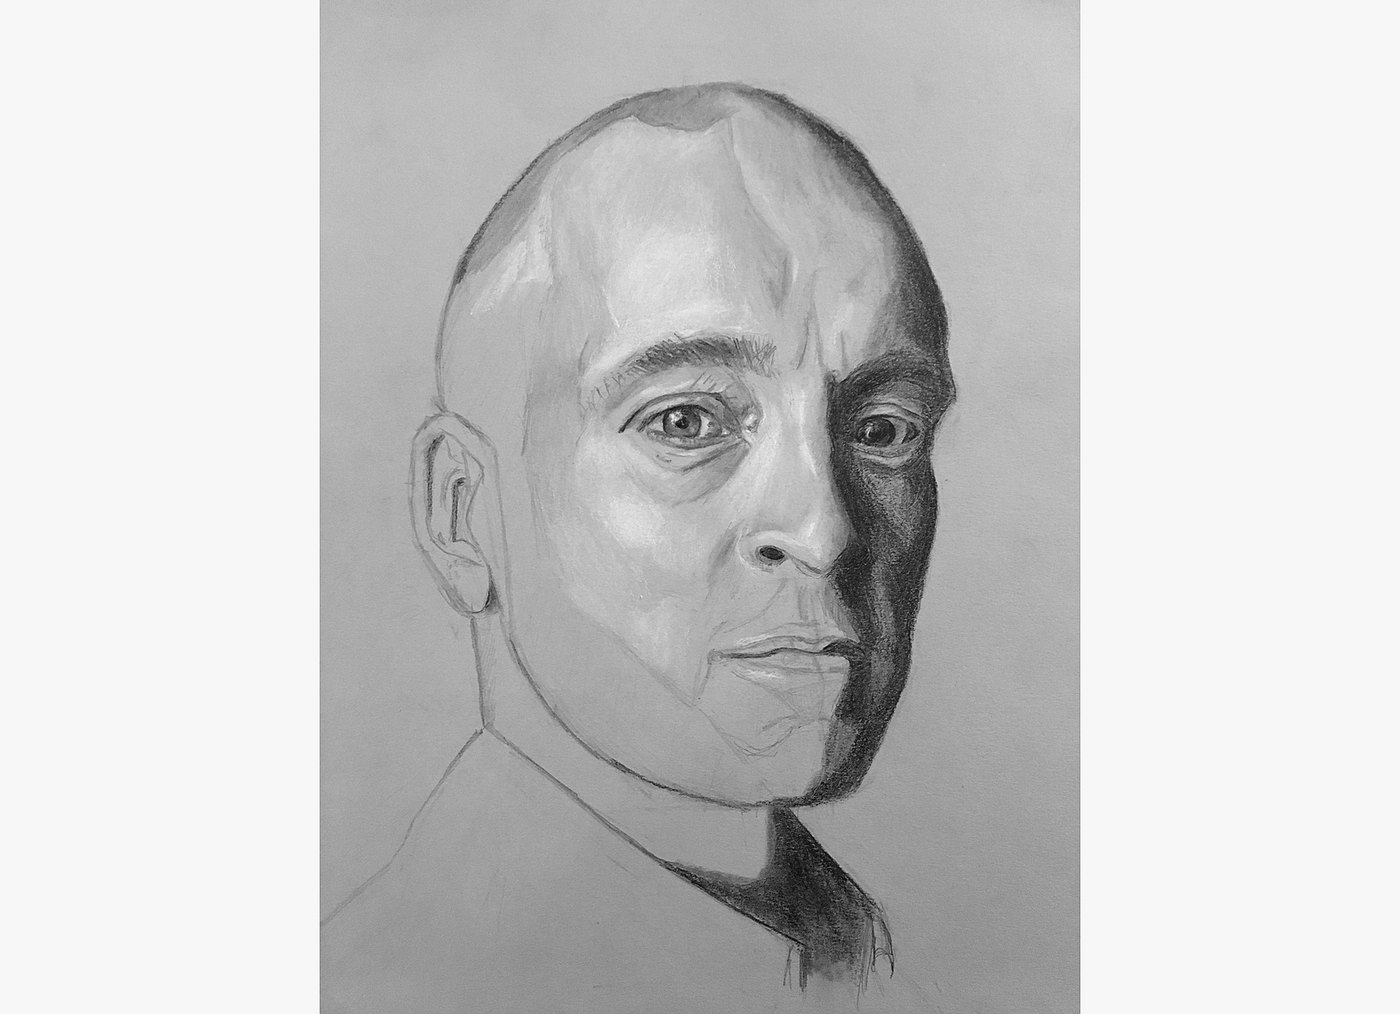
I continued shading the darkest areas forth the correct side of the face.
Additionally, while doing this, to check the accuracy of my key, I started developing the eye.
I finished up my key, by adding shadows to the lower face and the back of the head, and was ready to begin modeling the form (finding the intermediate values betwixt the darks and lights).
I started with the forehead.
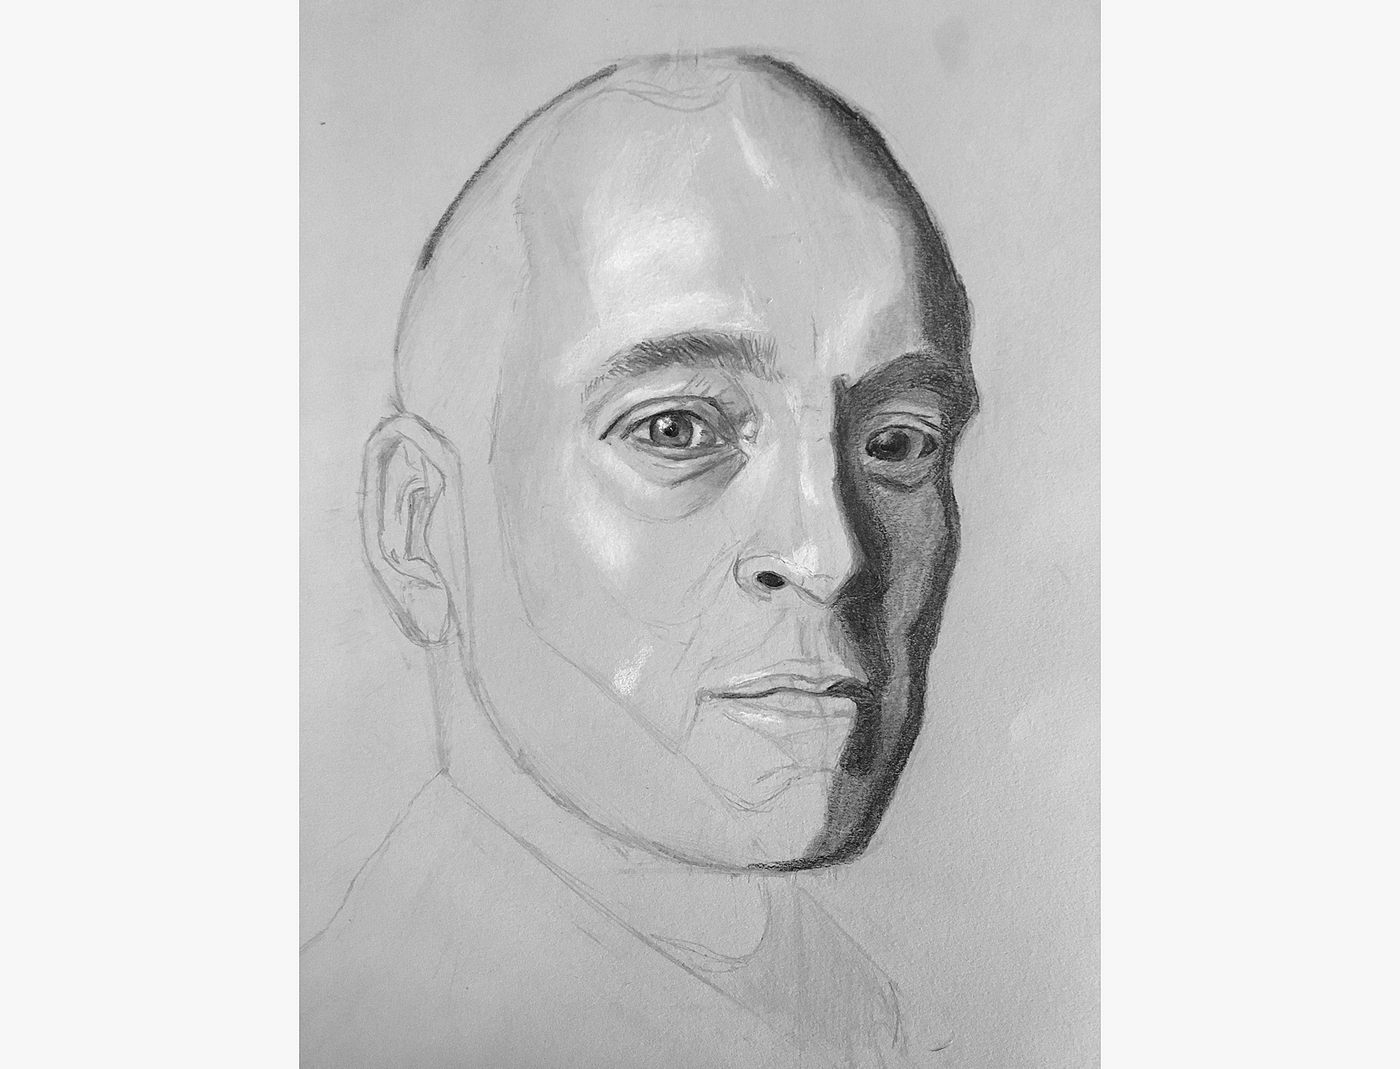
Added a bit more detail.
And then smoothed everything out.

This is where I stopped for the day, after some other 2.5 hours of working.
Derren looks a bit too shiny right now — a bit like a mannequin or the Tin Man — but I'grand optimistic that this event will vanish once I model the residuum of the form.
I'm guessing I have another 5 hours of work left on this.

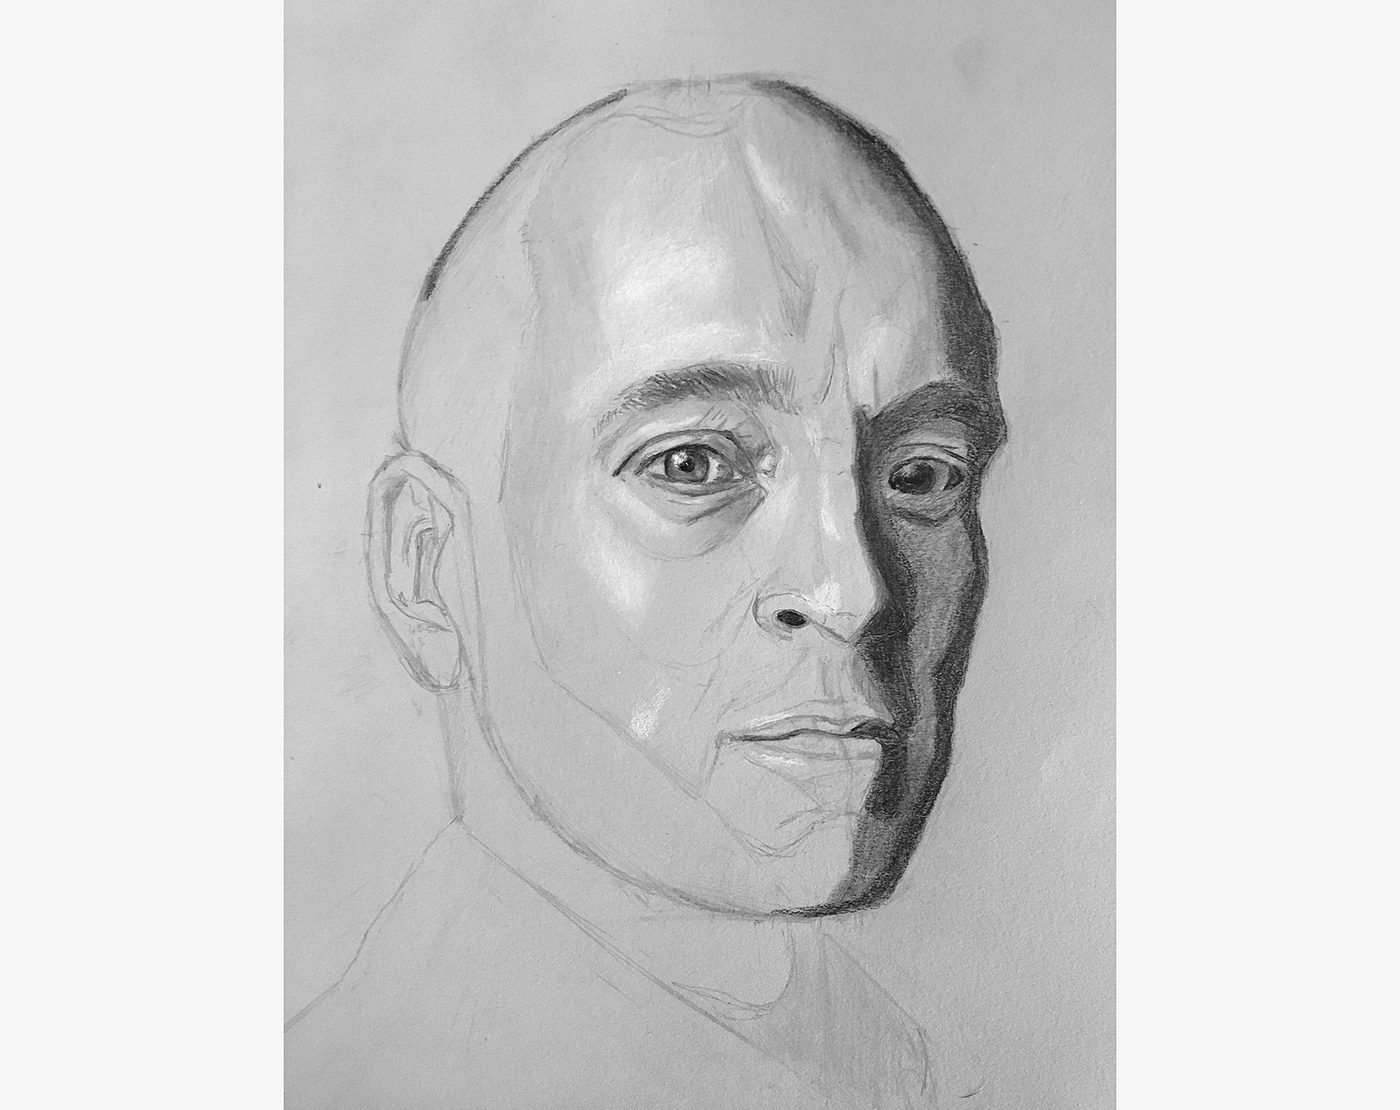
Today, similar yesterday, I continued adding tonal values to the portrait. I spent a picayune less than ii hours, and am getting really excited about the results.
Here's where I stopped yesterday.
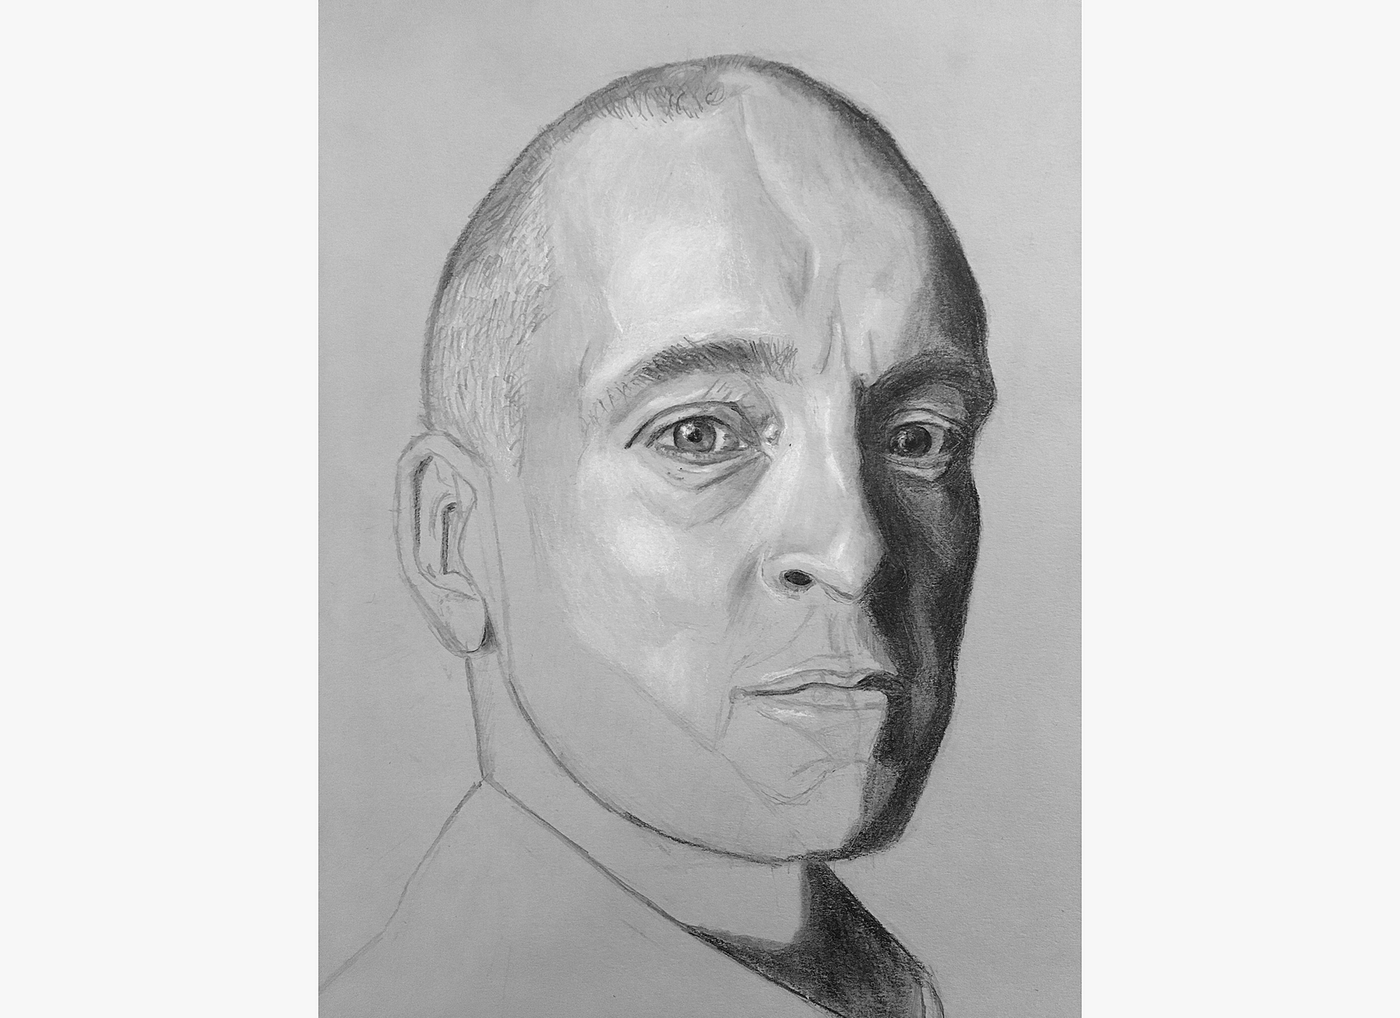
I proceeded today by first addressing the nose.
So, I addressed the right half of the face — further developing the shadow.
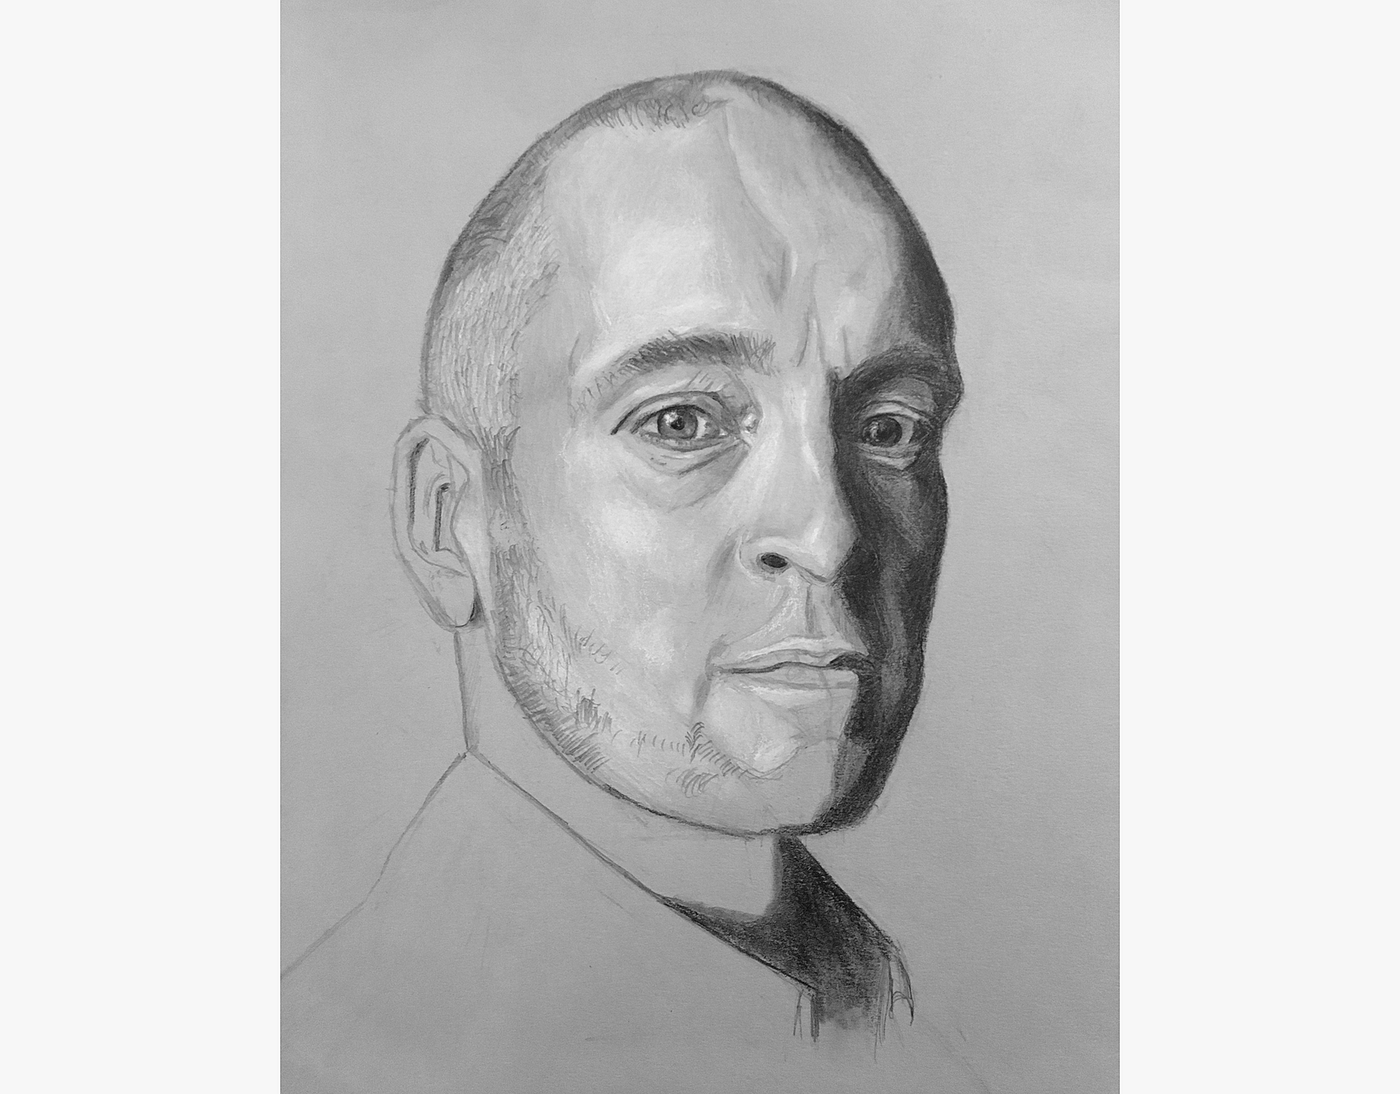
Next, I moved on to Derren's hair and beard.
Since the demo portrait in course is based on a long-haired female model, I had to do a bit more freestyling at this point. I remember it works.
I connected with the upper function of the beard, and finished up for the day.
Tomorrow, I need to cease the mouth, the ear, the cervix, the lower part of the beard, and perhaps the wear.
Getting shut…

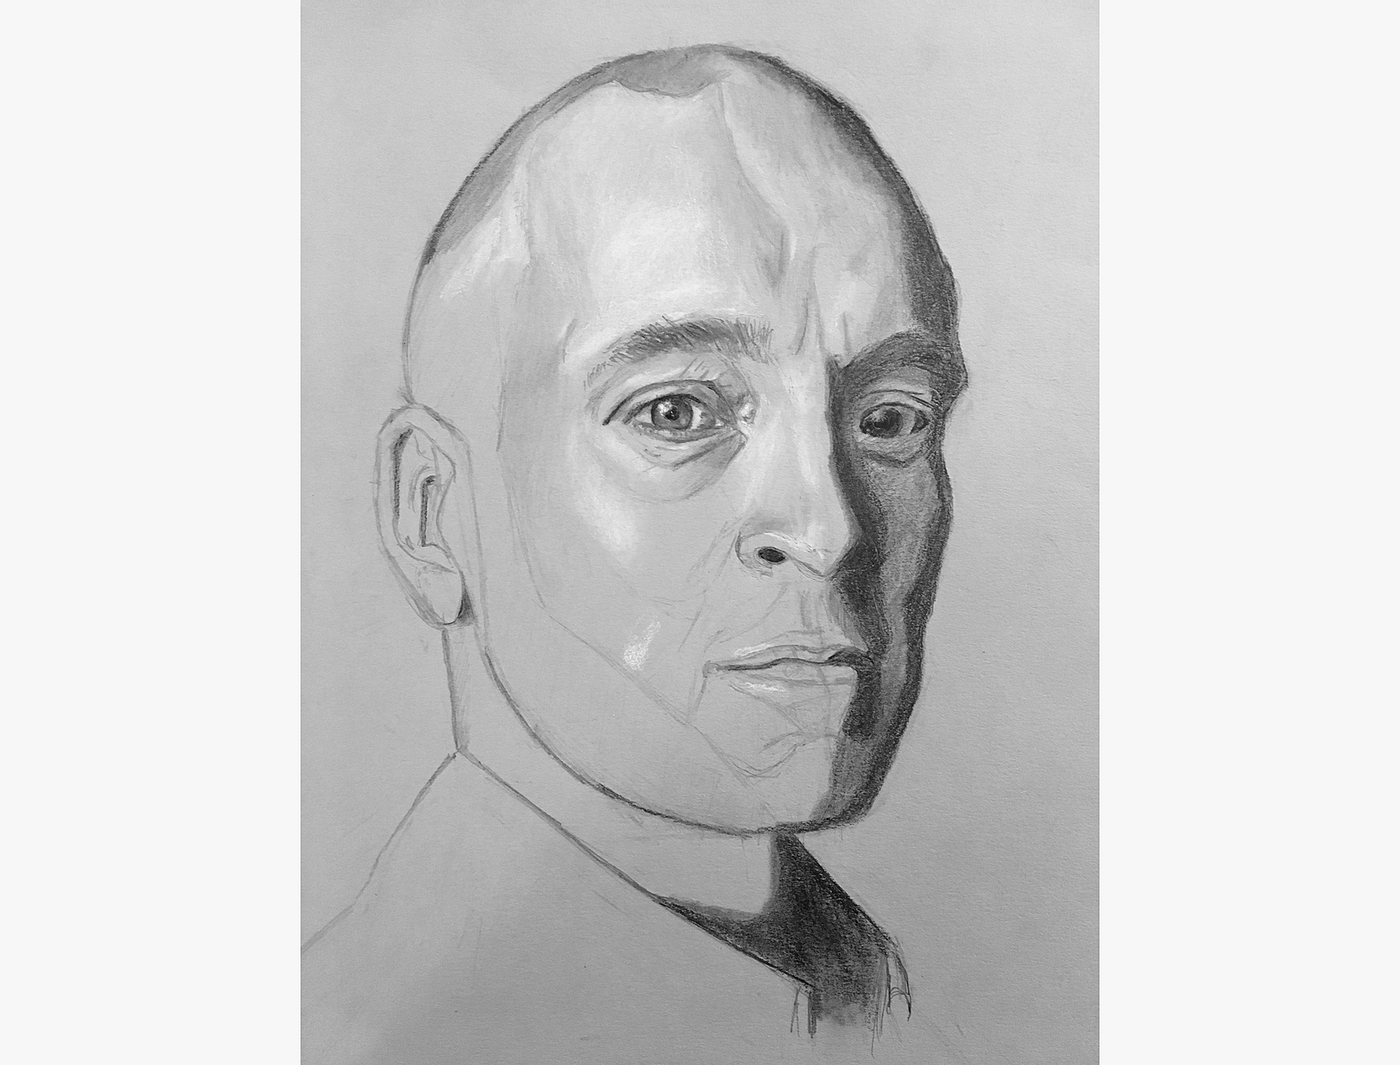
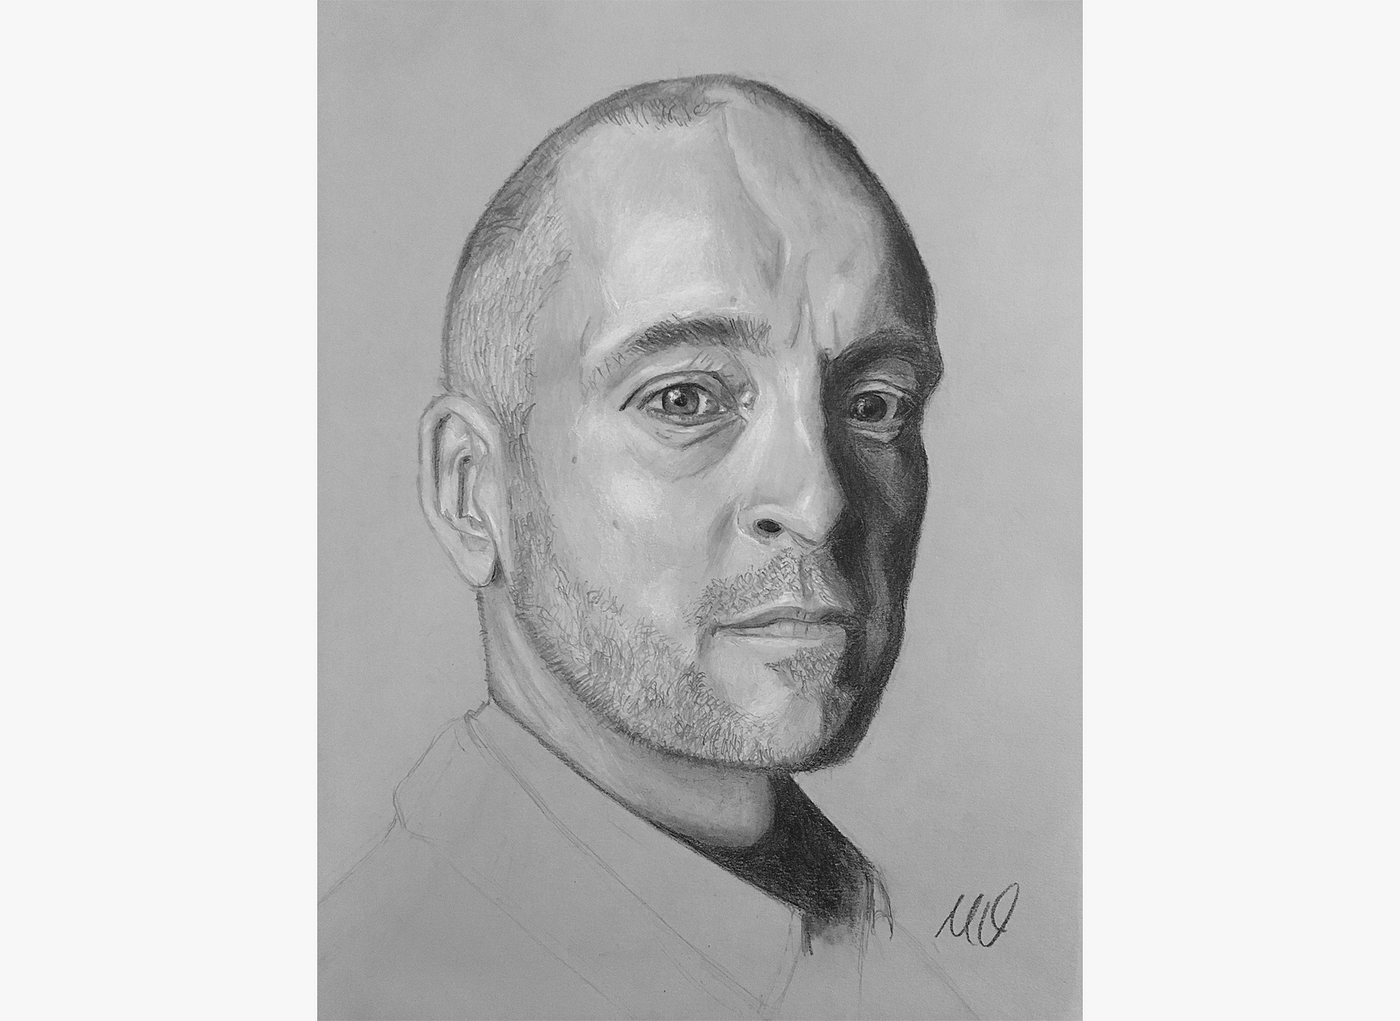
Today, after another 2.5 hours of work, I finally completed my Derren Dark-brown portrait.
In the coming days, I will write a few detailed posts about what I've learned, how I plan to move forward, etc., but for at present, I'll merely share the final photos of my progress.
Today'south progress
I started off past detailing the lips.
So, I added the mustache.
With this facial pilus momentum, I finished off the beard.
Then, the ear.
Finally, I completed the neck, decided not to accost the clothes, signed it, and I was washed.
For my first portrait of the calendar month, I'thousand quite happy with how it turned out.

Nine days ago, I began my 30-day quest to learn how to draw photorealistic portraits. Since and then, I've watched the unabridged 10 hours of the Vitruvian Studio drawing form, too as spent 14.5 hours working on my showtime portrait.
Here's the outcome…
And here'southward a video documenting the progression.
Considering where I started simply nine days ago (see the before portrait), it's hard for me to believe that I actually drew this. Information technology's not perfect, but I'm definitely excited about the issue.
Function of me lacks the motivation to continue drawing, as I feel like I've already achieved my goal. The other (more overpowering) function of me realizes that I accept some other 21 days to improve even farther, so that'southward what I plan to do.
In particular, I'm going endeavor to reduce the amount of time necessary to complete a portrait like this. With some practice, I think I tin reduce my time down from xiv.5 hours to 4–5 hours.
Tomorrow, I'1000 going to go through my previous posts (1, two, 3, 4, 5, vi) and write up a "Portrait Cartoon Cheat Sheet". Then, I'm going to intermission down the cheat sheet into isolated, practicable skills and drills, work on those individual skills for ane–ii weeks, and then starting time working on my cocky-portrait to finish off the month.

Here is my "Portrait Drawing Cheat Sheet", which features step-by-stride instructions on how to depict a portrait.
These steps are based on the first-class portrait drawing course past Vitruvian Studio, which I highly recommend you purchase if you are serious about learning how to draw.
The Instructions
- Mark the top of the head. Arbitrarily draw a line towards the height of the page. This represents the summit of the head.
- Marker the lesser of the chin. Arbitrarily draw a line virtually the lower 3rd of the page. This represents the bottom of the chin.
- Mark the notch of the neck. On the subject, using your pencil equally a guide, measure the distance from the lowest point of the head to the notch of the cervix. Determine how many of these distances can fit within the vertical distance of the head. Use this is as guide to draw a horizontal line towards the bottom of the page to represent the notch of the cervix.
- Find the highest point of the head. Arbitrarily make up one's mind a bespeak on the top line. This represents the highest betoken of the head. Often, on the subject, this betoken sits far back on the head.
- Find the lowest bespeak of the chin. Using your pencil as a guide, determine the angle from the highest point of the head to the lowest bespeak of the chin. Describe a line at this angle from the highest bespeak of the caput (as marked on the page) down towards the bottom of the mentum line. Depict a dash where these lines intersect. This intersection represents the lowest bespeak of the chin.
- Find the leftmost boundary. Identify the leftmost boundary on your subject. Determine the angle to this leftmost point from the highest point, and draw a line at that angle from the highest betoken towards the leftmost boundary on the page. Practise the same from the lowest point. Draw a marking where these two lines intersect. This intersection represents the leftmost boundary. The technique used to find this purlieus is called triangulation.
- Find the rightmost purlieus. Once more, triangulate from the highest and lowest points to detect the rightmost boundary of the caput.
- Check the angle. On the field of study, use your pencil to observe the angle betwixt the leftmost and rightmost boundaries. Check if this bending matches the angle represented on the folio. If not, retriangulate and check again.
- Draw the outer-boundary of the head and hair. Triangulate points around the head and connect them with straight lines. In one case the general shape seems right, smooth out the kinks. Check the angles between various points on the bailiwick and on the folio to make sure everything looks right. If at that place seems to be inconsistencies, retriangulate and adjust. Do the same for the hair line.
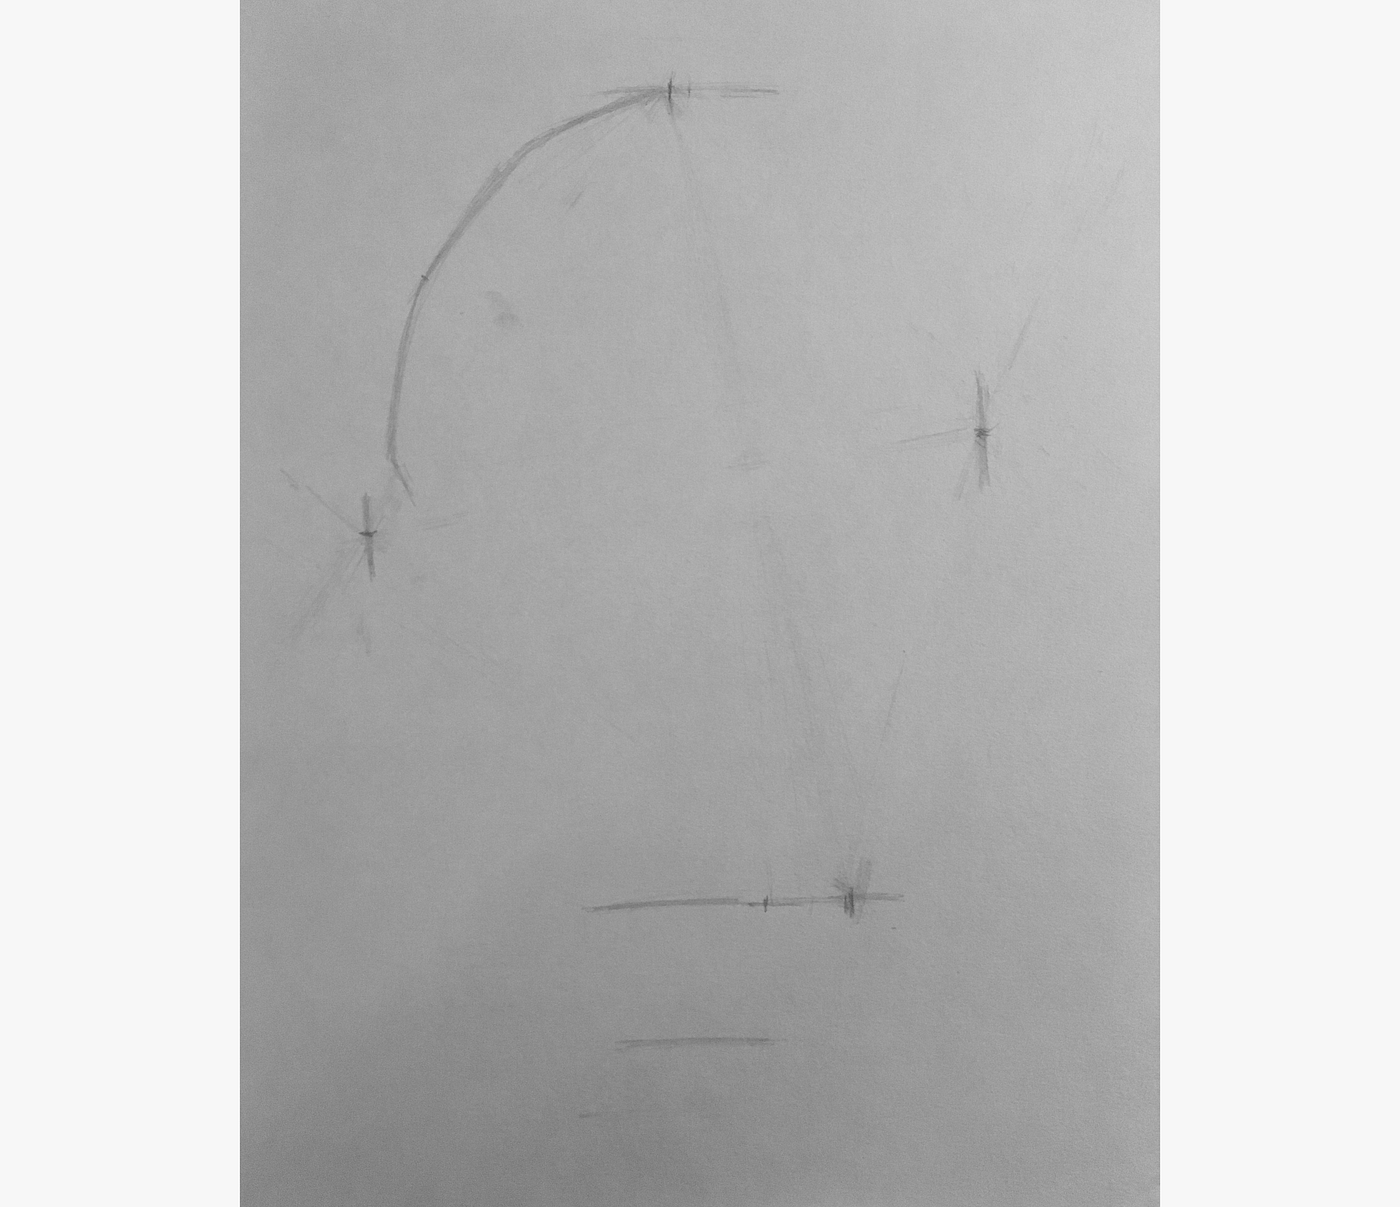
- Draw the vertical heart line. Pick some central point that looks like its on the vertical center line. Triangulate from outer-points inwards to observe this primal point. Check the angle from the bottom/center of the chin to this bespeak. Employ this as a guide to draw in the entire vertical center line. Every bit the center line approaches the top of the head, it typically flattens, as information technology rounds back backside the caput.
- Draw the level of the eyes. The level of the eyes typically falls about halfway between the elevation and bottom of the head. Employ this equally a starting betoken. Draw in this level, so bank check angles to confirm. Move up or down until everything checks out.
- Draw in the level of the brows and bottom of the olfactory organ. If yous divide the face up length into thirds, typically the level of the brows fall on the upper tertiary line and the level of the olfactory organ falls on the bottom third line. Use this equally a starting point. Draw in these level, and the check angles to confirm. Move the level upwardly or down until everything checks out.
- Depict in the level of the get-go of the nose. The nose begins somewhere between the level of the brows and the level of the optics. Guess where this is and draw it in.
- Draw in the lesser and middle of the lips. If you divide the distance between the bottom of the olfactory organ and the bottom of the chin into halves, the level of the bottom of the lips typically falls at the halfway signal. Use this every bit a starting point to depict in this level. And then, gauge where the middle of the lips falls relative to the distance betwixt the bottom of the lips and the bottom of the nose. Depict that in.
- Adjust the middle line for the nose. Starting from the level of the start of the olfactory organ, adjust the centre line so its angle matches the centre line of the nose. Typically this will be in two parts. The angle outwards from the level of the start of the olfactory organ to the peak of the nose, and the angle inwards from the peak of the nose to the lesser of the nose.
- Adjust the center line for the mouth. The mouth typically has some volume, which pushes the center line forward. Arrange the center line forward below the nose to account for the volume in the mouth.
- Draw in the shape of the eyes and centre sockets. Triangulate the corners of the eyes, and then draw in the complete shapes. Practice the same for the lids and the eye sockets.
- Depict in the shape of the brows. Triangulate the corners of the brows, so draw in the complete shapes.
- Draw in the shape of the nose. Triangulate the peak of the nose and the wing of the nose. Then, depict in the complete shape.
- Depict in the shape of the oral cavity. Triangulate the corners of the mouth. So, depict in the complete shape.
- Draw in the level of the chin. Triangulate the level of the chin, and draw a line to distinguish the shape.
- Describe in the shape of the ear. Triangulate points of bending-change effectually the ear. Connect these points with accordingly angled lines, and and so polish out the kinks.
- Describe in shadow shapes. Identify shapes of chief shadow areas. Triangulate their boundaries and describe them in.
- Darken the shadow shapes. Lightly shade in the shadow areas of the portrait. Apply a soft, clean paint brush to smooth out the material on the page. This will introduce some 3-dimensionality to your portrait, which should help you meliorate visualize if annihilation doesn't seem quite right. If at that place is something that seems incorrect, ready it.
- Item the eyes. Draw in the iris, pupils, and other details.
- Detail the nose. Depict in the nostrils and other details.
- Detail the lips. Smooth out the shape of the lips.
- Detail the ear. Describe in some of the principal inner land marks.
- Central the drawing. Place the lightest and darkest tones on the discipline, and add together these tones to the folio.
- Modeling an area. Option an area of the head (like the forehead), and detail some of the main places of tone-change. Identify and add in the main lite and dark areas. Using a shading stump and the necessary pencils, fill in the transition tones. To better see the shapes of highlights and shadow, squint your eyes until the face isn't recognizable equally a face, but rather a drove of tonal blobs.
- Model the remaining areas. Proceed as above until all areas are modeled.
- Sign it. And you're washed.

A few days ago, I finished cartoon my start portrait. Since then, I've reread my notes, reviewed some parts of the class, and wrote upward my "Portrait Drawing Cheat Canvass".
With all the steps documented, it's now time to deliberately do the most important skills.
In detail, as I said on Day 35, I believe that it'south virtually of import to accurately capture the proportions of the head, the head shape, and the level of the features. If these things are done correctly, the rest of the procedure is very forgiving. If not, the portrait volition terminate upward beautifully shaded, but won't await like the subject.
Today, I'm going to practice finding the correct proportions of the subject's caput using a few celebrities: Matt Damon, Natalie Portman, and Morgan Freeman.
Matt Damon
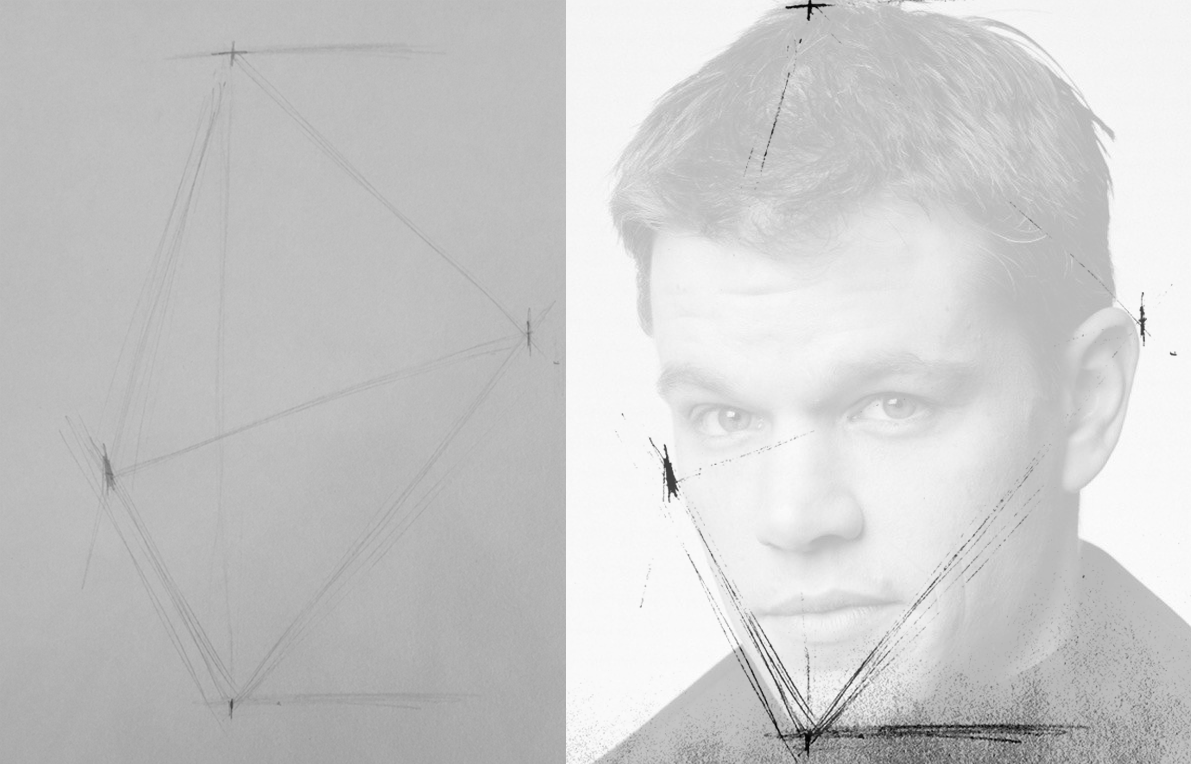
Here'south the photo I'k using.
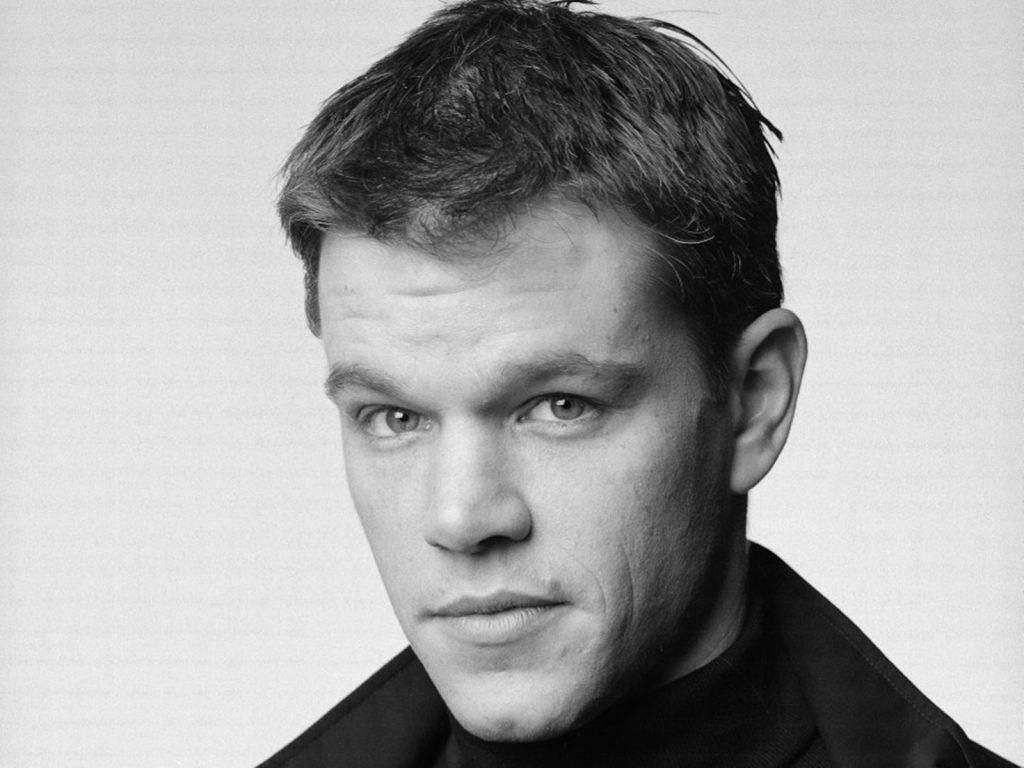
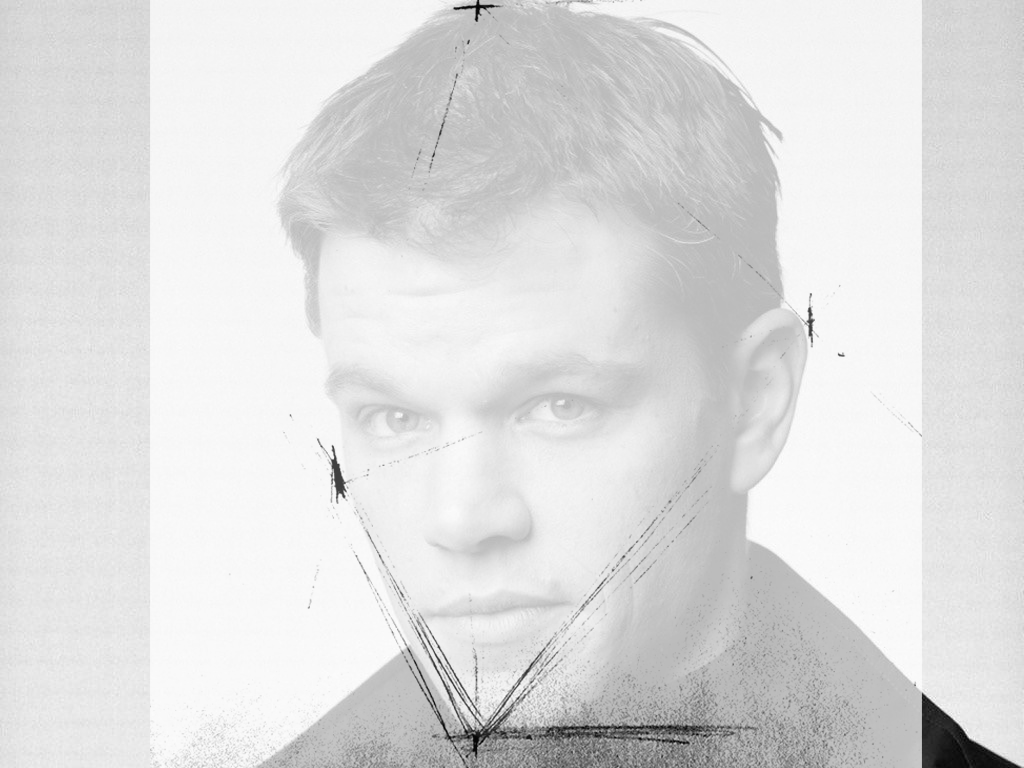
Here'due south my endeavor to locate the summit of his head, the lowest indicate of his chin (which is located on the chin'south left side), the leftmost point of his cheek, and the rightmost point of his ear.
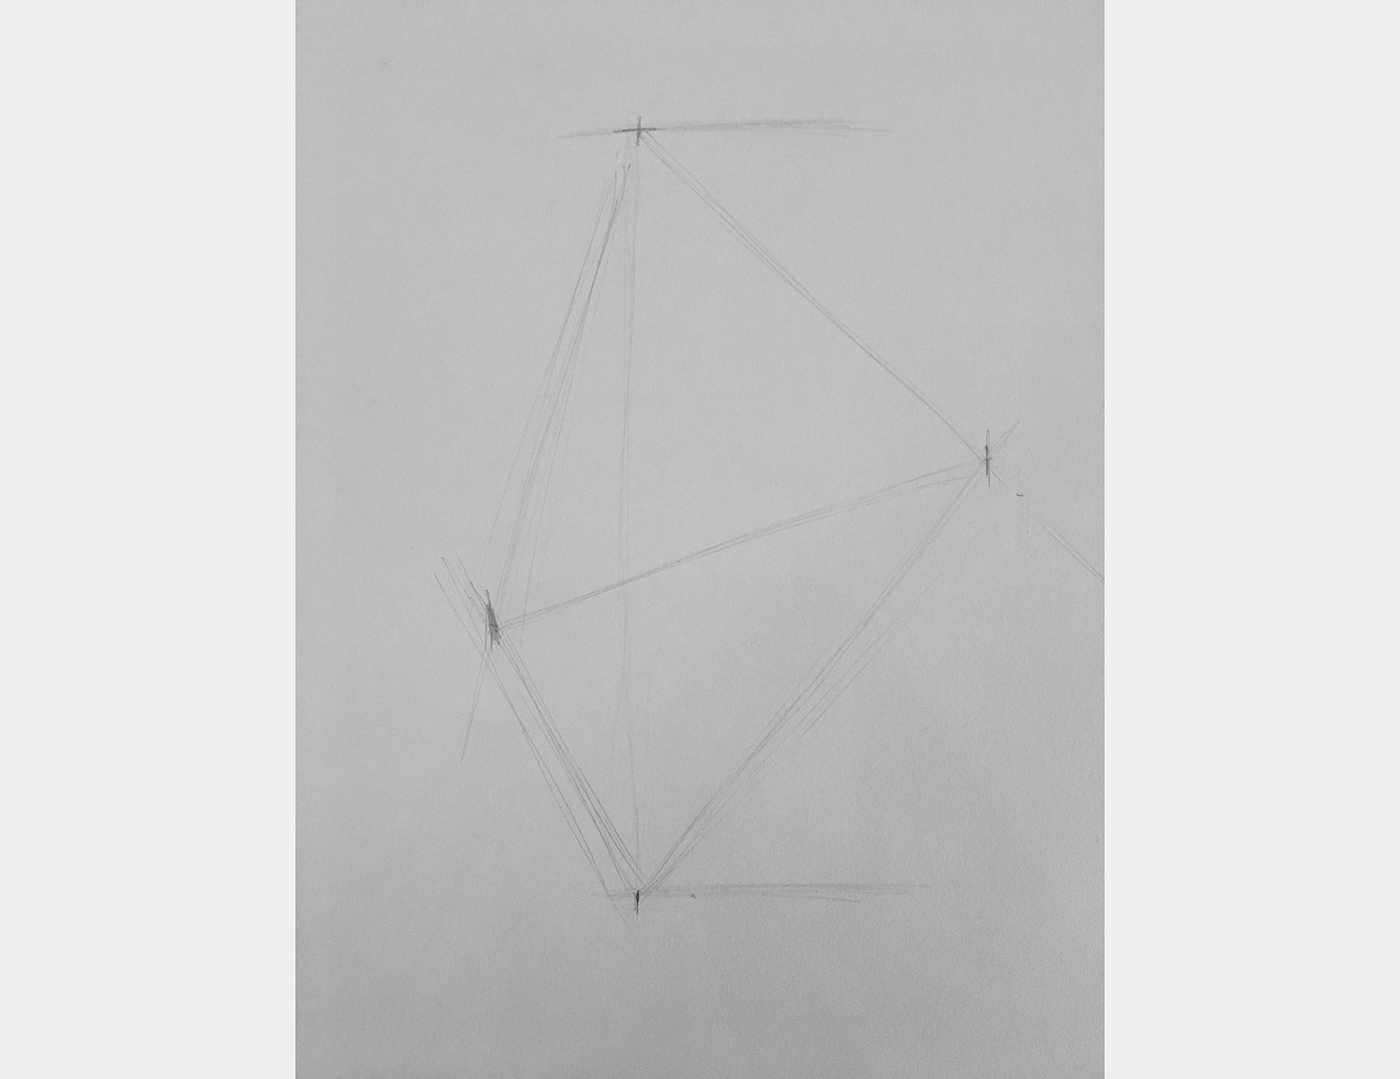
In Photoshop, I overlaid my sketch on the photograph to bank check. I was pretty authentic.
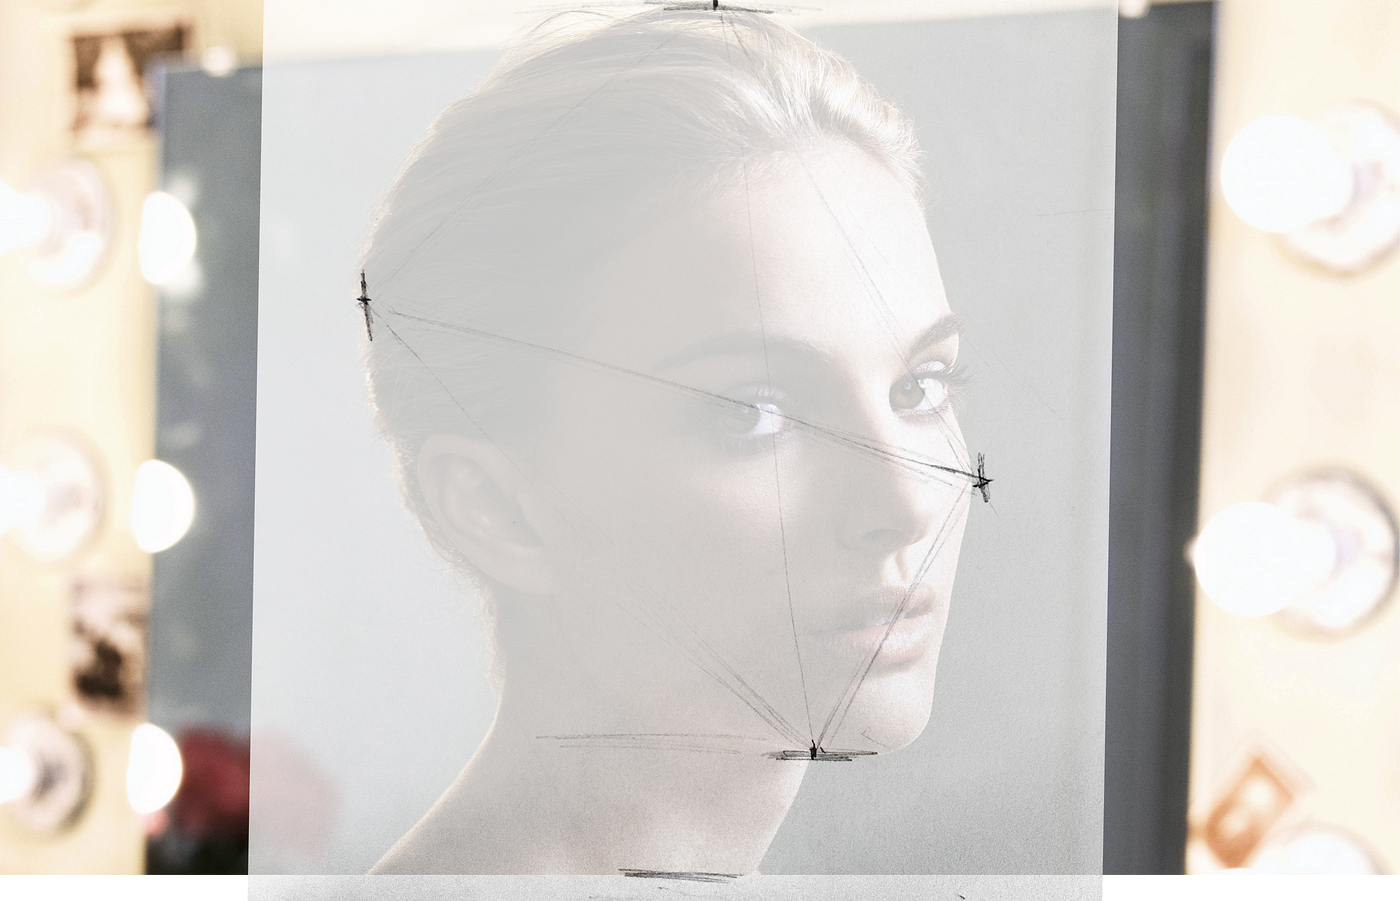
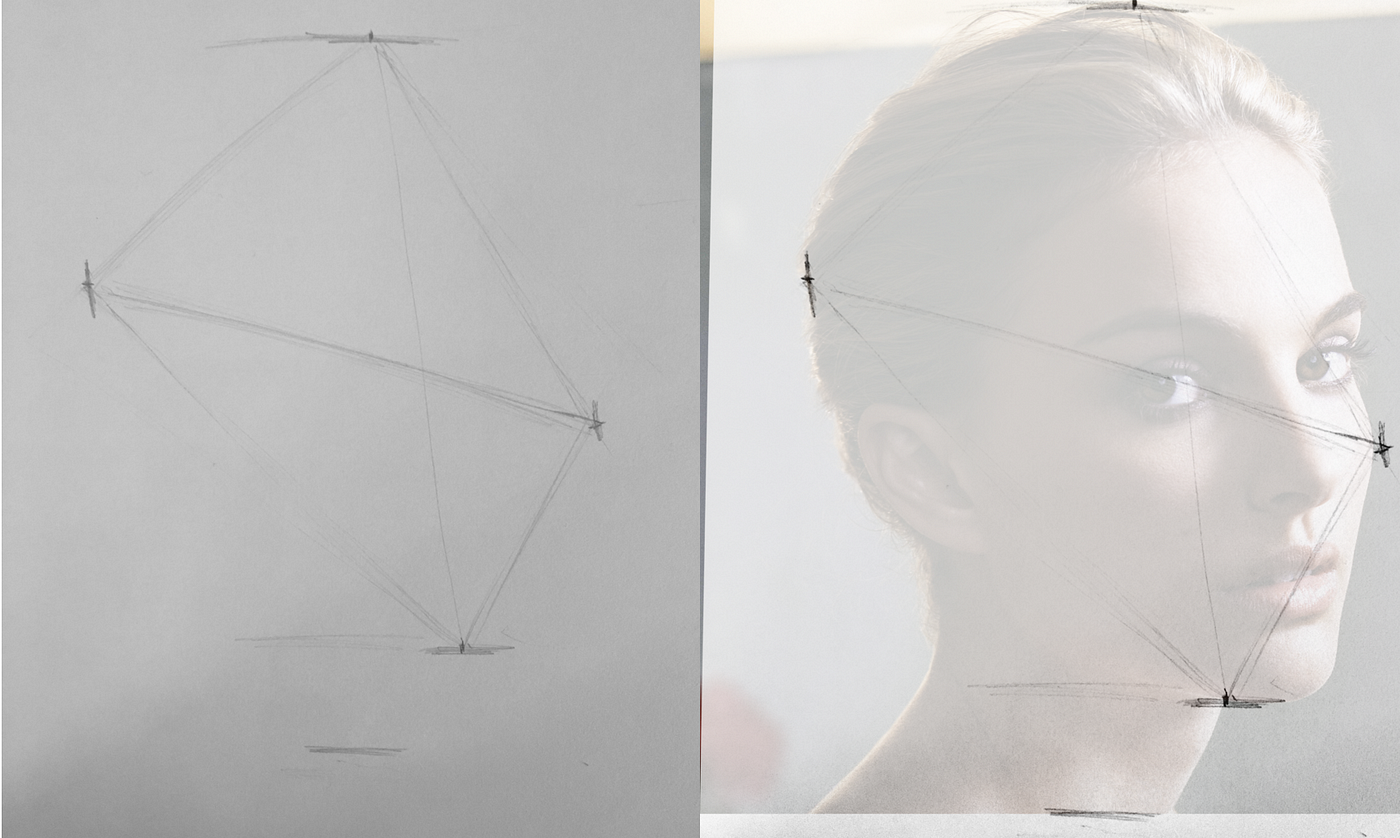
Natalie Portman
Here's Natalie.

And here's my attempt to locate the height of her hair, the lowest betoken of her chin (again on the chin's left side), the rightmost point of her cheek, the leftmost point of her hair, and the notch of her neck.
Checking in Photoshop, everything seems pretty accurate. Although, the low point of the chin may be slightly too far left.
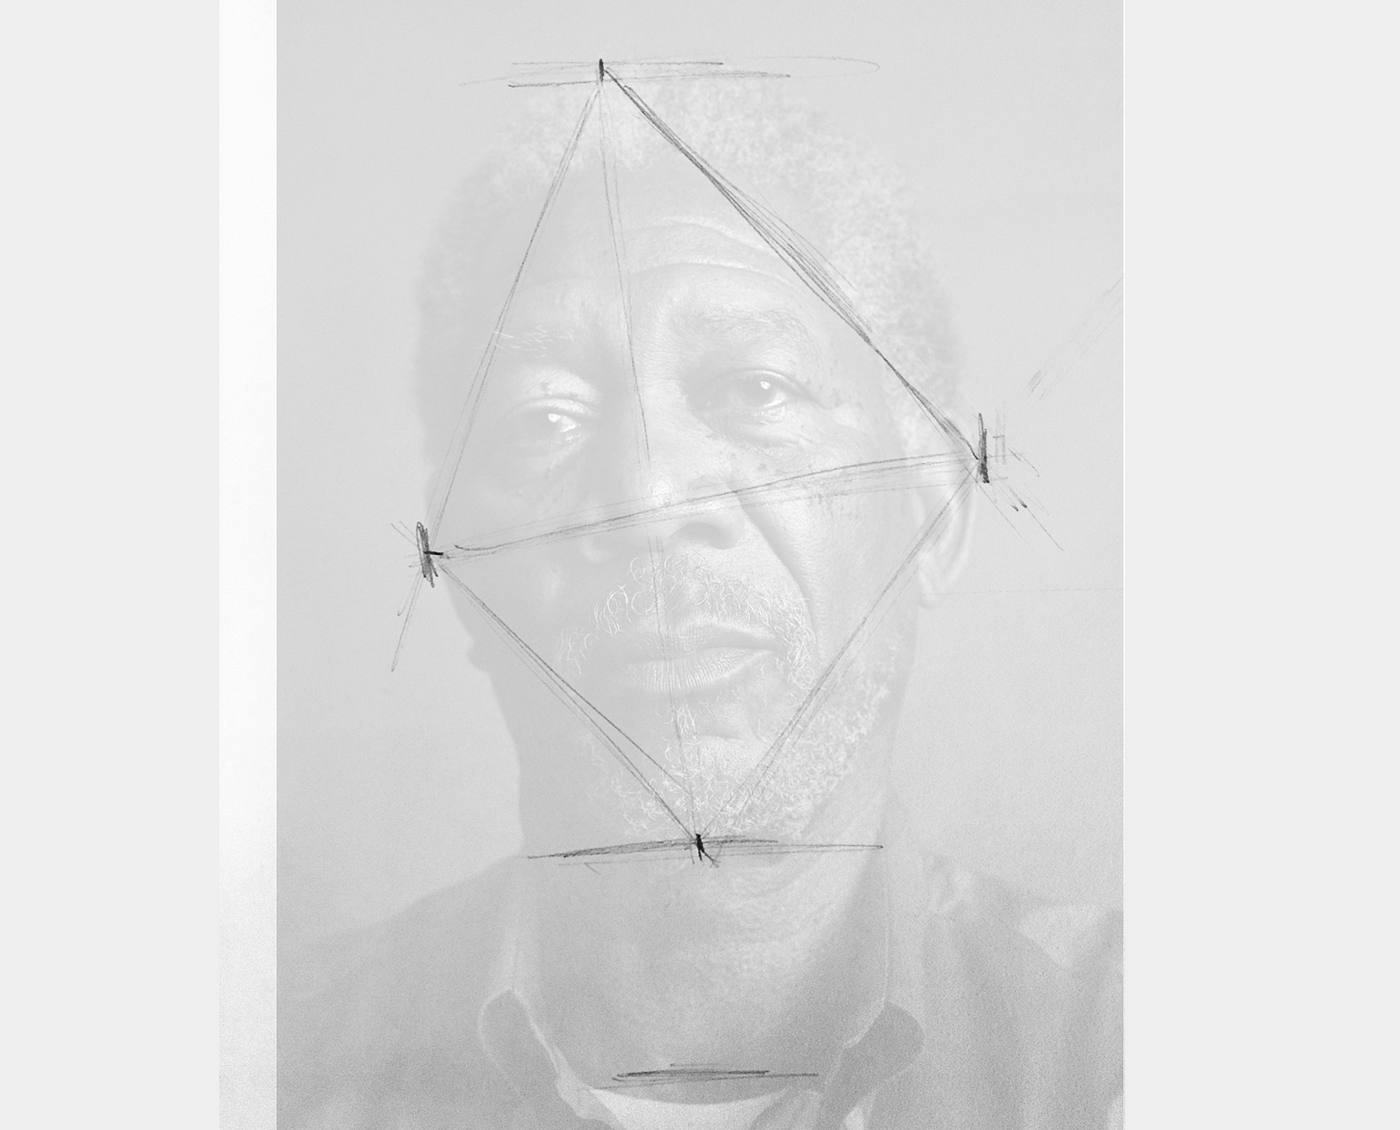
Morgan Freeman
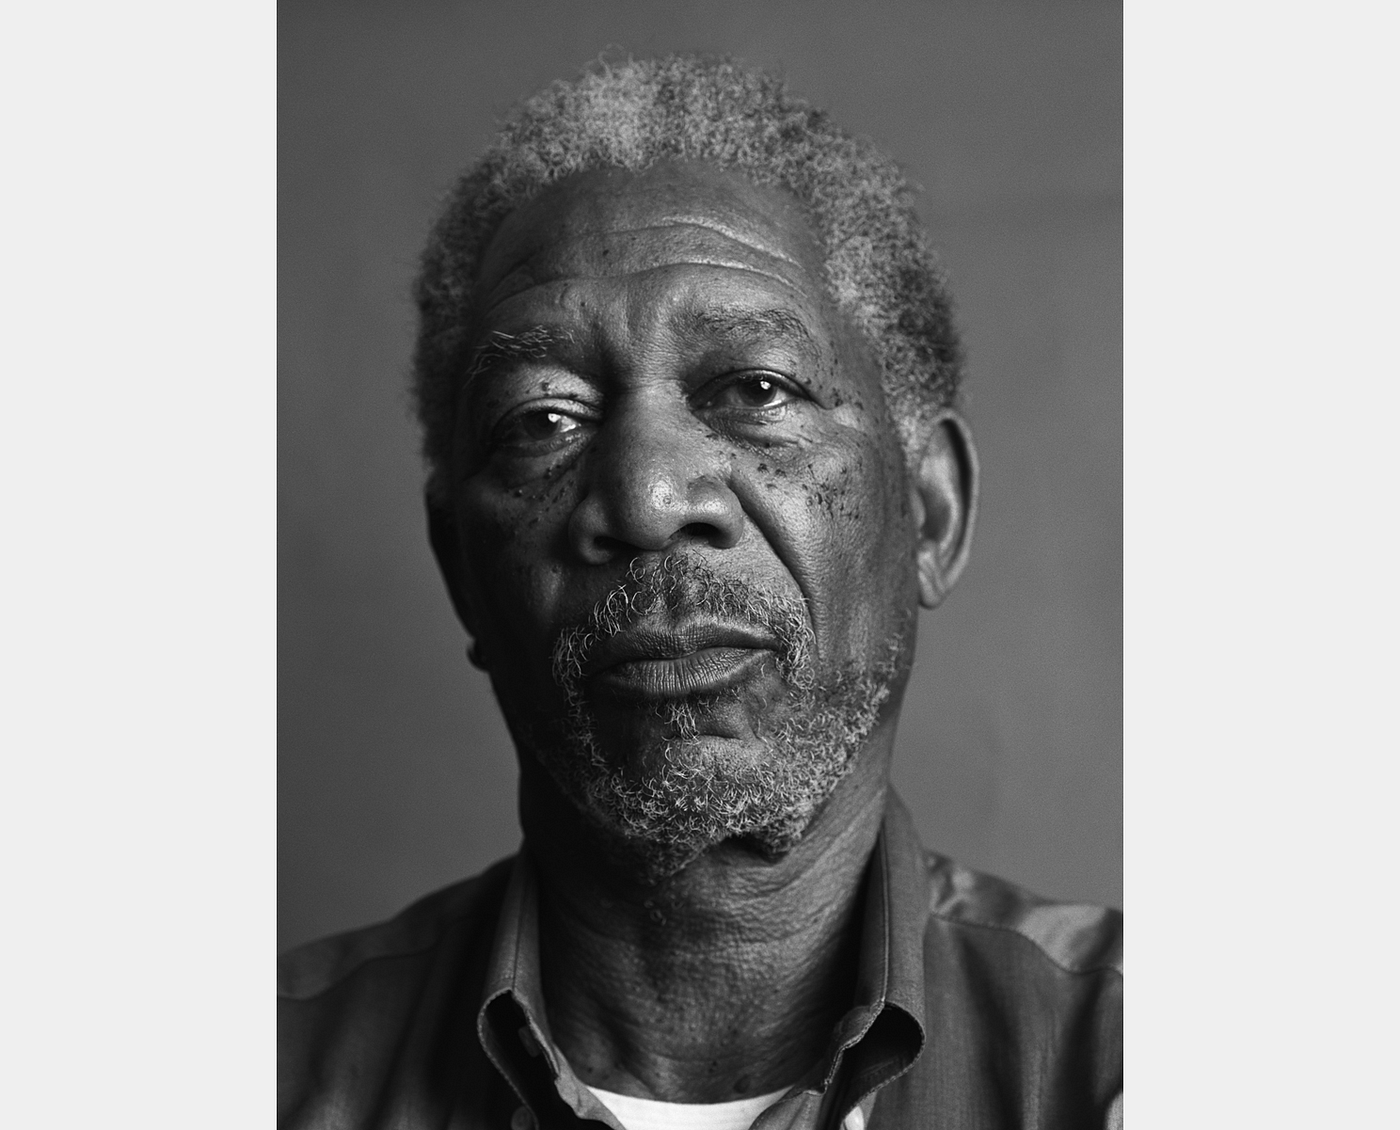
Hither I try to locate the peak of his head, the lowest point of his chin, the rightmost point of his ear, the leftmost indicate of his ear, and the notch of his neck.
This one looks right on the money.
With each of the sketches, different with my Derren Brown portrait, I felt that I was able to encounter the bending on the discipline and accurately replicate it on the folio with express try.
This is a good sign…

Yesterday, I practiced triangulating the proportions of a few glory heads.
For example, here'due south 1 I did of Natalie Portman.
Today, I skilful triangulating the complete head shape and gauging the level of features.
It took about 45 minutes.
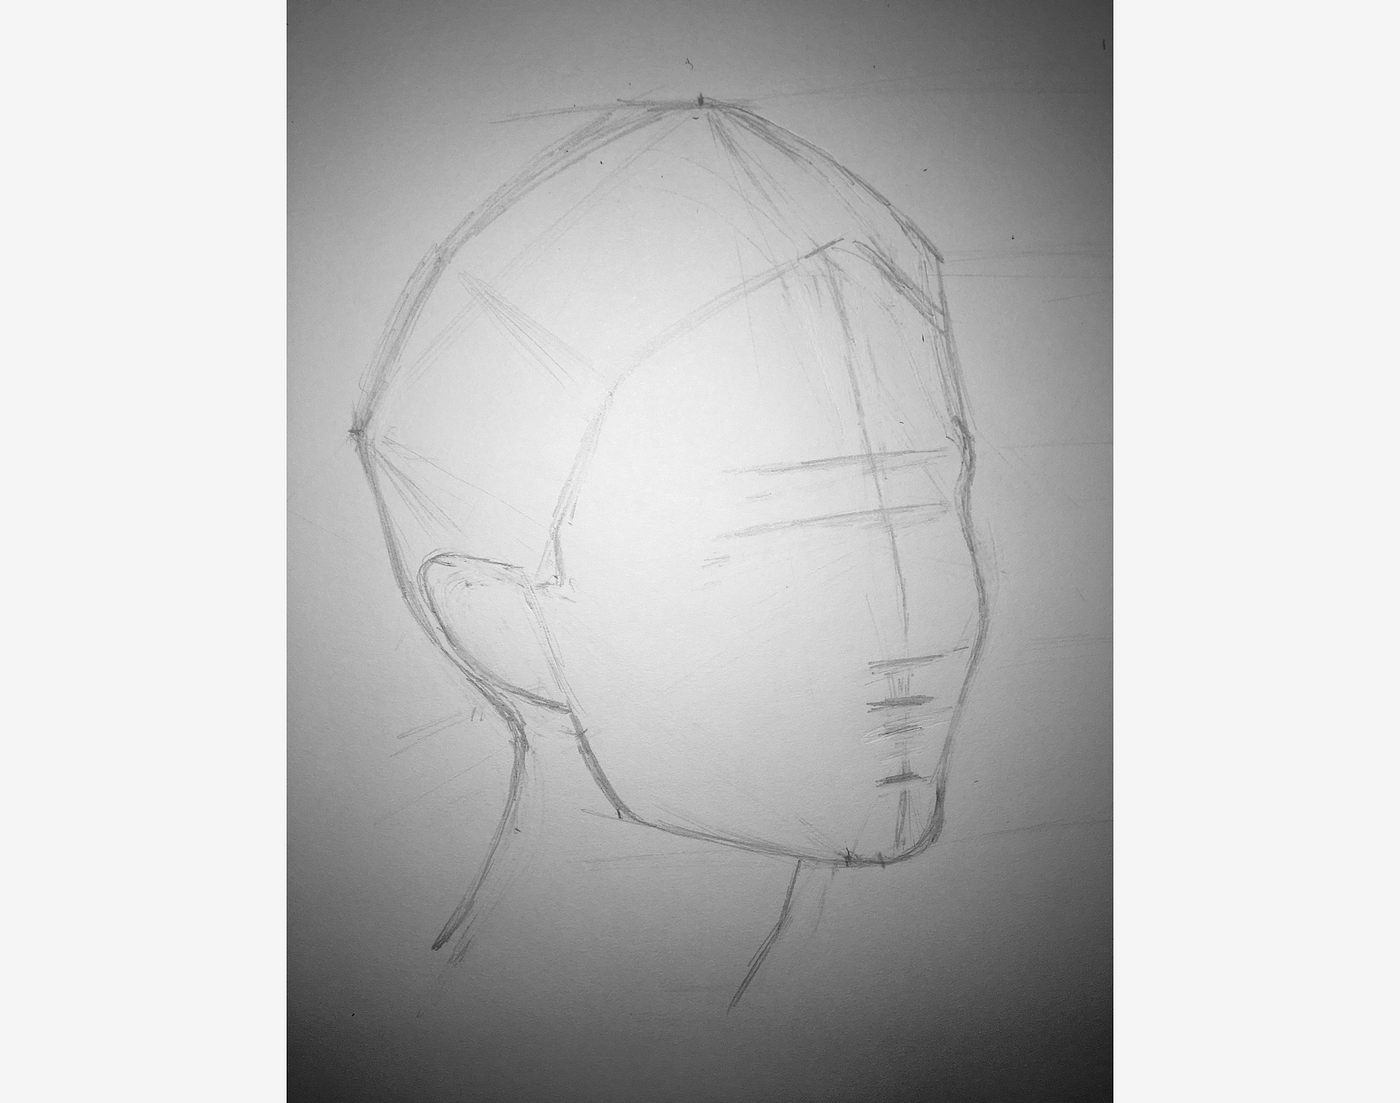
To assess my piece of work, I overlaid the sketch on Natalie.
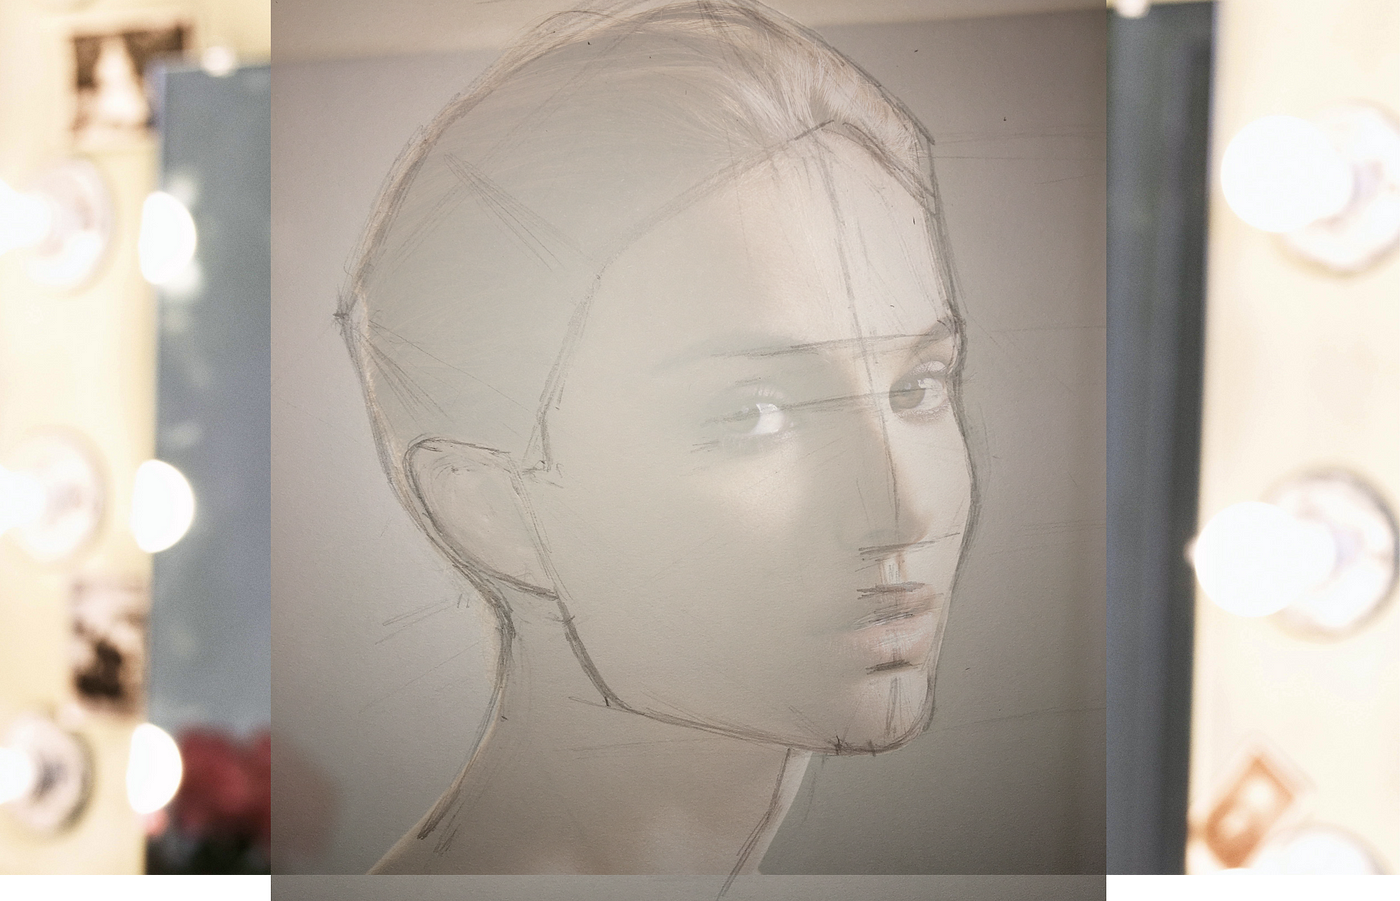
My Critique
- The face up shape is accurate
- The level of the features is accurate
- The angle of the features is accurate
- The center line curves a little too apace as it moves up betwixt the eyes
- The cervix shape is inaccurate — I peculiarly misestimated the starting indicate of the cervix on the right side.
- Higher up the correct eye, the bending of the head/pilus is too steep
- The elevation of the head is too steep
- The angle of the pilus above the ear isn't steep enough
Overall, I'd give the sketch a B-.
Since I was accurate with the face shape and the level of features, if I connected working, I suspect I would develop the face fairly accurately. As a result, I would probable have enough authentic data to gradually correct the major mistakes with the head and hair shape.
Tomorrow, I'll do once more on a different celebrity.

Today, I didn't take also much fourth dimension to draw. And so, I chop-chop progressed the Matt Damon sketch I started two days ago.
Hither's what I shared on Sun.
Today, I spent 30 minutes sketching the caput shape and feature guides.
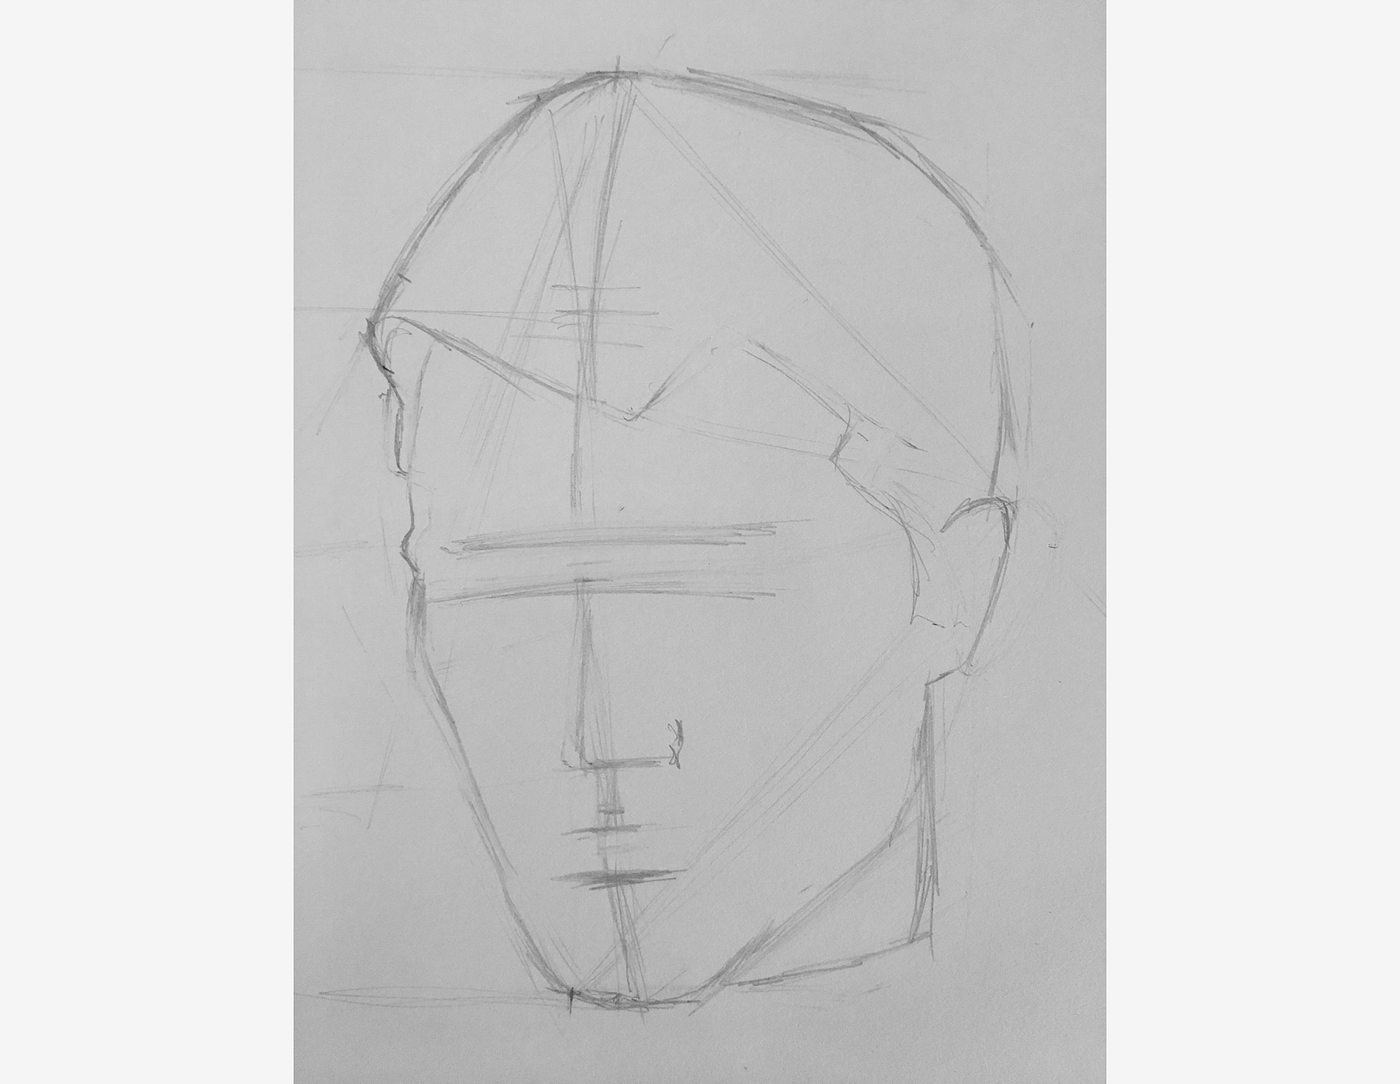
Simply looking at the sketch, the head shapes seems a picayune narrow for Matt Damon. Merely, overlaid on the photo, it seems to friction match up.
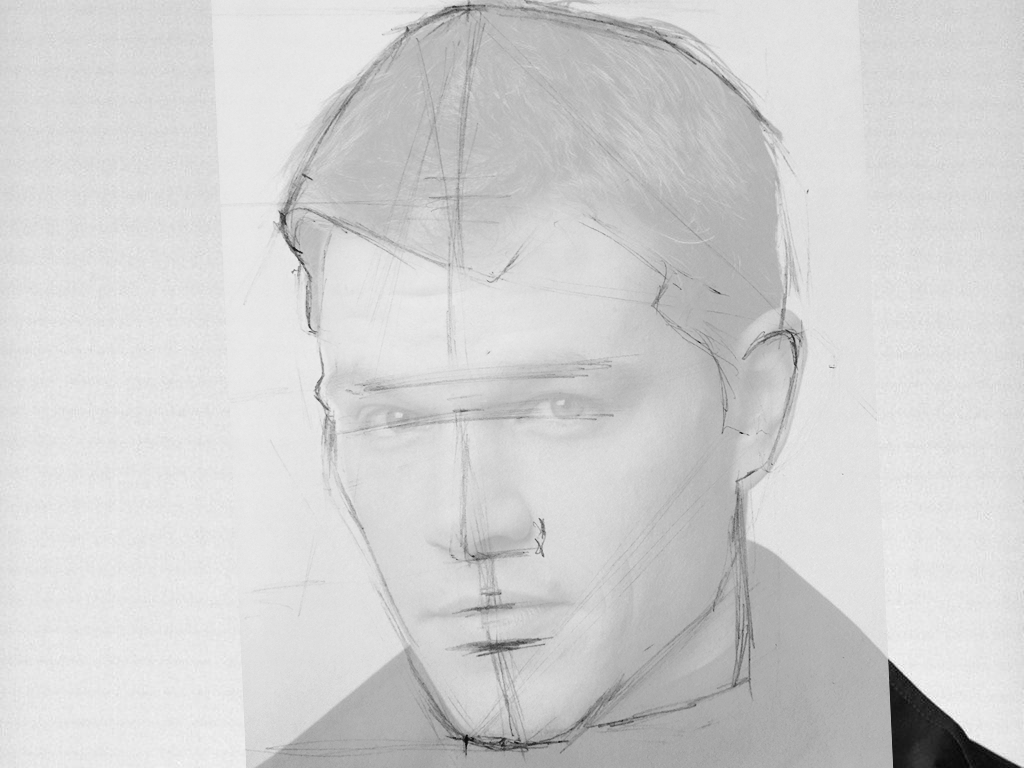
With the exception of the oddly tiny ear, everything else seems to line up well. The head shape, face shape, and hair shape seem authentic. The level of the features and the heart line seem accurate. The fly of the olfactory organ is a bit also far to the right, but I really just threw that in for fun.
Overall, I'm pretty happy with the outcome — peculiarly since I sketched this fairly speedily. I guess that ways I'm improving…

Last calendar month, when I was learning to memorize a deck of cards at grandmaster speeds, I started unintentionally seeing playing cards in the existent-world. In particular, real-world things (like wheelchairs and airplanes), which have association in my mnemonic system, were triggering images of playing cards, without any conscious thought on my part.
Just, I was rewiring my brain.
This month, as I learn to draw faces, I'thousand experiencing a new phenomenon… For the past few days, I've found myself scrutinizing and deconstructing other people's faces on the railroad train, at work, on the street, at Whole Foods, etc. Wherever there is a face, I can't assistance but try to clarify information technology, and imagine how I'd depict it.
Now (and I hope this somewhen wears off), when I run across a new confront, my showtime instinct is to judge the ratio between the superlative and width of the head. Other times, I just wait to encounter what shapes the eye sockets are. Or how prominent the brow ridge is. Or if the nose and brows equally intermission the face in thirds.
Basically, I tin can't finish staring at people.
And then, give thanks you people of San Francisco for not getting totally creeped out. I promise I'll finish soon.

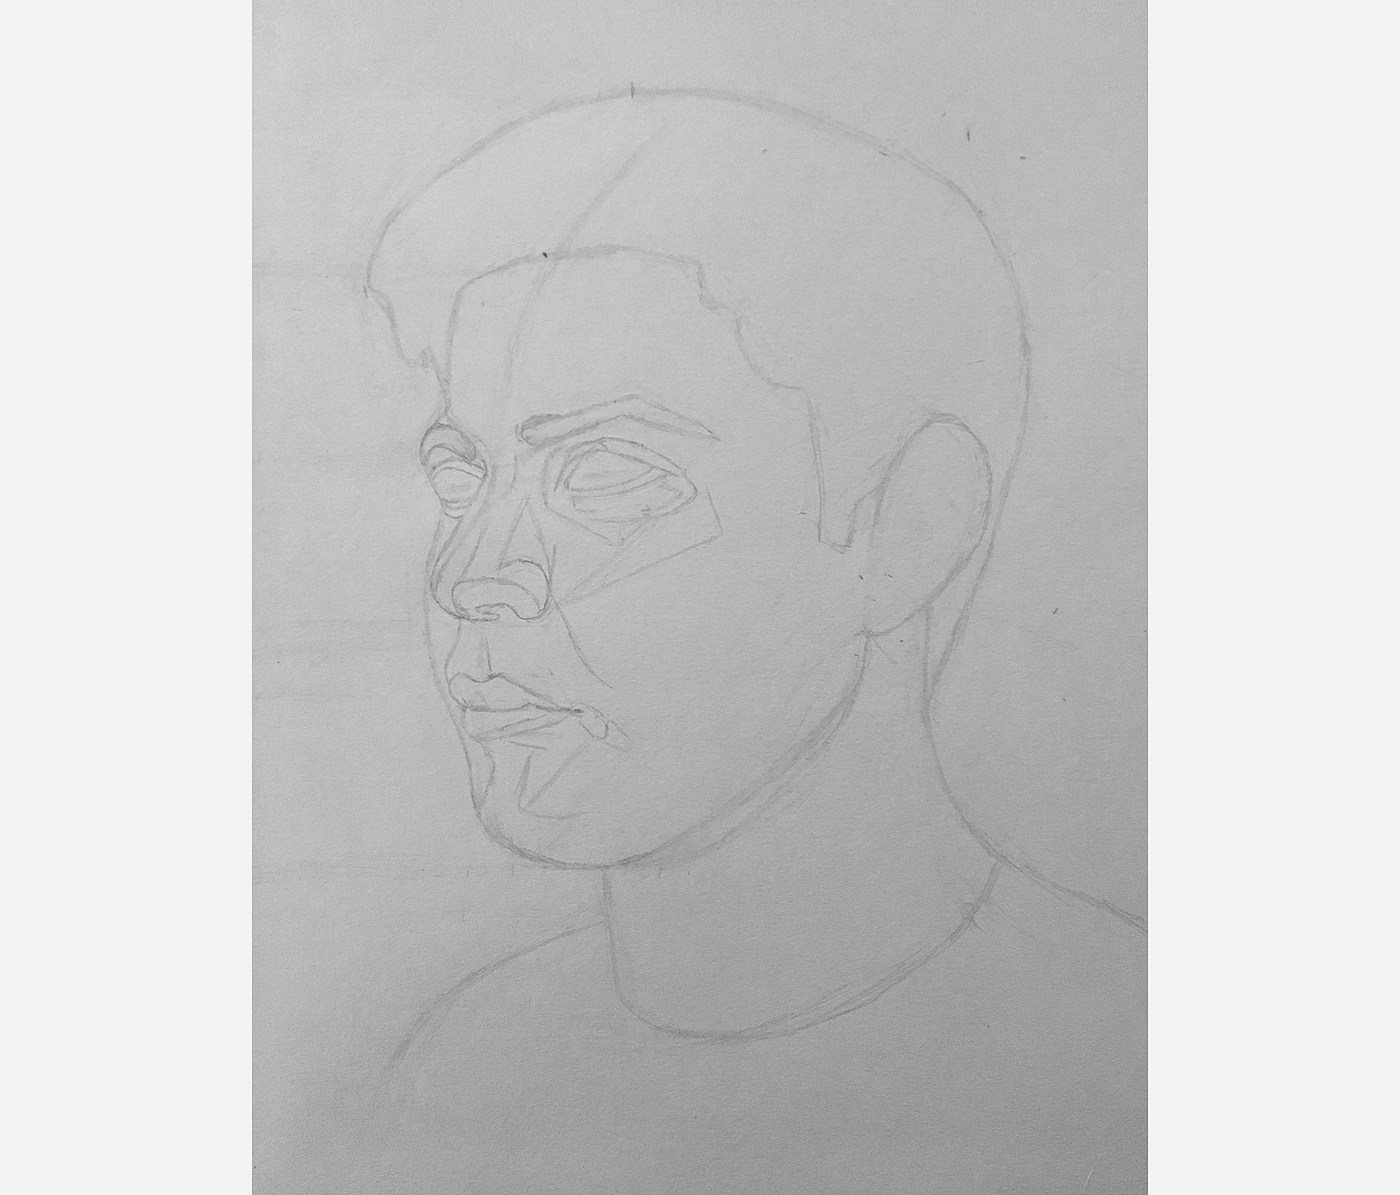
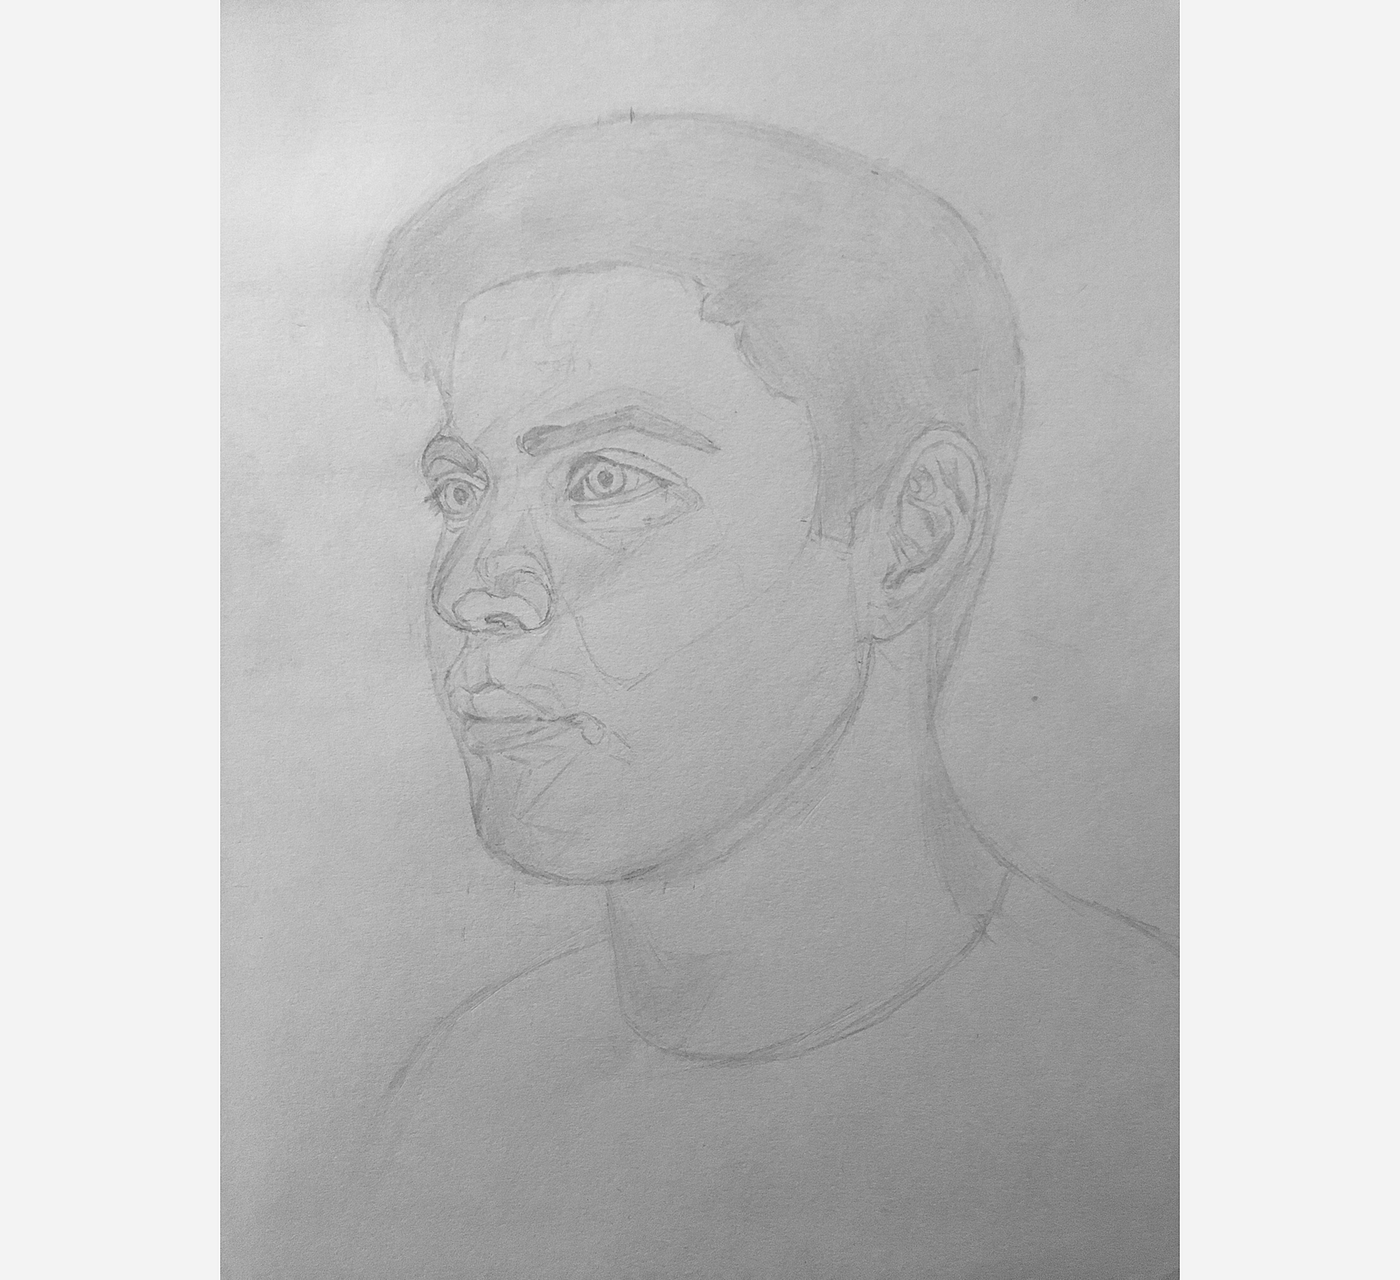
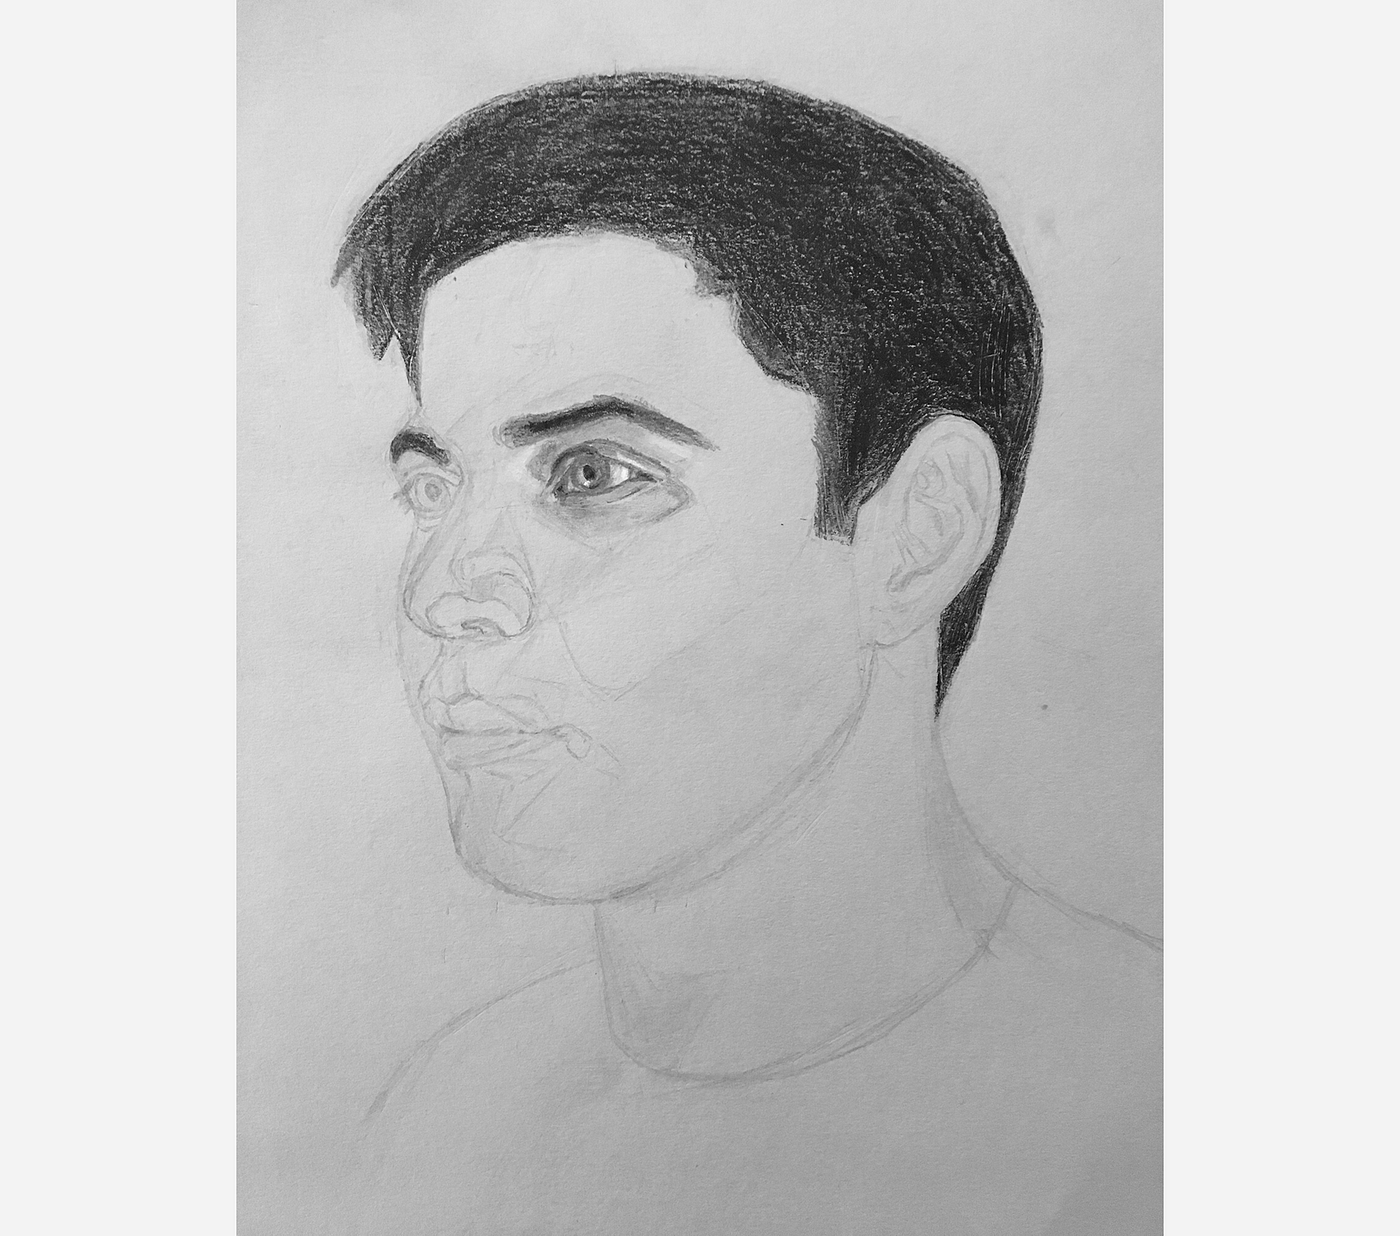
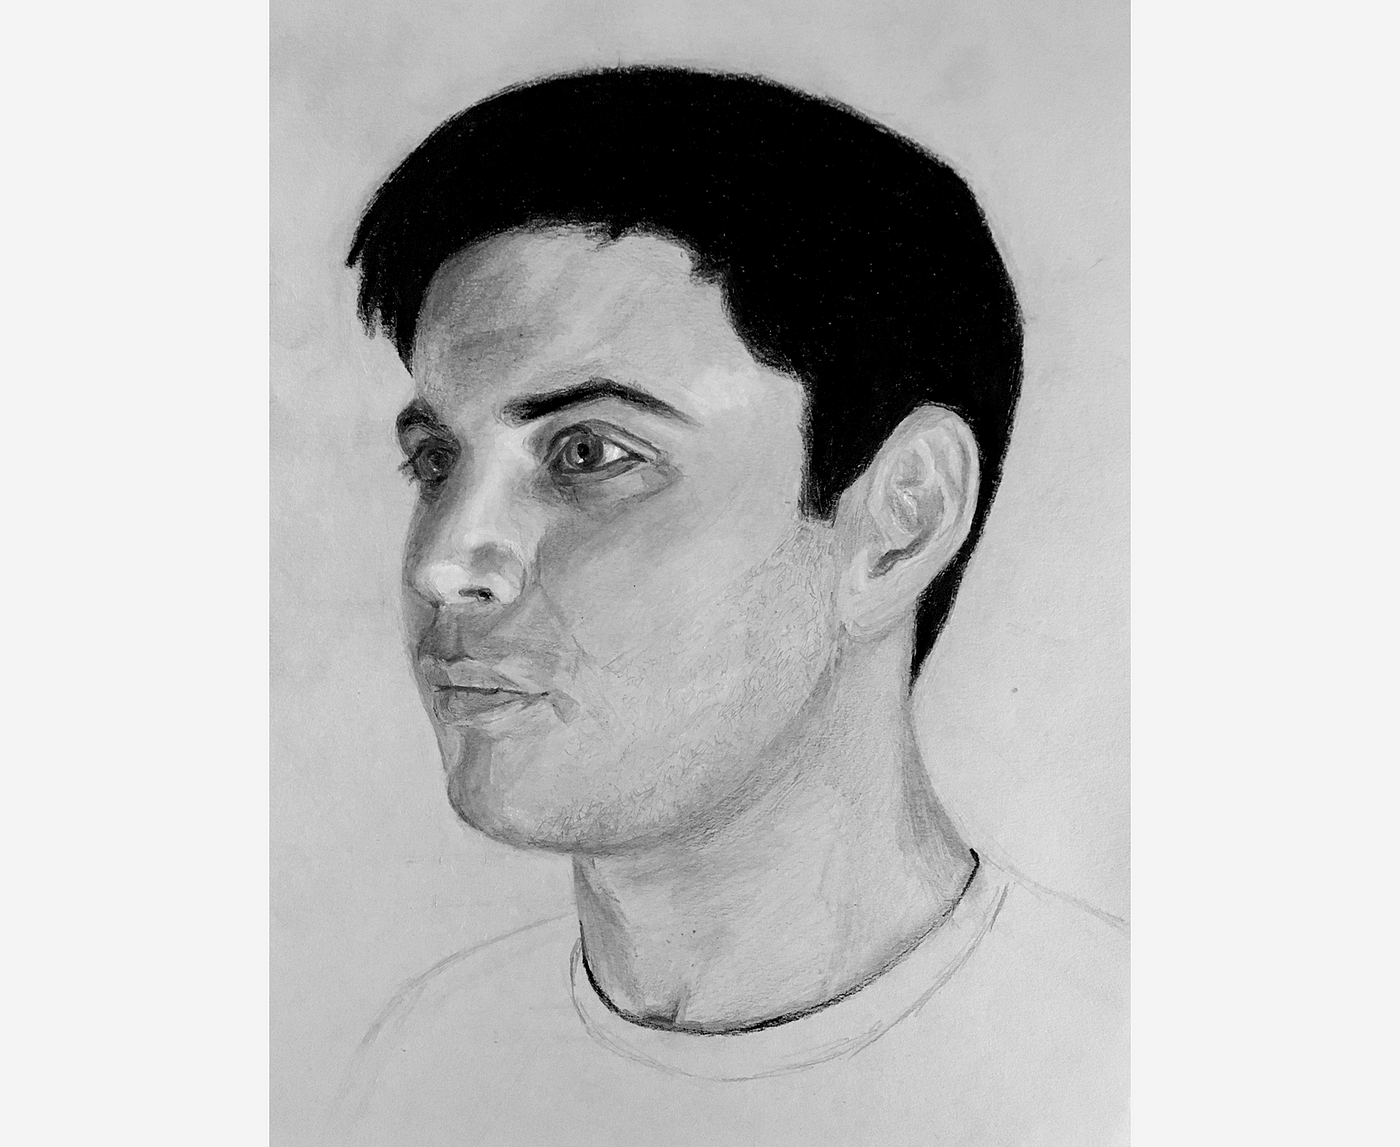
For the past couple days, I've been itching to start my self-portrait. So, today, I did just that.
Subsequently working for about an 60 minutes, I was able to finish sketching the outline of the head, hair, and neck.
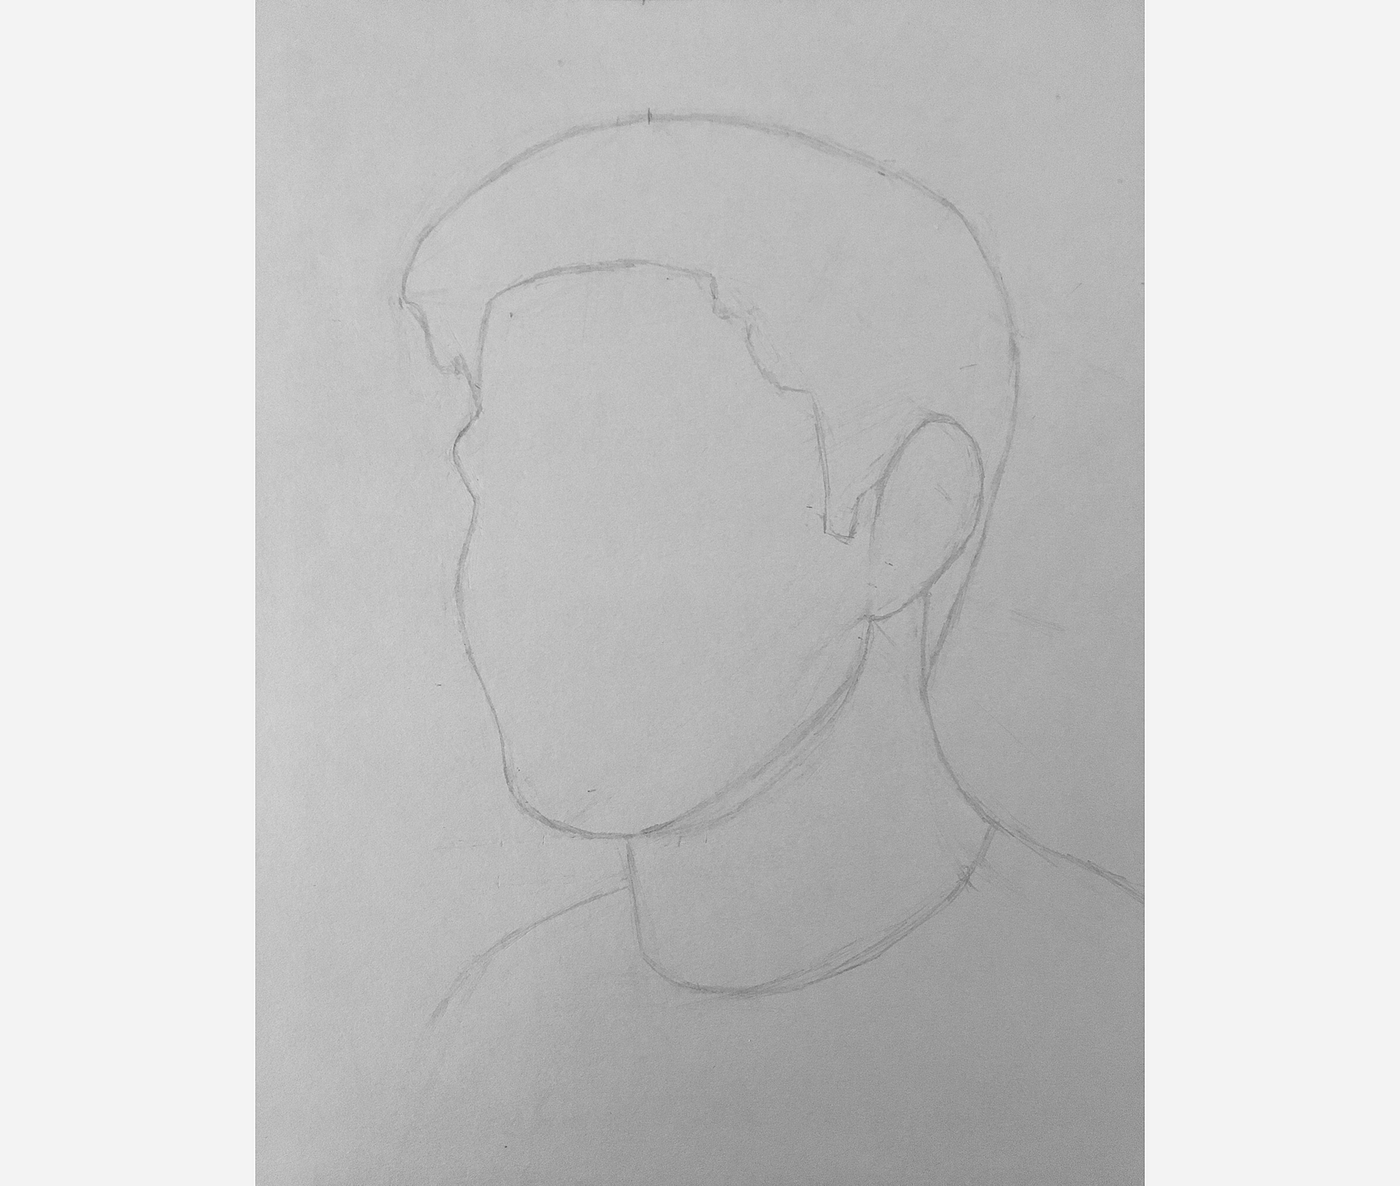
And here's a video of today's progression.
So far, so good. Tomorrow, I'll start blocking in the features.

Today, I connected working on my self-portrait. Although it's meeting nicely, I made a mistake upfront that's definitely costing me now.
Before, I become to that, though, allow me start share today's progress.
My mistake
Although I'yard loving the composition of my self-portrait, I've sadly draw everything 10–twenty% as well small.
Take a look at the self-portrait side-by-side with the Derren Chocolate-brown portrait. My head is noticeably smaller.
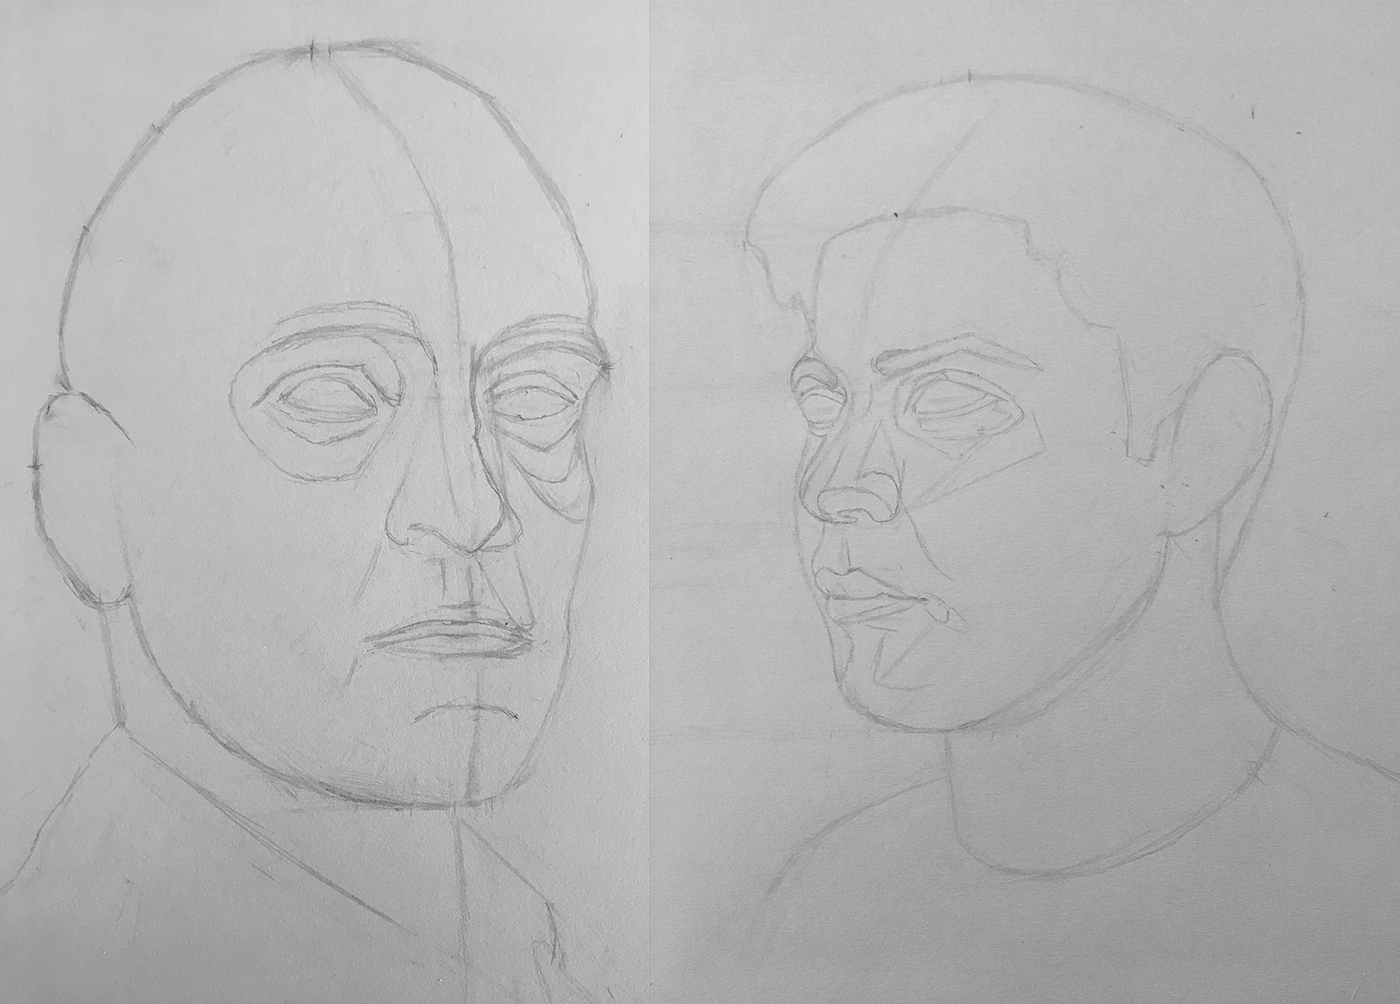
Over again, I think this is okay compositionally, just it's still a bit of a problem — particularly, for two reasons.
- A smaller drawing offers smaller margins for mistake. If I slightly misplace the corner of the mouth or the acme of the brow, the distance betwixt the correct and wrong placements represents a proportionally larger difference on a smaller drawing. In other words, smaller drawings are less forgiving and errors are more than pronounced.
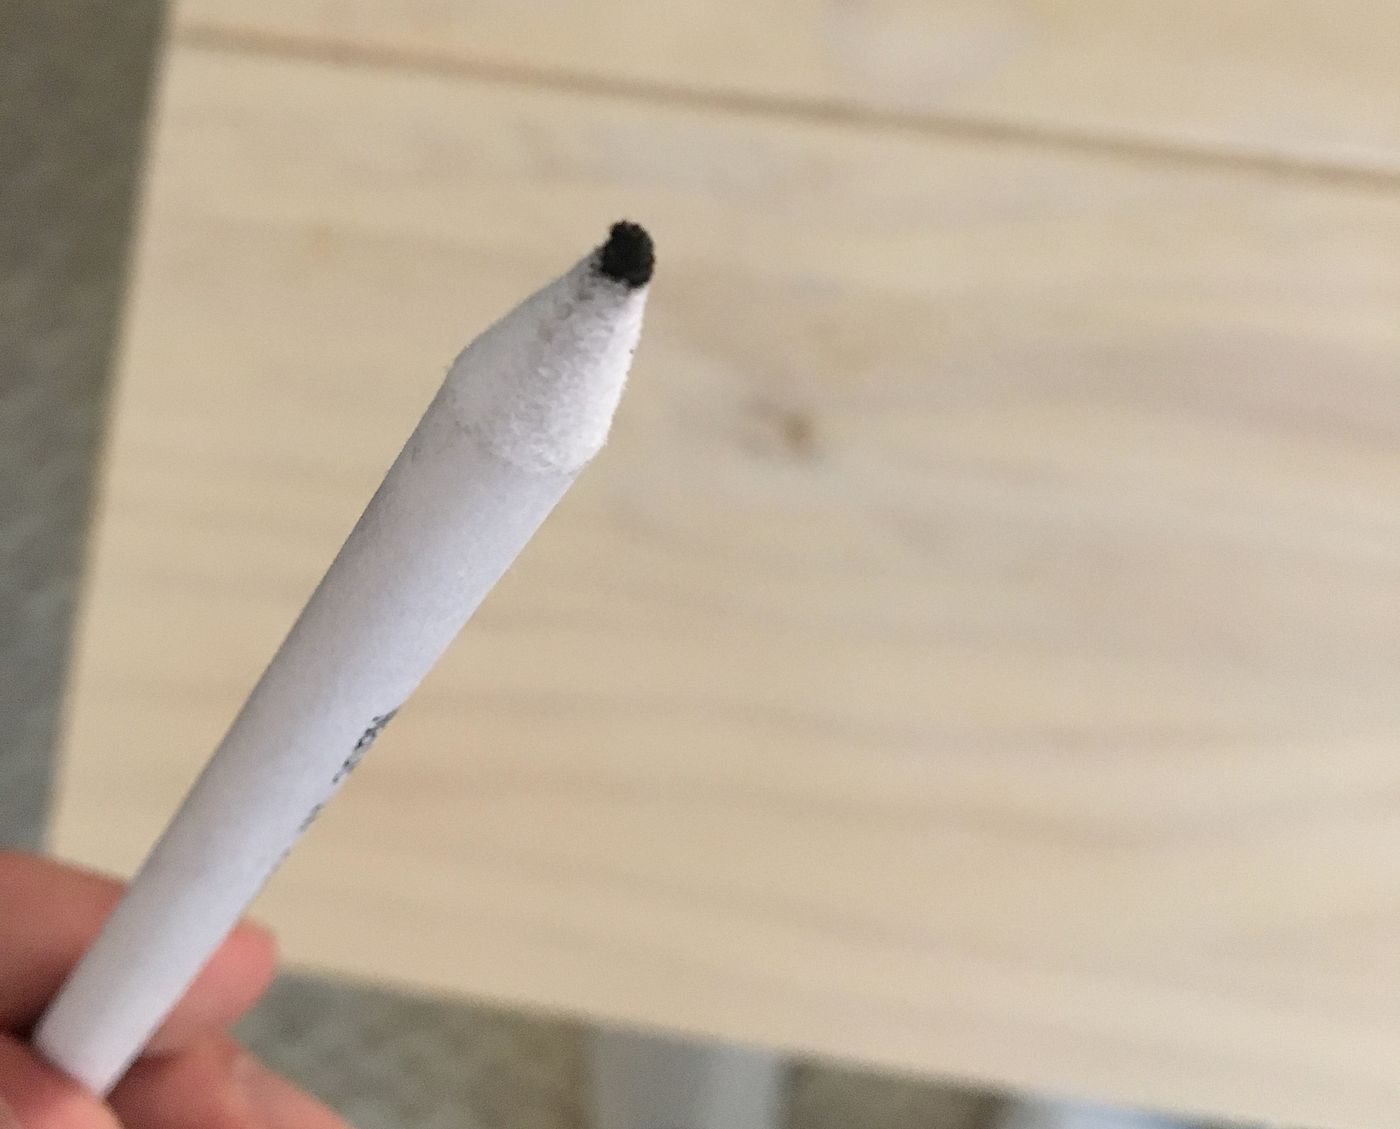
- A smaller cartoon means finer details. My pencil sharpener doesn't seem to work very well with the pencils I have, which means I'm cartoon the tiny eyelids on my self-portrait with a tree body. Basically, the smaller drawing requires that I work in finer areas, which is challenging with the tools I have.
Nevertheless, I will persist, since, fifty-fifty with the sizing mistake (and the associated challenges), I'm quite happy with the portrait then far.
In fact, challenges are probably a good thing (I hope). Ideally, they push button me to go a amend artist.
Anyhow, I think the takeaway is that I demand to invest in a improve pencil sharpener…

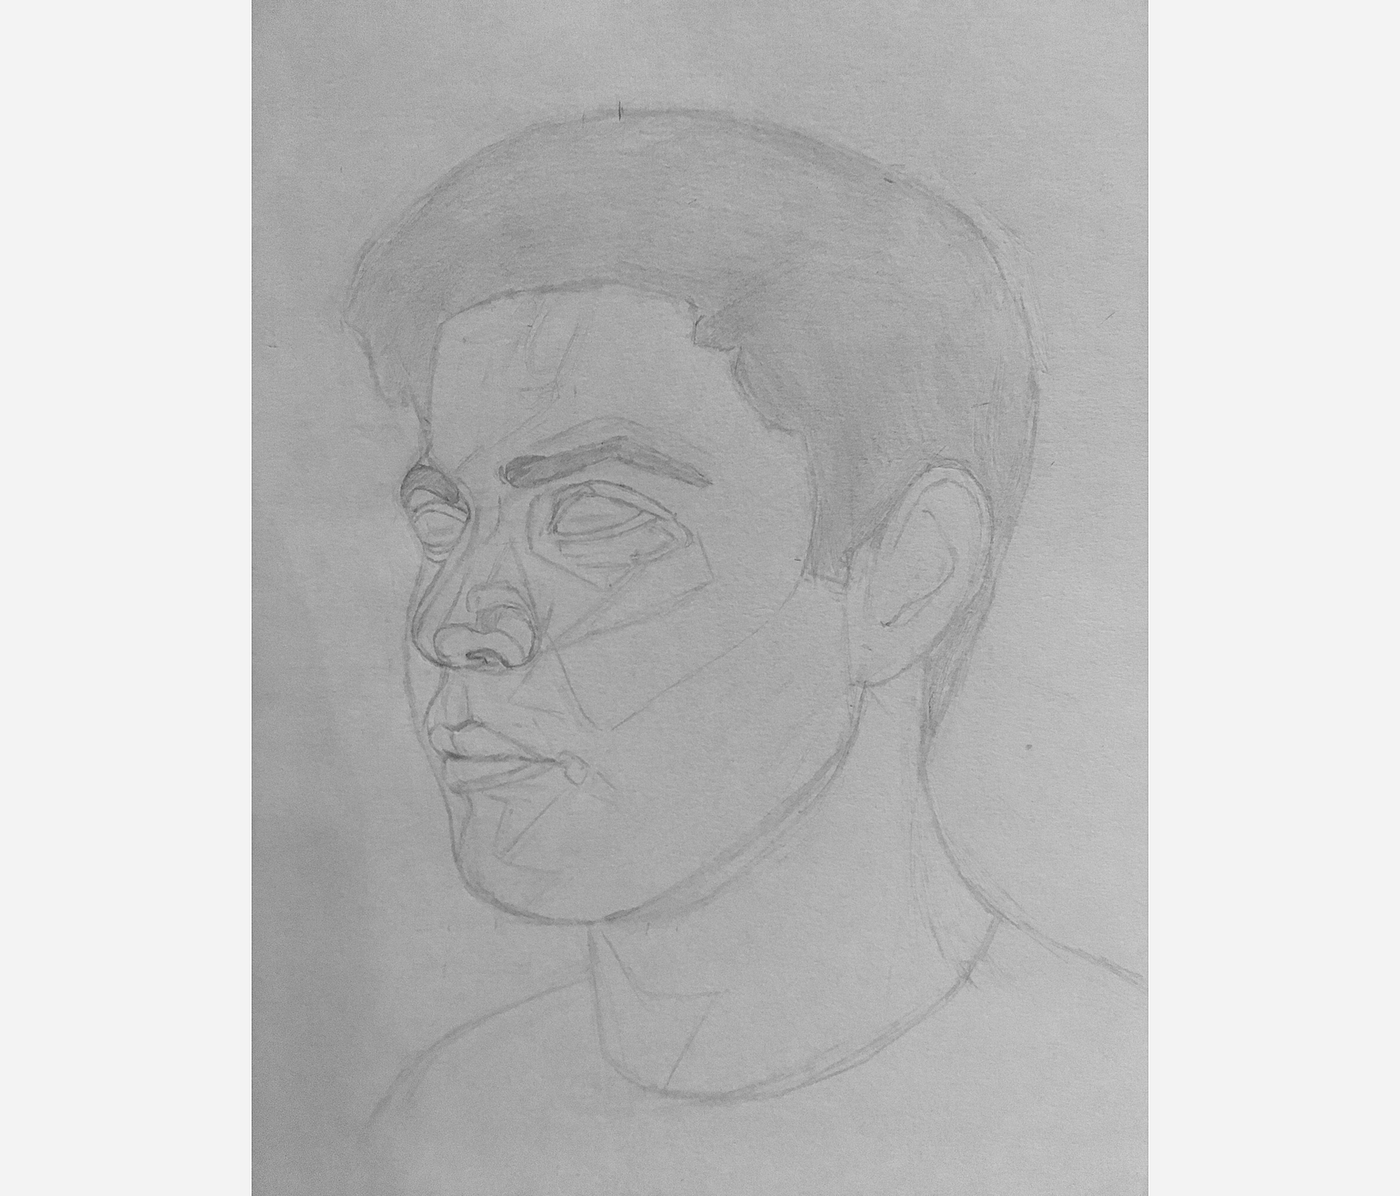
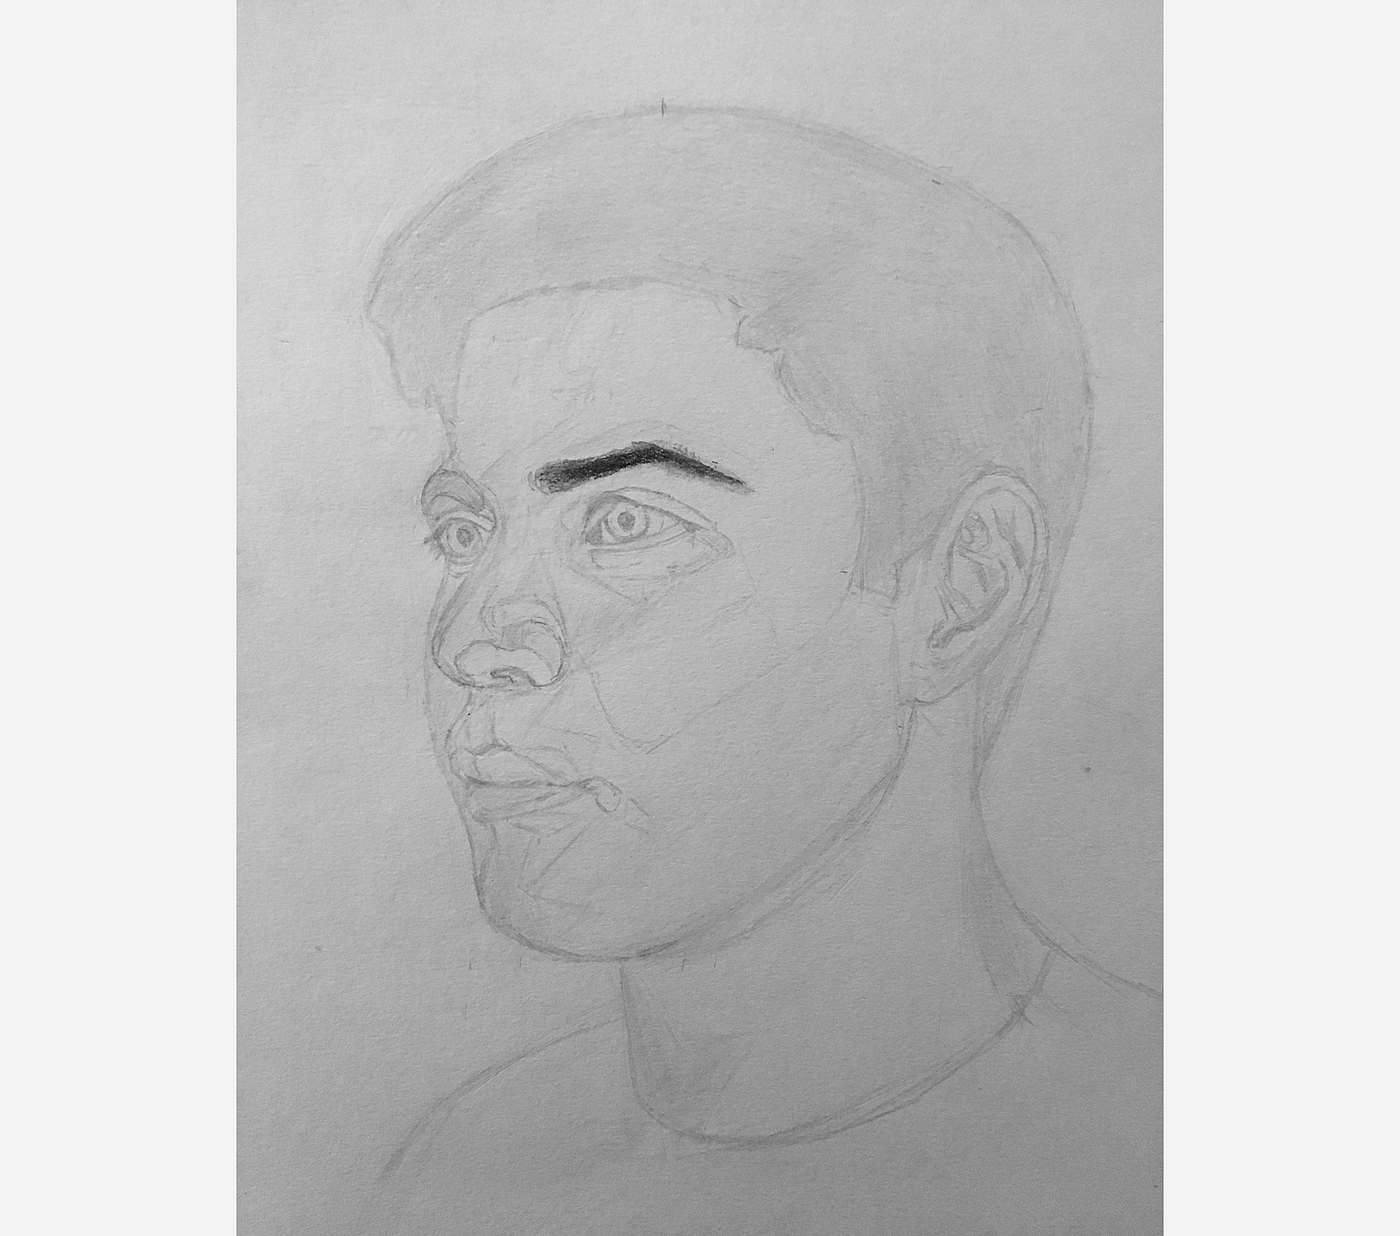
Today, my self-portrait progress is broken into 2 parts:
- Finishing the sketch
- Defacing the sketch (a.k.a. adding tonal values)
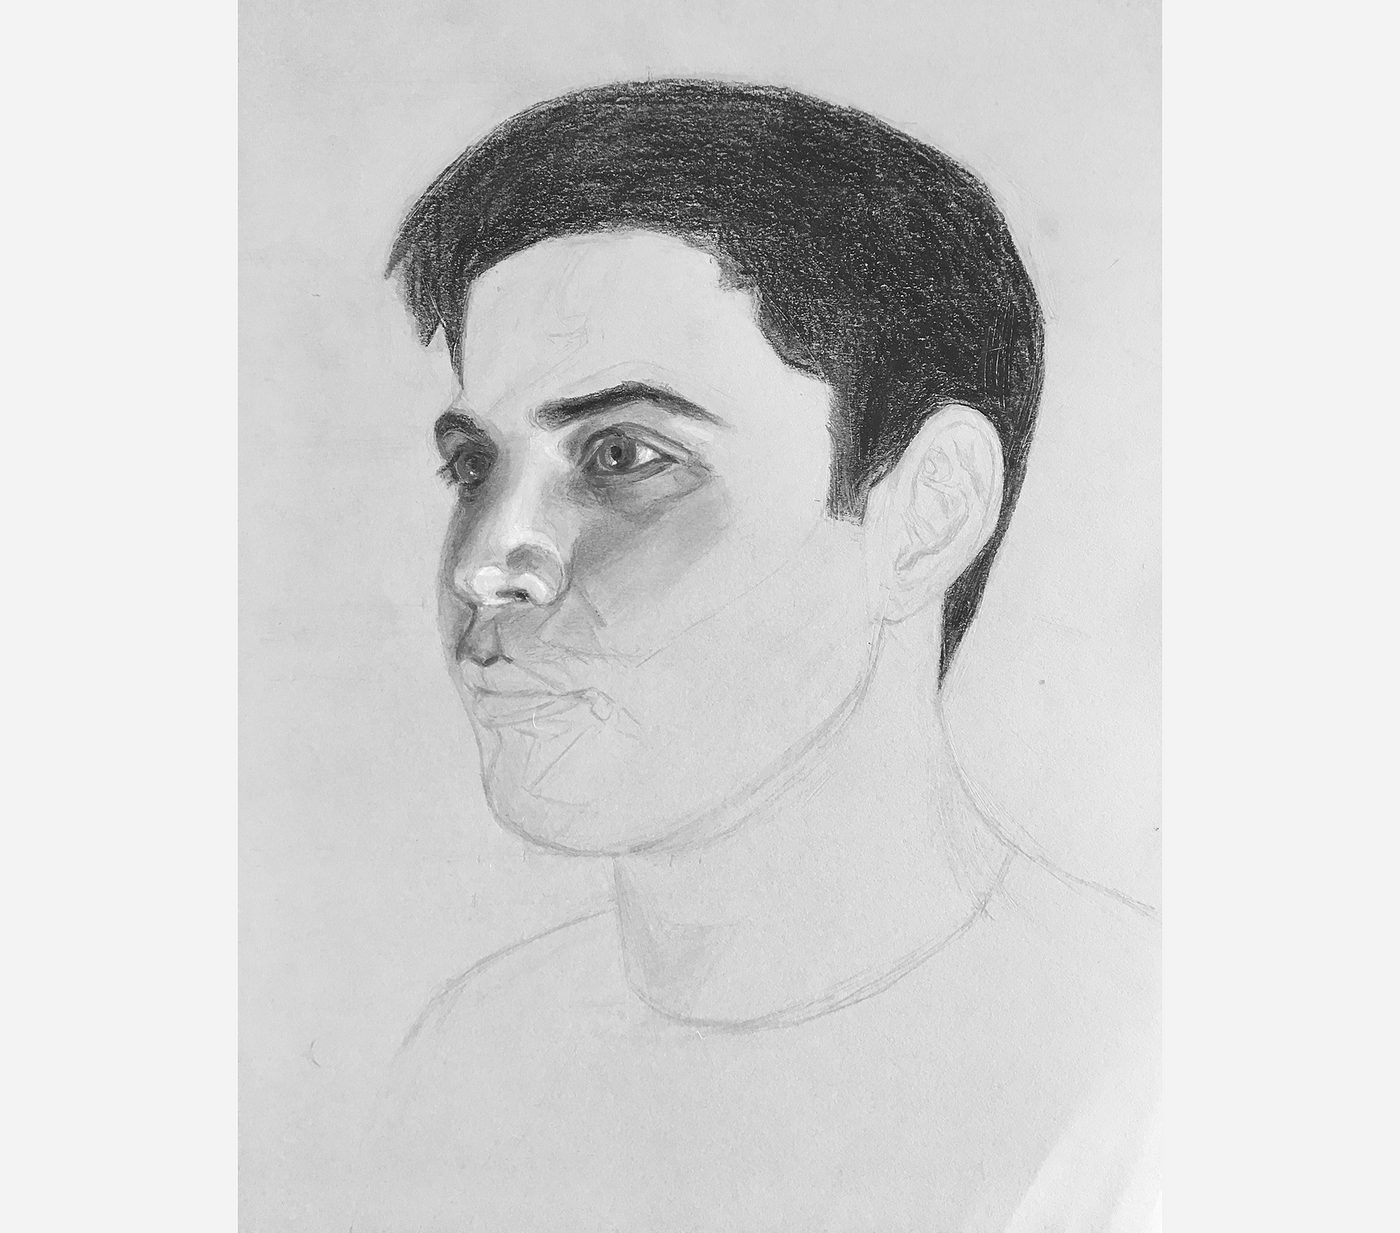
Finishing the sketch
Yesterday, I was able to sketch about 80% of the portrait. Today, I just need to add the last details.
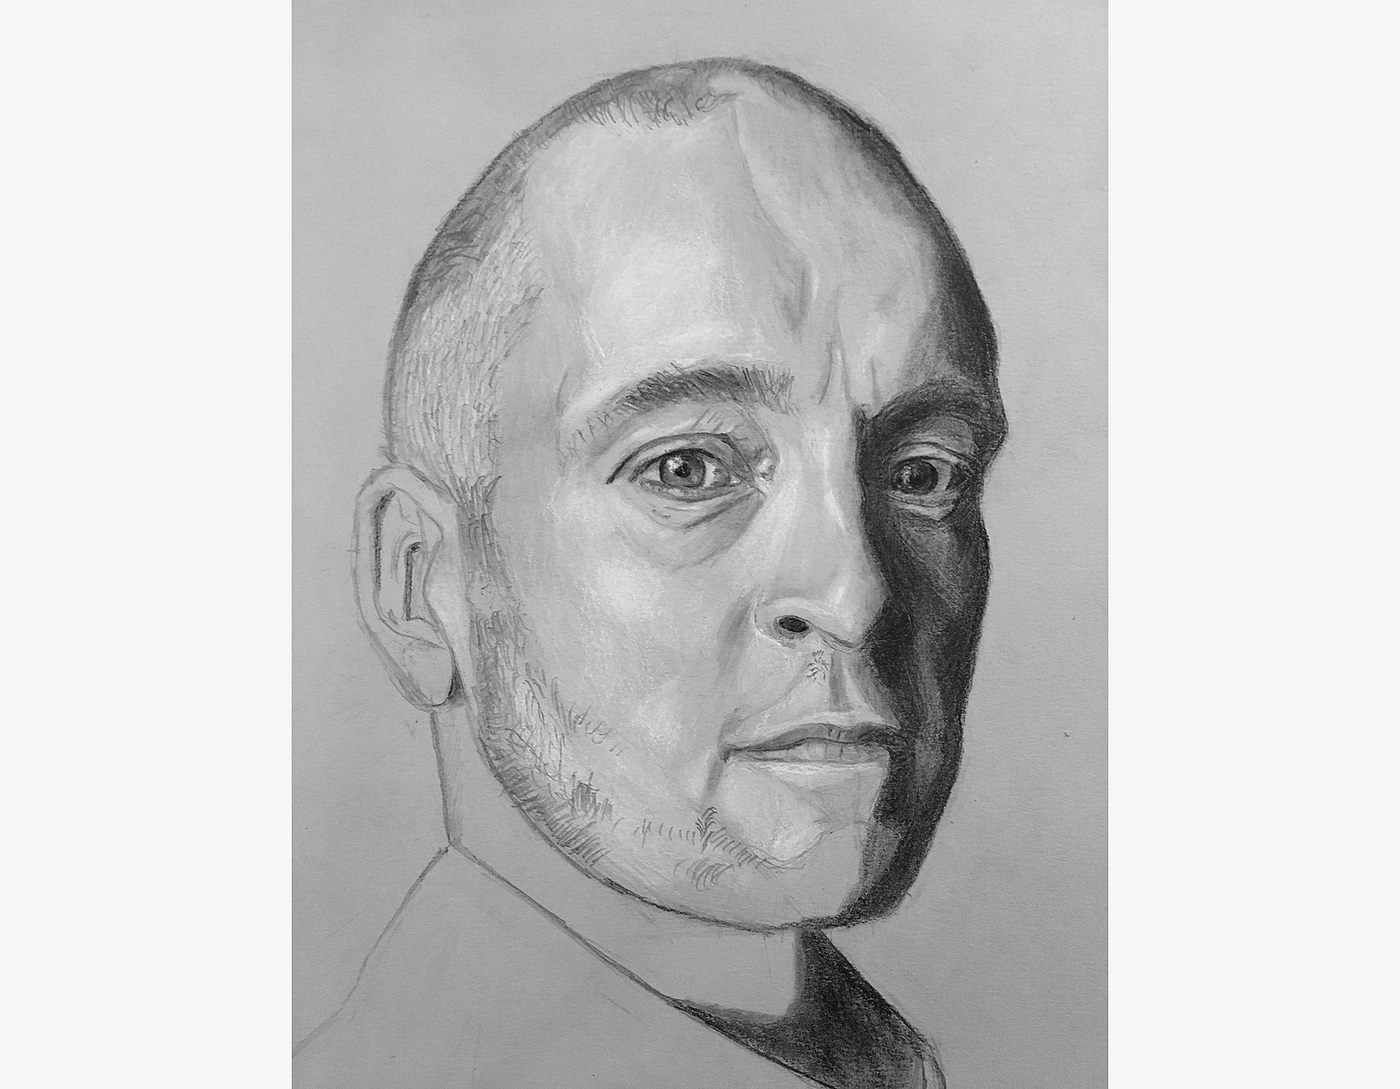
I first past blocking in shadow areas near the mouth, on the brow, and on the neck.

And so, I darken the hair and eyebrows.
I add particular to the eyes, and the portrait jumps to life.
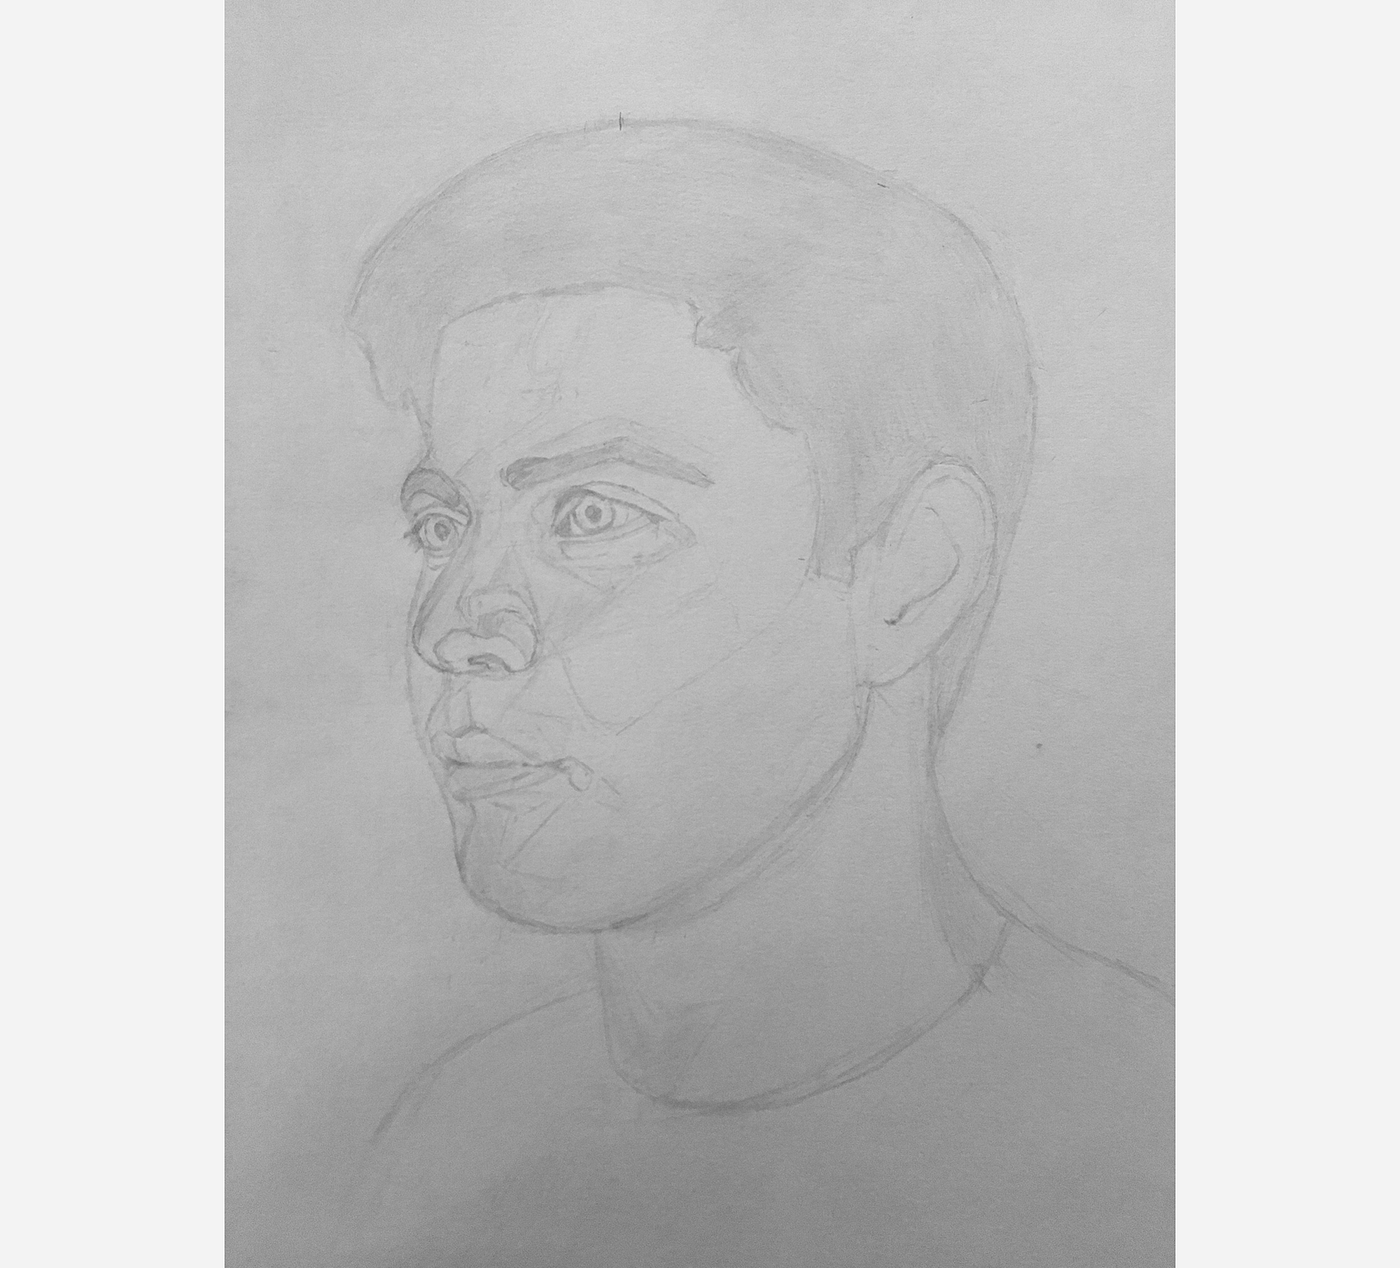
Finally, I item the ear, which is 1 of my favorite parts of the whole procedure. (Ears are merely weird looking and fun to depict)
With the ear done, my sketch is complete.
Interestingly, this abyss is a bit problematic: Considering the sketch feels whole (and, from my perspective, represents an interesting, standalone slice of art), I struggle to go on working on it.
The portrait merely feels balanced at this betoken. As soon as I start adding tonal values, that rest will be disrupted, and won't return until I'1000 near done with the whole portrait.
Information technology almost feels unnatural to add together tonal values to the sketch, as if I'm defacing something I worked hard to create.
Notwithstanding, I must continue. And so, here I go… Time to temporarily deface my piece of work.
Defacing my portrait
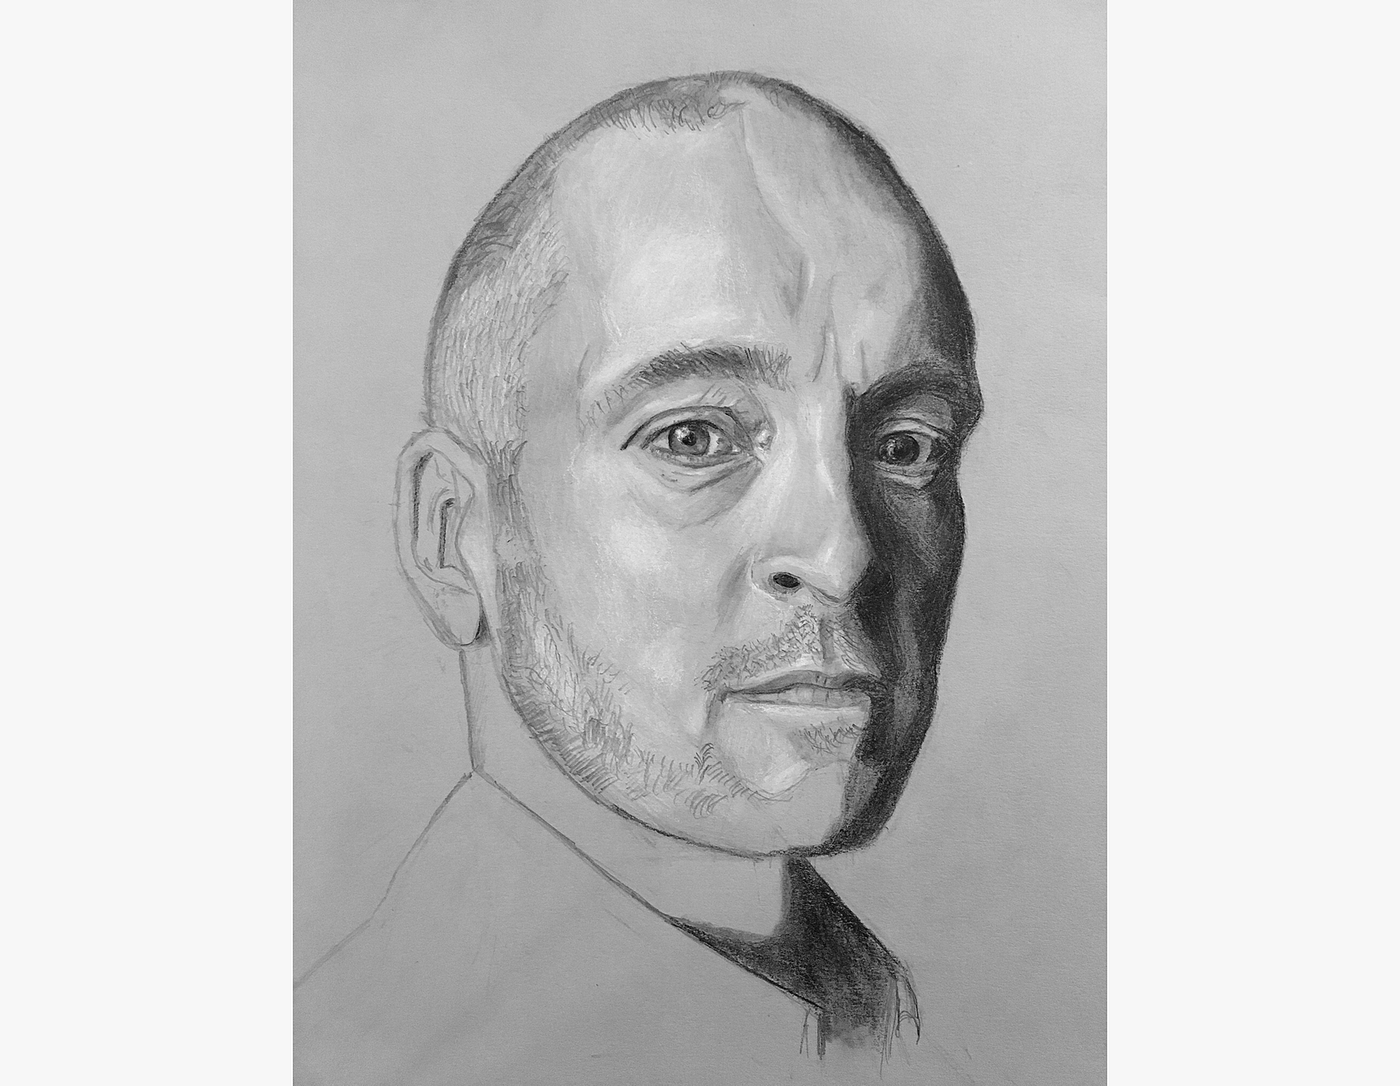
I get-go by blackening one of the eyebrows. This is piece of cake, and hopefully volition help me build momentum.
I continue with my black pencil, concealment the other eyebrow and the pilus.
I can't seem to easily get the hair to exist one polish blackness mass. Instead, the grain of the paper is very noticeable, giving me a nice salted look. Even later on aggressive blending with a blending stump and a dry castor, I all the same can't become the material distributed nicely on the newspaper.
I may need to invest in some powder graphite (but I'll return to this after).
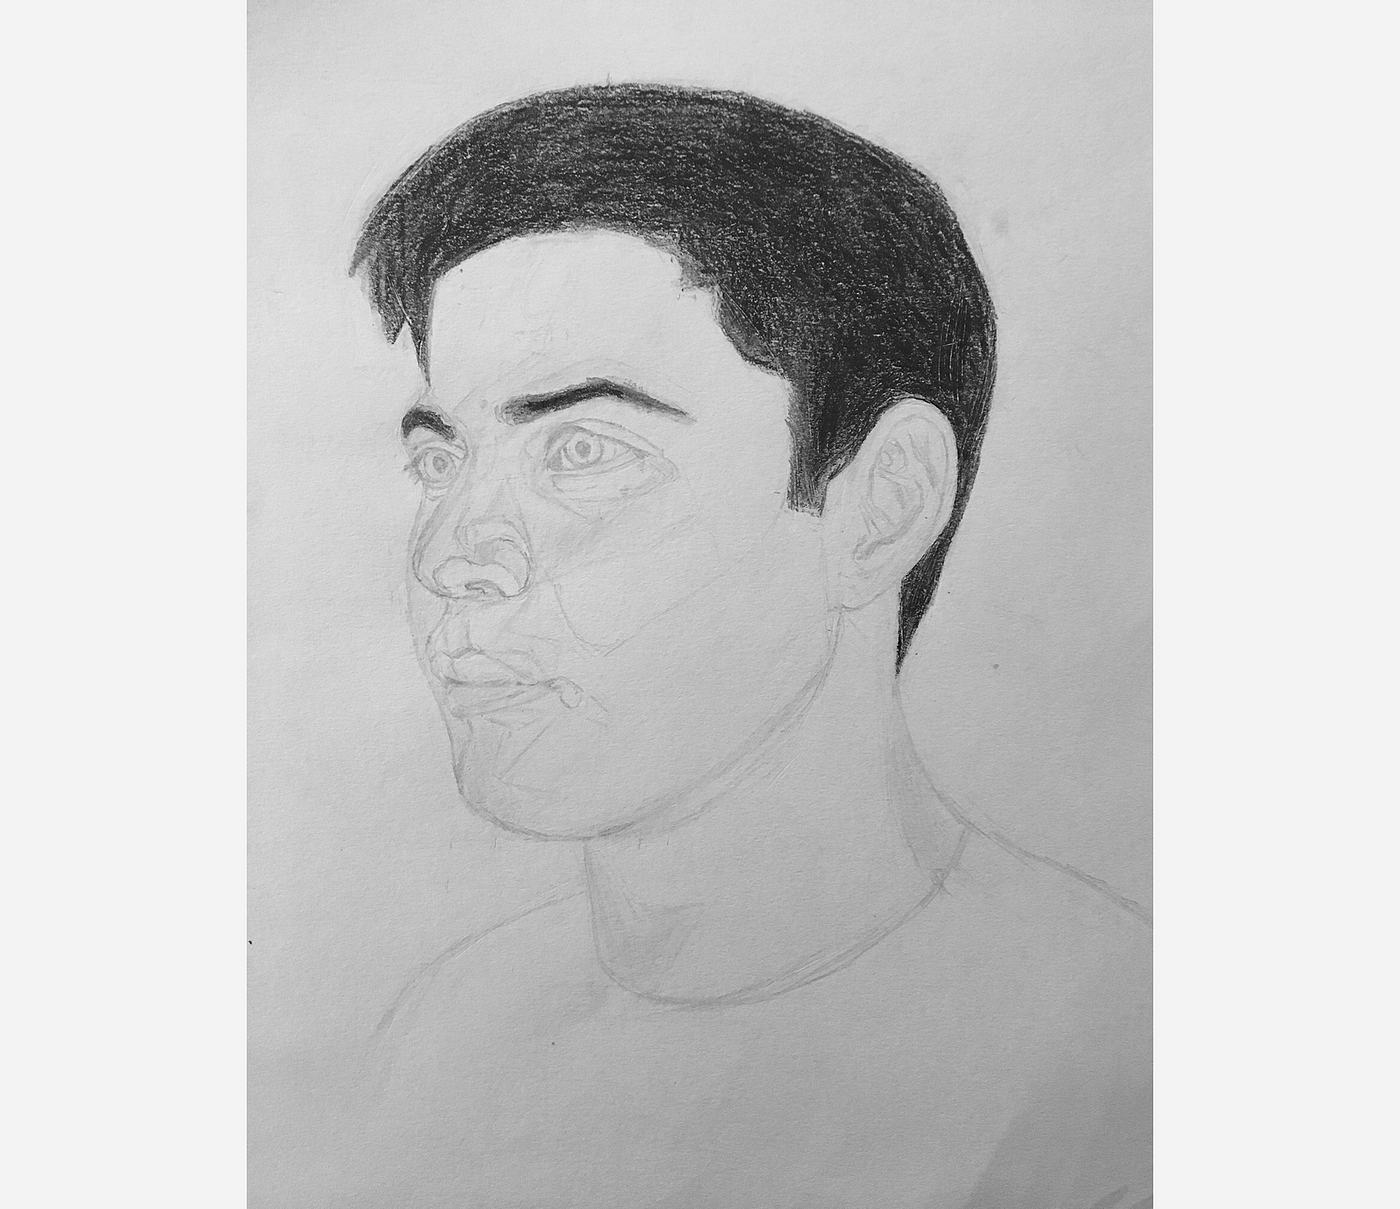
Adjacent, I start on the prominent eye. This is where the real defacing starts, as information technology's going to be a while until it doesn't look like I'k wearing makeup.
After many more minutes of piece of work on the eye, I finish for the dark. I'll continue more than tomorrow.

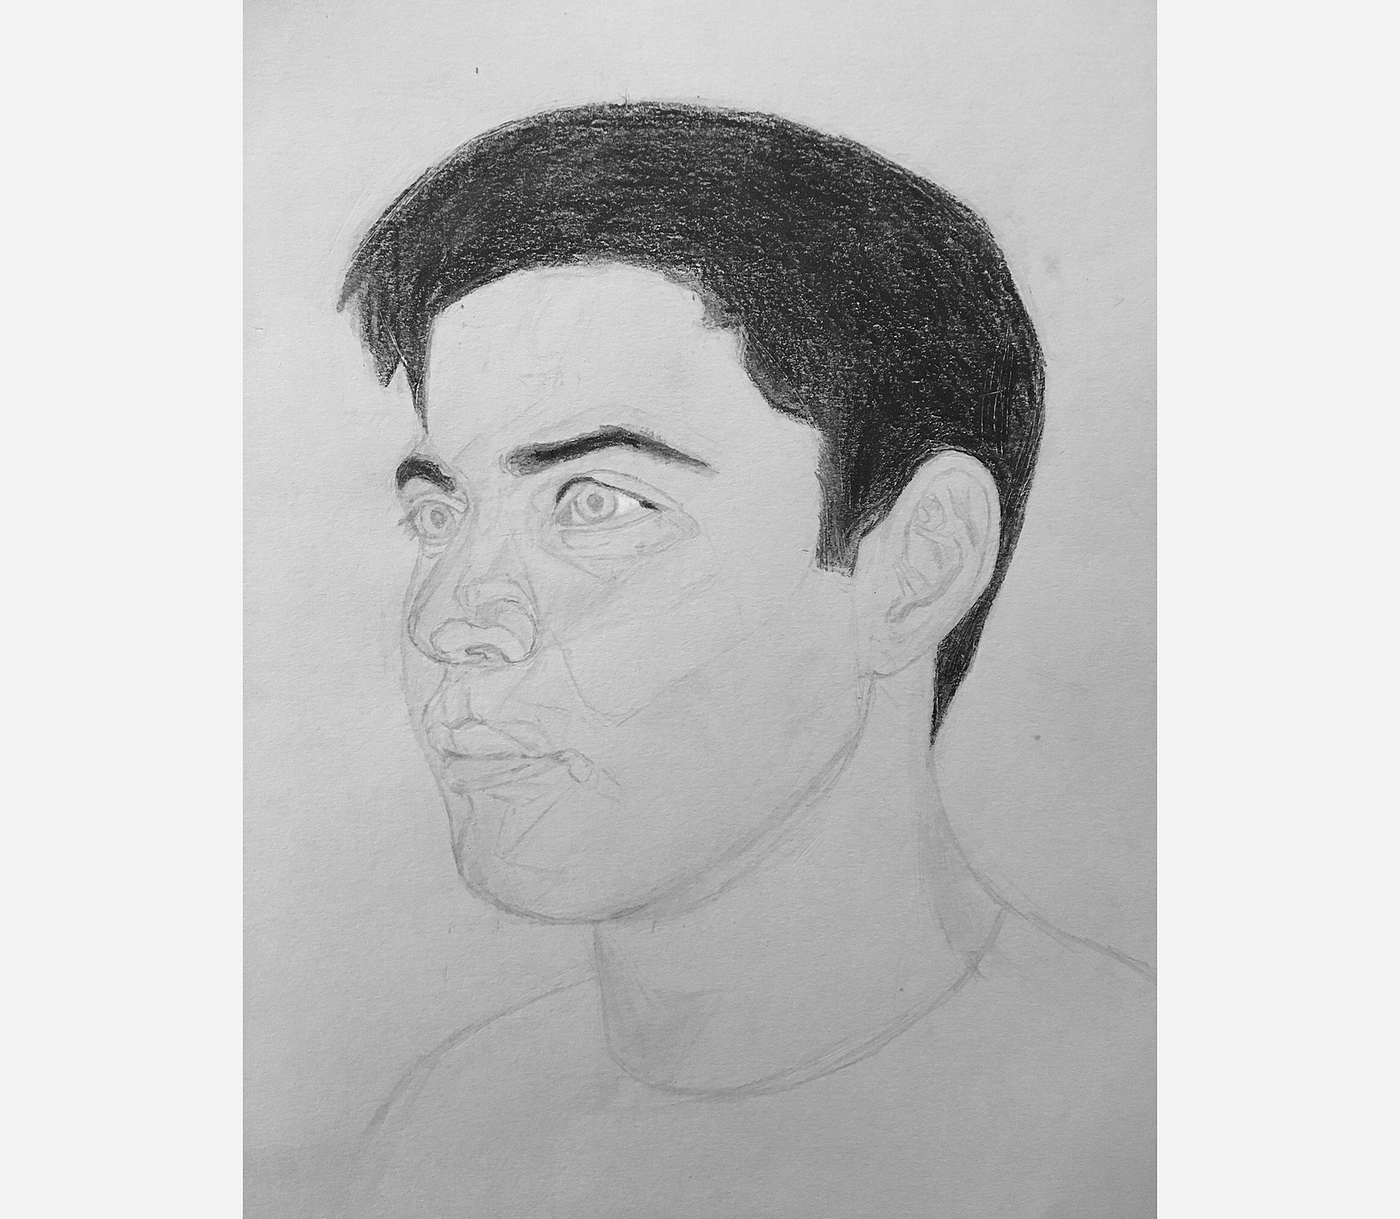
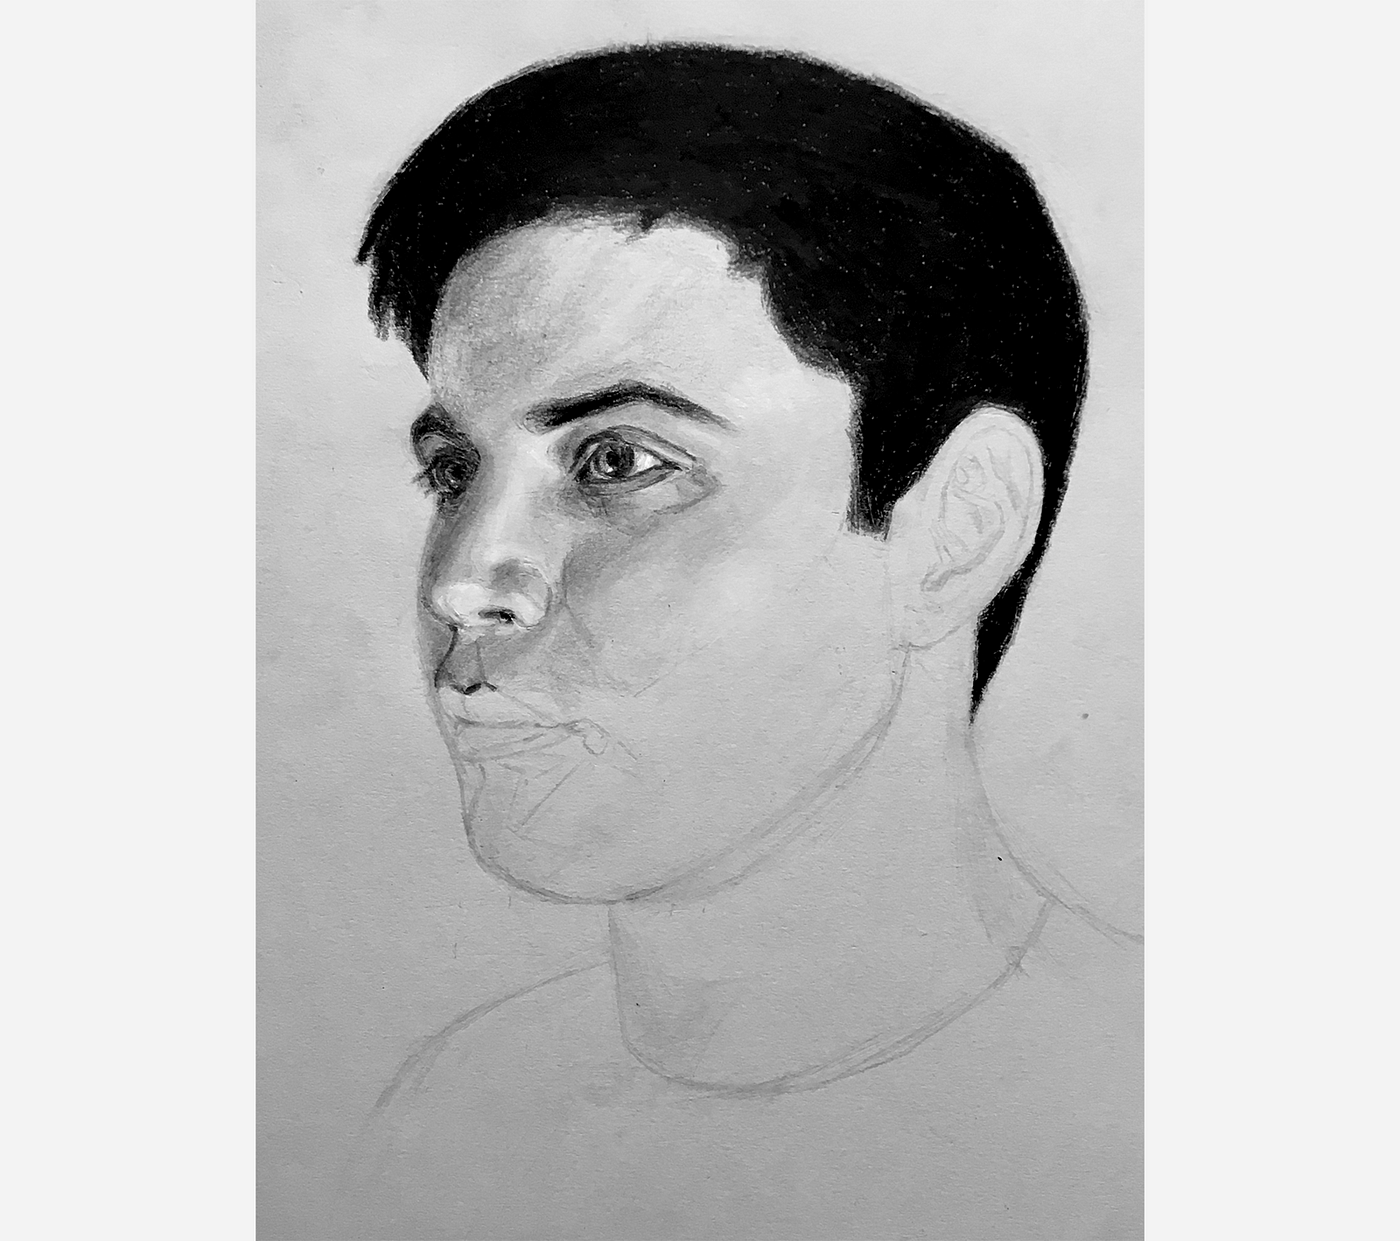
Today, I spent a couple hours working on the optics and olfactory organ area of my cocky-portrait.
My tonal approach is noticeably unlike than that used on the Derren Brownish portrait.
With Derren, I wanted to ensure the portrait emanated 3-dimensionality, and so I pushed aggressively on the contrast of the portrait. I also didn't care much for the micro-gradations of shadow/calorie-free, as I was more concerned with the definiteness of the bigger shapes.
As a result, the portrait definitely has a stunning roundness, simply I wouldn't call it photorealistic.
Thus, this time around, with my self-portrait, I'k aiming to more than closely match tones, while besides paying attention to the smaller areas of lite autumn-off. With this attention, my hope is to create a more realistic rendering of my face.
It's nonetheless hard to tell whether I'll be successful, but we'll discover out shortly…

In about of my posts, I tend to be pretty positive (i.east. "Whoa, today went better than expected…", "I'g actually pleased with today's progress…", "I tin can't believe how good this is…", etc.).
This is more often than not because I'm very bullish on this entire project.
Yet, in my past three posts (I made a mistake, Intentionally defacing my self-portrait, and Fighting for photorealism), I've tried to interrupt this trend, and share some of the day-to-twenty-four hours challenges I face.
While I am still very positive most this project, and happily take on the micro-challenges, I thought sharing some of these things would be more than interesting than writing about how every day is always better than the last.
Anyway, standing with this theme, today, I want to share an interesting struggle.
The Light Situation in San Francisco
For some (peradventure, legal) reason, nigh apartments in San Francisco don't take overhead lights in their main living areas. Commonly, apartments only have overhead lights in the bathroom and (sometimes) the kitchen, which is the instance for my flat.
Every bit a outcome, the remainder of my apartment is lit via Ikea flooring lamps, which, although they practice a 90% good job, information technology turns out, at nighttime, there's simply not enough light for detail-oriented drawing.
During the sketching phase of my self-portrait, I didn't need to see precise tone, so sketching at night was no trouble.
All the same, now that I'm trying to carefully model the lights/shadows of my face, I demand more light.
I considered cartoon in the bathroom, but this isn't entirely comfy. Peculiarly considering I was worried that the portrait would become wet/damaged on the sink, whose counter is the about feasible drawing area.
Since, without deconstruction, the kitchen table doesn't fit through the bathroom door (I tried…), I needed to notice somewhere else to work tonight.
I ended up across the street from my apartment at a well-lit coworking infinite, which was great for drawing, but not-so-nifty for film-taking. The abundance of overhead lights meant that, however I positioned my body, I was e'er casting a shadow on the portrait.
Thus, in one case I finished drawing, I came back to my dark apartment to snap a photo.
After my light-seeking gamble, here's what I was able to achieve.

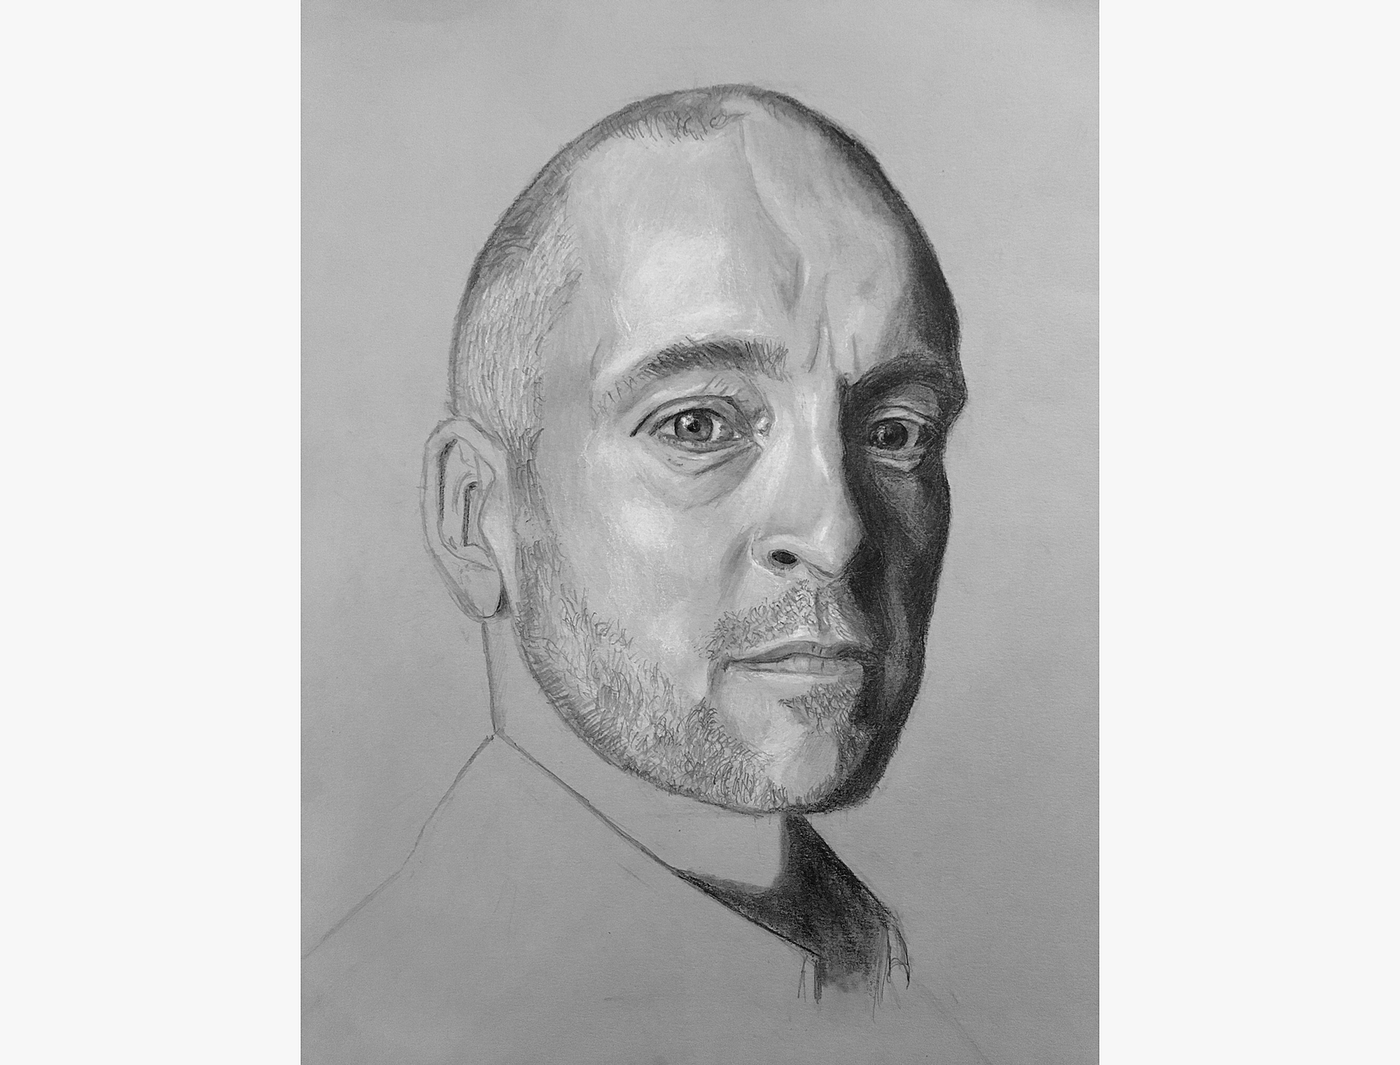
Today, I simply had 10 minutes to describe, then I spent all ten darkening the hair and eyebrows on my self-portrait, until they were equally black as I could get them.
This greatly improved the portrait in ii means:
- The relative tones of the face up to the pilus are much more authentic now, which helps with realism.
- The shape of the hair on the left side of the portrait wasn't quite correct, so this gave me the risk to fix information technology.
Here's the earlier…

And the after

At first, the black of the hair is a bit jarring, but information technology accurately represents the "exposure" I'm going for (where the hair is emitting no light, and thus, shows upwardly as pure blackness).
Although today'south darkening session improved things, the portrait still seems a chip odd and unbalanced because of the nakedness of the rima oris and cheek. I'll first tackling those areas tomorrow.

Yesterday, I declared that today I would commencement working on the mouth and cheek areas of my self-portrait. And even so, somehow, the 24-hour interval is over, and the mouth and cheek areas are nevertheless naked.
Instead, I got caught upwardly making micro-changes to the parts of the portrait I've already worked on (the eyes, nose, forehead, etc.). It seems I tin brand modest improvements forever.
This is clearly not the right approach. Especially because… As I brainstorm shading the oral fissure, I will demand to make adjustments to the nose expanse, so everything fits together. As I brainstorm shading the cheek, I volition demand to make adjustments to the eye area, and so everything fits together. And and so on.
Maybe, I'chiliad just stalling out of fear: One time the mouth and cheek are developed, I'll have a much better idea if the portrait is any skilful.
If I am fearful, I definitely need to become over information technology.
To do so, tomorrow, I'll focus, not on perfectly detailing the oral fissure and cheek, but instead, broadly blocking in the right tonal values.
With the general tones in place, I'll have enough momentum to push the portrait towards completion.

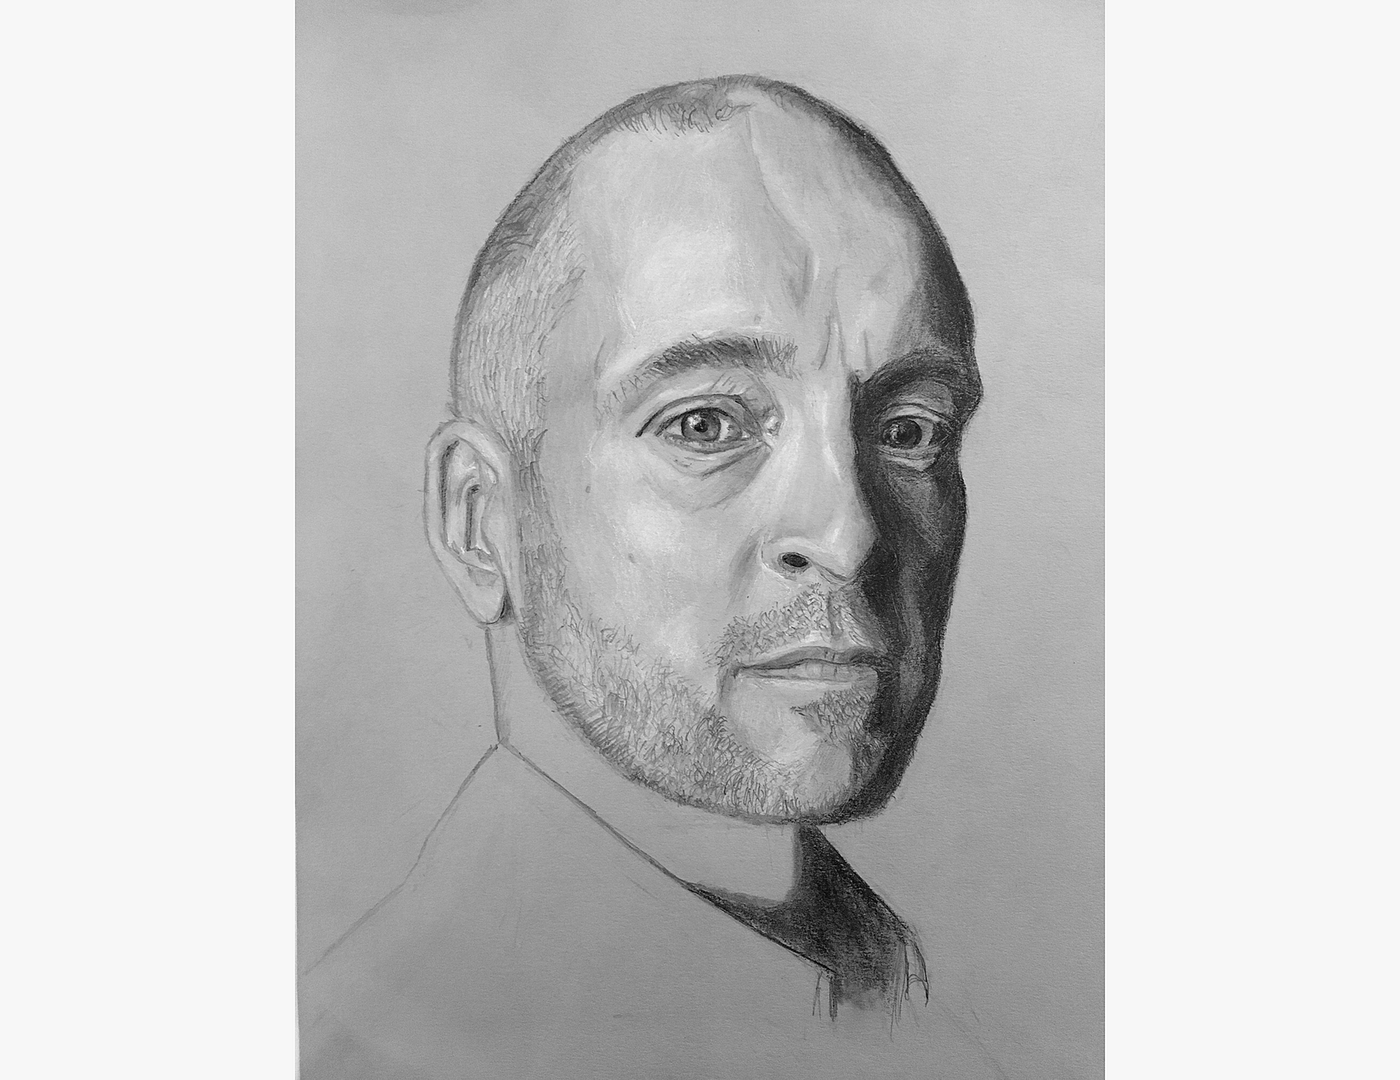
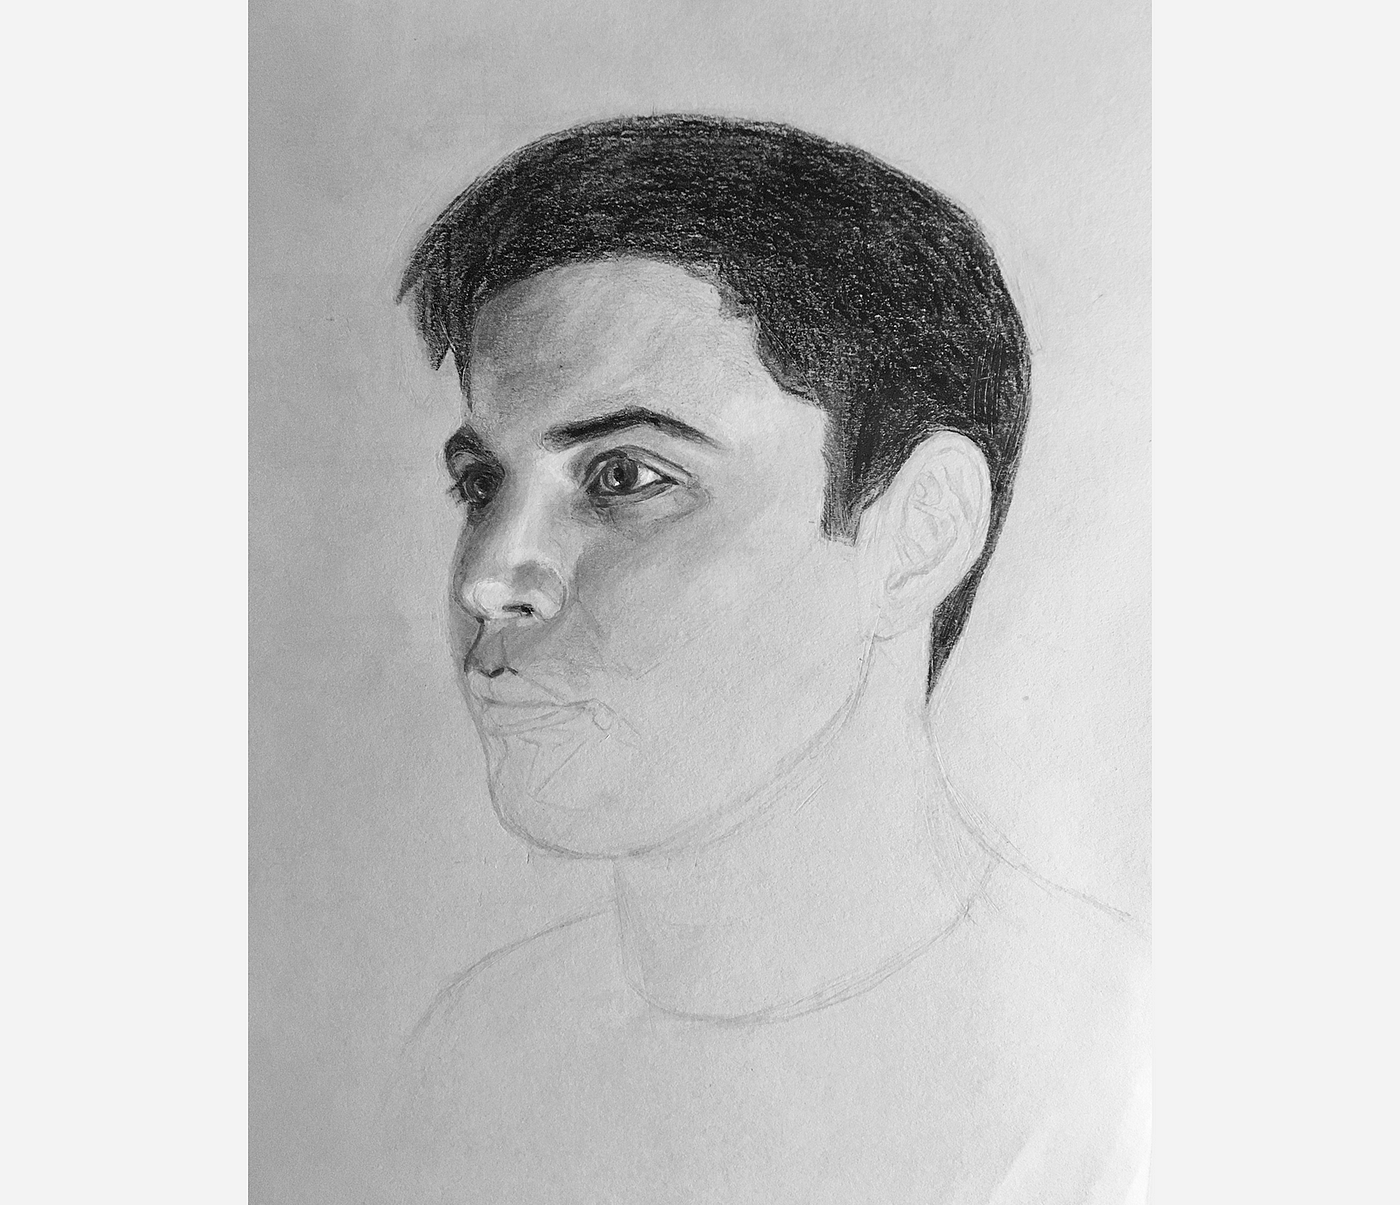
Today, I spent an hour developing out the rest of my self-portrait.
It went from looking like this…
To looking similar this.
It'southward starting to look similar me, merely it even so looks similar a drawing — mostly because I oasis't blended the newly developed areas like the neck, cheek, mouth, ear, forehead, etc. Pretty much the whole matter.
I've been property off on the blending because my blending stump is unusably muddied.
Tomorrow, I'll get swing by the art shop and selection upwards a few fresh ones.

I picked up some new blending stumps today, and went to work smoothing the value changes over my face and neck. Here'southward the result…
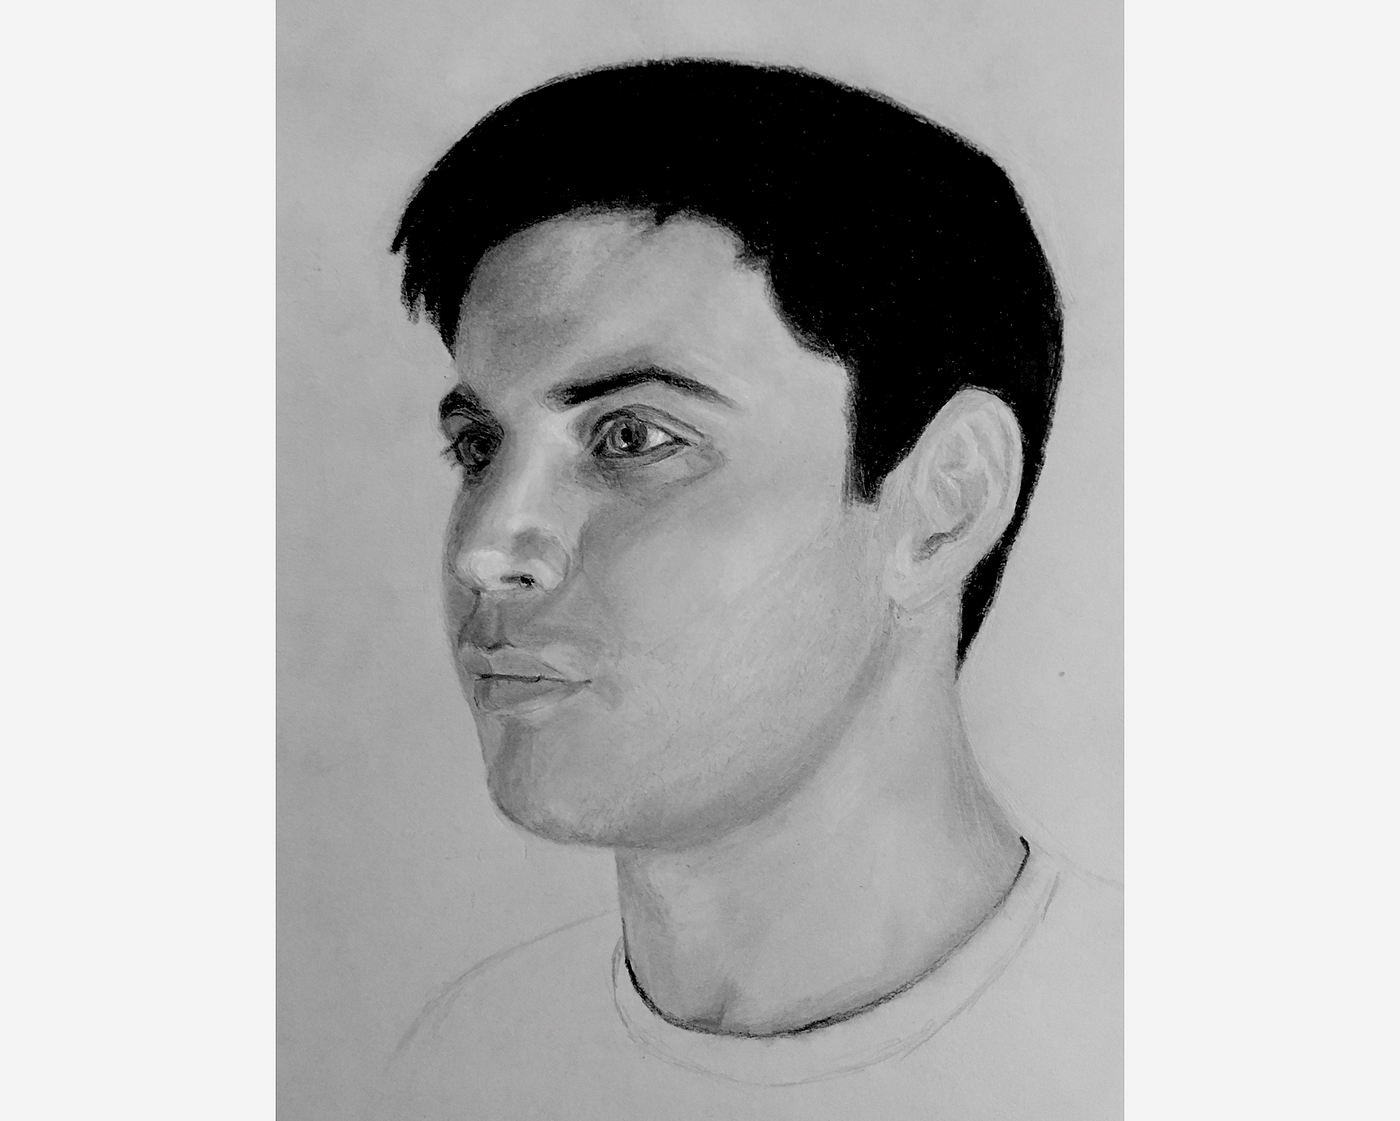
When compared with the before, the difference is pretty hit. In the before portrait, I expect like a sickly, pencil-sketched version of myself, while the later version has a much nicer roundness and weight to it.
Tomorrow, I'll brand some small tweaks, sign it, and hang information technology on the wall.

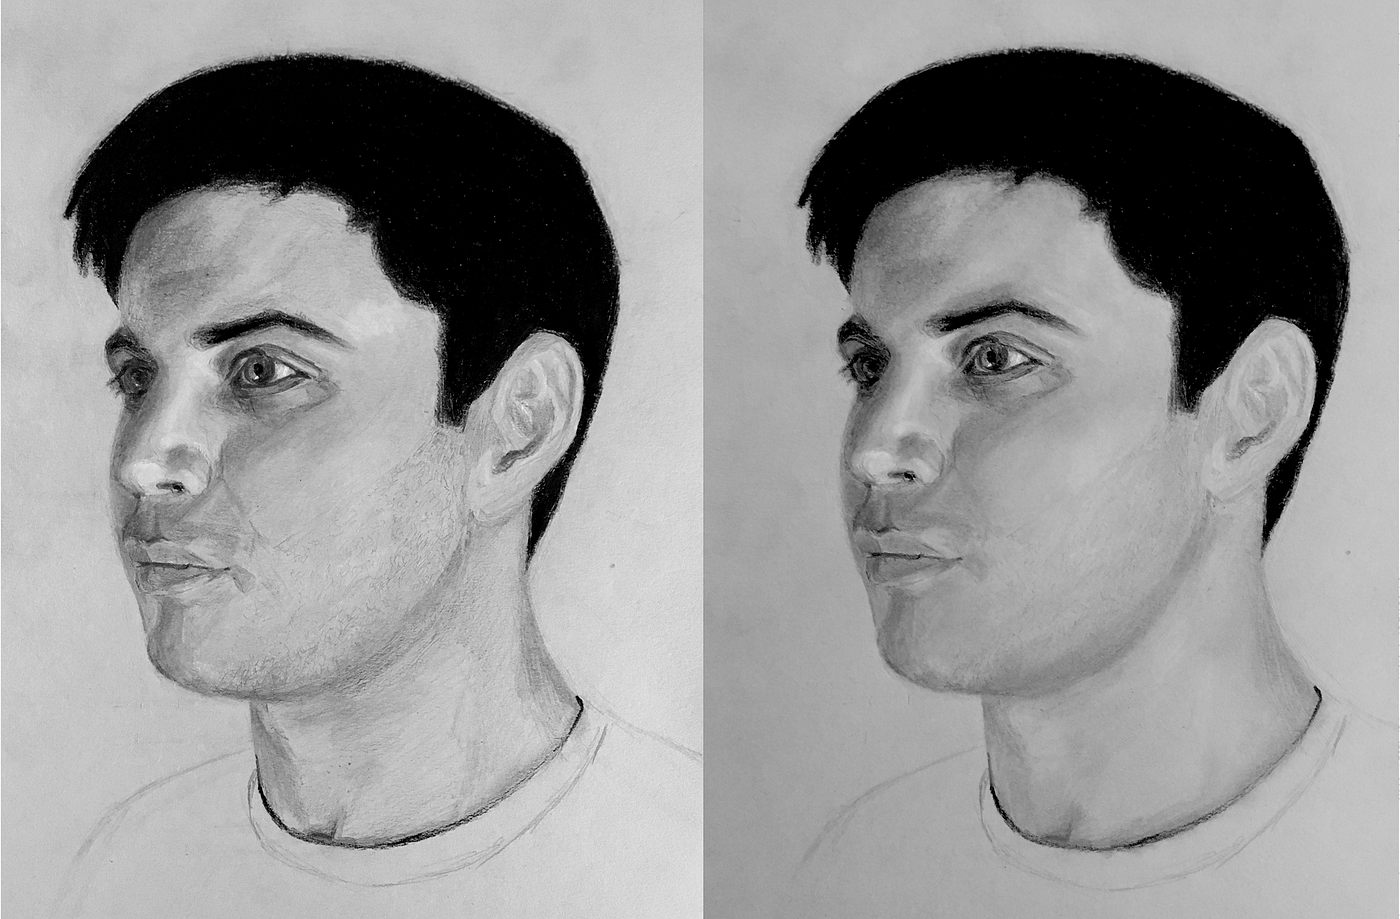
24 days agone, to kicking off Dec'due south challenge, I tried to draw a self-portrait.
So, over the adjacent 3.v weeks, I completed a 10-hour drawing course, drew a few other people, and then spent 8 hours on a new self-portrait.
Here are the before and after.
And here'southward a time-lapse of the 8 hours of drawing.
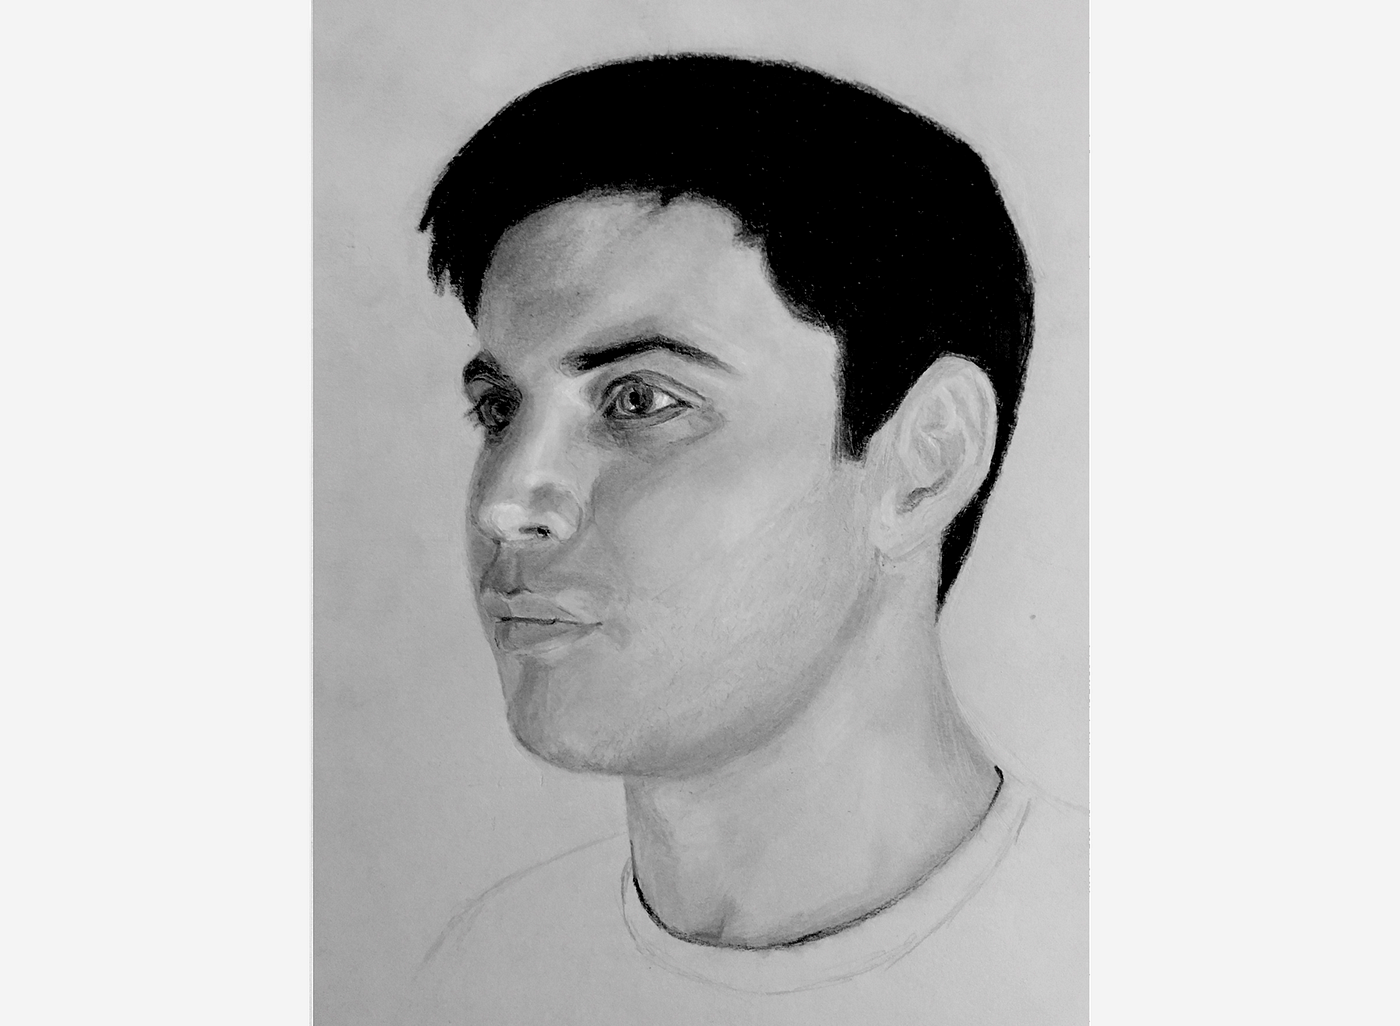
I'm happy with the event, and actually call up the self-portrait looks a lot like me.
Tomorrow, I'll write upwardly a more thorough critique. Simply until so, I'thousand declaring this month'southward challenge a success.

Yesterday, I declared this month's challenge a success, noting the differences between my before and later self-portraits.

And while my virtually recent self-portrait is a major improvement, and does wait very much similar me, I all the same do have some quick critical thoughts on it, which I've broken downwardly into ii parts: 1. Likeness and 2. Artistry.
i. Likeness
- Overall, the likeness is potent. The portrait unequivocally looks like me. Although, it isn't perfect.
- My expression/emotion in the portrait is plausibly mine, particularly in the eyes.
- The shape of hair near the ear and back of the caput is very accurate. Even so, the hair line doesn't seem completely right, and information technology'south probably the second biggest reason why the portrait doesn't look perfectly similar me. The hair line should probably come downwards on the forehead and should exist less rounded. When I snapped a photograph of myself (on which I based this portrait), I had simply gotten a shorter-than-normal haircut, which is probably why I'thousand not used to the haircut I drew.
- On paper, I feel I captured the olfactory organ perfectly, but, as a result of the shadow, it may seem slightly also small/short. To address this, I could take accentuated the tonal difference between the cheek and the adumbral function of the olfactory organ, but I wanted to remain as tonally accurate every bit possible and chose not to.
- I'thou very happy with how the neck turned out. Its weight and main features (the Adam's apple and the notch at my collar line) seem accurate.
- At that place is something odd nearly the ear. It seems a flake out of identify.
- The eyebrows may exist the slightest fleck sparse, but they are very close to reality.
- The biggest potential miss is my cheek. While I practice have prominent cheeks when I smiling (which I'm not doing here), I also accept a fairly slender face and a reasonably defined jaw. Depending on how I look at the cheek, information technology sometimes appears also round and too full. Other times, when I look at the portrait, my eye renders this area properly. If anything, I probably could accept made the bottom of the face (in the rolling shadow) a fleck more athwart.
Withal, fifty-fifty with these critiques in isolation, the portrait as a whole comes together nicely and captures a strong likeness. Thus, I've left it every bit is, since I care more than about an overall likeness (versus a non-cohesive drove of individually authentic features).
two. Artistry
Before I drew my self-portrait, I drew a portrait of Derren Chocolate-brown.
This portrait has two big advantages over my self-portrait: i. The tonal range over the confront is much greater, and ii. The midtone of the face matches the tone of the paper.
With my self-portrait, I strayed from both of these advantages. For one, on purpose. For the other, less and then.
1. Narrow tonal range
Purposefully, I chose to base my cocky-portrait on a photograph with a tighter tonal range, since I wanted to challenge and push button my abilities (Drawing a portrait with heavy contrast requires less subtly and is, in my opinion, easier).
Arguably, the contrast of the Derren Brown portrait makes it a more visually compelling portrait, simply this is another topic completely (first, I wanted to master accurate portraiture before tackling well-composed portraiture).
Even with the narrow tonal range, my self-portrait notwithstanding maintains a believable roundness and depth.
two. Dark midtones
Less purposefully, I chose a photo where the midtone of my confront was darker than the paper.
This was a flake of a mistake, only a good learning opportunity. As a result of this decision, different with my Derren portrait, I had to pencil-shade the mid-tones on my face up, leading to a slightly dirtier portrait. (In the case with Derren, where at that place were midtones, I left the blank paper untouched and clean).
Especially before I smoothed out my confront, it looked as if I had but been cleaning chimneys.

While the Derren Chocolate-brown portrait (with its ultra-contrasty tonal range) may be a more dynamic portrait, my self portrait seems closer to photorealism, which is the primary comeback I was aiming for.
Overall, I'm very happy with the upshot.

After spending well-nigh a calendar month learning to draw portraits, I'g more convinced than ever that anyone tin draw. Fifty-fifty if y'all don't have any artistic talent.
To me, drawing is a bit like doing your laundry. Earlier you do it for the first fourth dimension, you lot feel it's much more complicated than it actually is, and thus, you feel incapable of trying. So, you're shown that doing your laundry is only a affair of putting your wearing apparel in the machine, pouring in some soap, and clicking a button. Much easier than y'all thought.
It turns out drawing is very similar. From the outside, it seems much more than complex than information technology actually is. Yet, once you acquire the two or iii bones principles, drawing (at least, at my level) becomes nearly every bit straight forward as doing your laundry.
In fact, in guild to draw a reasonable portrait, yous only need to know the 2 following skills:
one. Triangulation
2. "Outside-in" Shading
In one case you're equipped with these ii techniques, you'll exist fix to follow the "Portrait Drawing Cheat Sheet" and describe your first portrait.
You'll exist surprised at how well it goes. I know I was…

As I mentioned at the beginning of this month, British illusionist Derren Brown originally inspired me to start drawing portraits. In fact, to admit this inspiration, Derren was the subject of my beginning portrait.
Nevertheless, Derren didn't inspire me with his drawings, but rather, his paintings, like these…
Of course, these paintings are built on a prerequisite foundation of cartoon, but they also introduce a whole new skill set that I would love to cultivate.
Watching Derren paint, information technology seems like in that location are clear parallels betwixt shading a drawing and painting a portrait: He sets a mid-tone color, adds the lights and darks, works his style towards the middle, so adds item.
There are also clearly major differences, like evaluating and mixing colors, general painting hygiene (letting paint dry, etc.), and best practices I'm probably non yet aware of.
And while this seems like a major leap from my drawing studies, I at present have the artistic confidence to attempt a painting similar this, without whatsoever (or very little) boosted instruction.
In the coming months, I program to start sketching a portrait on canvas, and so experimenting with paint.

Final month, I memorized a shuffled deck of cards in nether two minutes, which required obsessive, consistent exercise. If I were to stop practicing, over time I would lose this skill.
Nevertheless, I don't think the same is true for my newly-found drawing skills. Mostly considering… I didn't learn annihilation new this calendar month.
Well, that's non exactly right. While I didn't cultivate any new drawing-enabled motor skills or artistic skills, I did learned to structure my already-existing skills inside of a meliorate cartoon process.
In other words, if I tin can retrieve the process, which, in my opinion, only depends on two very straightforward insights, I volition always be able to draw at the level I can now.
In twenty years, fifty-fifty if I don't practice from now until then, as long as I tin can remember triangulation and exterior-in shading, I will be able to fully replicate my results from this month.
I think that's a pretty cool thing, so wait out for my Medium post in 20 years.

On December 1st, I drew this.
26 hours of do later on, I drew this.
In other words, after practicing for nearly an hour per day for 26 days, I majorly improved my portrait drawing skills.
Terminal month, information technology just took me 22 hours to go a grandmaster of retention.
I think this is going to be a theme for the entire Month to Master project: If my practice is deliberate and consequent, information technology's going to accept a lot less time than expected to master these seemingly expert-level skills.
The pull a fast one on, then, is to create a mechanism to force deliberate and consequent practice month after month. This is the difficult part nigh learning these new skills, not the time required.
Something to recollect almost as you start planning your 2022 resolutions…

Today, I flew from San Francisco to Florida to meet up with my family for a few days. I'll be here until January 4th.
I left all my drawing supplies behind, and then I'one thousand definitely not drawing any more than this month.
I did, still, bring a Rubik'southward Cube with me in preparation for Jan's claiming (which starts in ii days).
I'grand definitely eager to start a new claiming, since I similar the idea of ever existence in pursuit of something (which maybe suggests that I need to learn how to relax). However, instead, these past two months, I've finished both challenges on Day 24 (of the month), and thus, needed to await, without a claiming, for a week, until the side by side one began/begins.
Should I but start the next challenge once I stop the previous ane? I'm not sure. On one manus, this seems reasonable and time-efficient. On the other hand, at that place is something very tidy about starting on the first of each month.
Clearly, I have some corporeality of obsessive compulsiveness going on, only I'm curious to know what you lot call up…
Should I wait for the beginning of each calendar month to start a new challenge, and bask my few days of relaxing (if available), or should I just use my extra time towards future challenges and get-go immediately?
Let me know.

Today, to celebrate the New Year, I decided to compile my personal highlights from 2022, which includes Month to Primary, just also everything else from my life.
Rather than writing another M2M post today, I'll encourage you lot to check out that postal service if you're interested.

This post is function of Max's year-long accelerated learning projection, Calendar month to Principal.
Max Deutsch is the co-founder of Monthly — an online didactics platform that partners with some of the globe's biggest YouTubers to create one-calendar month, highly-immersive online classes.
If you lot want to follow forth with Max's year-long accelerated learning project, make sure to follow this Medium account.
For exclusive content on accelerated learning, discipline, and lifestyle pattern, subscribe to my once-in-a-while newsletter.

Source: https://medium.com/@maxdeutsch/how-i-learned-to-draw-realistic-portraits-in-only-30-days-3fb8e8eccee0
Posted by: gallowaycusese.blogspot.com
0 Response to "How To Draw I Love My Mom"
Post a Comment